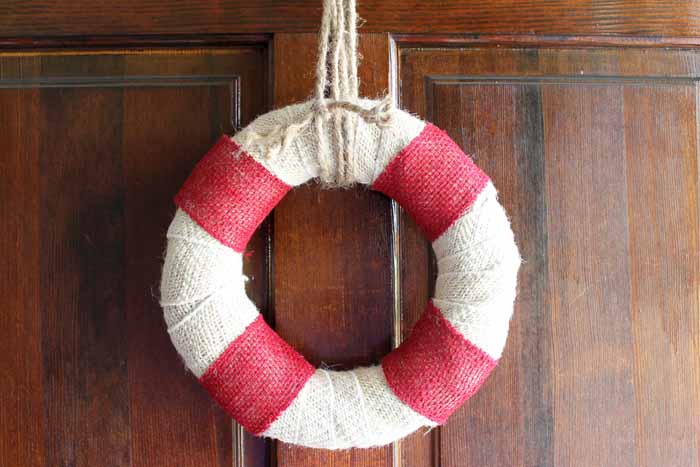
How To Make A Burlap Wreath With A Beach Theme
Are you looking to add a touch of rustic charm to your home decor? Look no further than a DIY burlap wreath! This simple yet stunning craft project is not only easy to make but also customizable to suit your personal style. So, let's dive into the step-by-step process of creating your very own burlap wreath. Hang your beautiful burlap wreath on your front door or display it indoors as a charming wall decoration. Get creative and experiment with different variations to make a wreath that truly reflects your personal style.

Supplies Needed
Here’s what you’ll need to gather in order to make this project. I’ve included a few handy links to make finding certain items easier.
- Wreath form
- White burlap ribbon
- Red burlap ribbon
- Rope or twine
- Hot glue and glue gun
- Scissors
- Hot glue finger protectors – optional but very nice!
DIY Beach Wreath Instructions
Step 1
Wrap the entire wreath form with the white burlap ribbon.
Cut the excess with scissors.
Step 2
Use hot glue to secure the end of the ribbon on the back of the wreath.
Pro Tip: Use hot glue protectors on your fingers, as the hot glue will go right through the burlap and burn your fingers!
Step 3
Wrap the red burlap ribbon around the wreath once and trim it to size with scissors.
Secure ends with hot glue on the back of the wreath.
Step 4
Repeat the process with the red burlap ribbon in four areas that are equally spaced.
Step 5
Tie on a rope and hang your wreath.
Isn’t it fun? Add this simple DIY burlap wreath to your must-make list this summer. You will love how simple it is and the summertime vibe it gives your home.