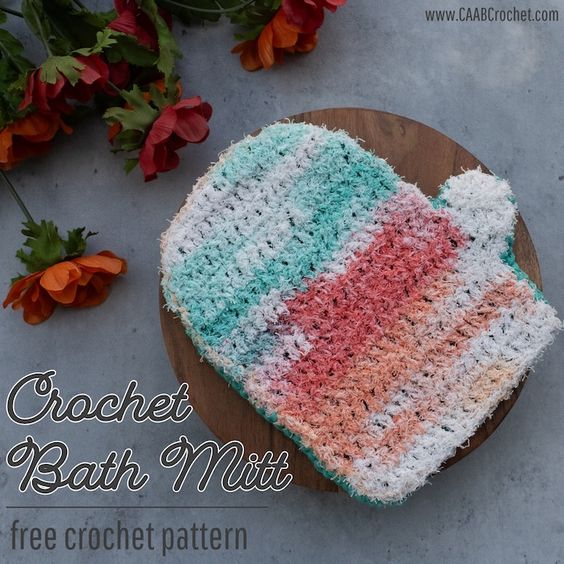
Crochet Bath Mitt
Crochet bath mitts are a fantastic addition to your daily self-care routine! These handmade wonders not only help you cleanse your skin thoroughly but also provide a touch of luxury to your bath or shower experience. The soft, textured yarn gently exfoliates your skin, leaving it feeling refreshed and rejuvenated. Plus, the cozy feeling of slipping your hand into a crocheted bath mitt adds a delightful touch of comfort to your me-time ritual. Whether you choose a vibrant color or a soothing pastel, these mitts are not just practical but also a fun way to add a pop of personality to your bathroom. Try one out and treat yourself to a spa-like experience right at home!
Materials:
- Cotton Weight 4 Medium (100% Cotton, 3.5oz/100g, 180yd/165m) 1 skein Aspyn (approx. 47 yards used)
- Yarn Bee Scrub-ology cotton Weight 4 medium (100% cotton, 3 oz/85g, 125yd/115m) 1 skein See You At Sunset (approx. 46 yards used)
- US I/ 5.5 mm Crochet Hook
- Yarn Needle
- Scissors
Gauge:
After row 8 in side 1 of pattern, project was 4” tall and 6” wide
Finished Size:
8” wide x 8.5” tall
Abbreviation Key:
(ch) chain
(fdc) foundation double crochet
(sl st) slip stitch
(sc) single crochet
(sc2tog) single crochet two together
(hdc) half double crochet
(hdc2tog) half double crochet two together
(dc) double crochet
(dc2tog) double crochet two together
(mod tr) modified treble crochet *see special sts
* * Repeat instructions between asterisks as any times as directed.
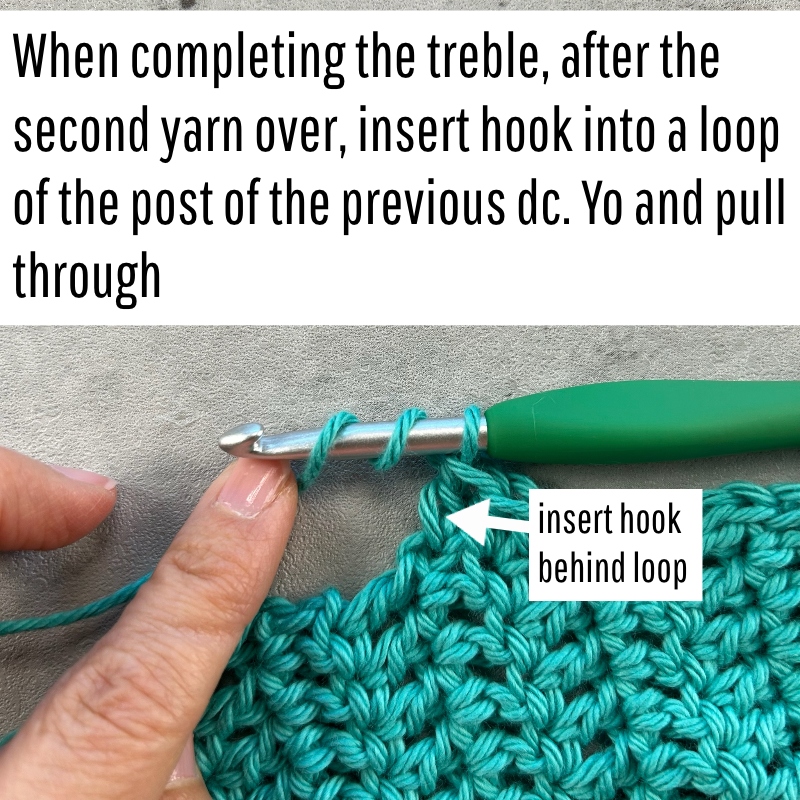
Special Stitches:
Modified treble crochet (mod tr): To be used when making the thumb. Yarn over twice, insert hook in side bar of previous dc, yarn over and pull up a loop, insert hook in side of row 5, yarn over and pull up a loop. With 5 loops on hook [yarn over, draw through 2 loops on hook] twice, yarn over, draw through 3 remaining loops on hook. Stitch complete.
Pattern Notes:
Beginning chain of each round does not count as a stitch.
I tend to crochet tightly. So be sure to check your gauge and if you are crocheting more loosely you can move to a smaller hook (or larger if you crochet even more tightly). Some people find they even need to go down two hook sizes to meet my gauge.
The scrubby yarn is a little more difficult to see the stitches than traditional yarn. The trick is to feel for your stitches as you go.
The scrubby yarn worked up at a larger gauge for me than the size 4 cotton. So, side 2 instructions are adjusted to make both sides match up as closely as possible. If you work differently than me with scrubby yarn and you find your scrubby side is coming out too small, you can just use the instructions for side 1 to see if it is a better fit for you.
Pattern:
Side 1 (using I Love This Cotton)
Row 1: Fdc 19.
Note: If you prefer to use a starting chain instead of foundation stitches, chain 21. Dc in the 3rd ch from the hook and in each ch across. <19>
Row 2: Ch 2. Turn. Dc in same st an each st across. <19>
Rows 3 – 13: Repeat Row 2.
Row 14: Ch 1. Turn. Dc2tog. Dc in each of the next 15 stitches. Dc2tog. <17>
Row 15: Ch 1. Turn. Dc2tog. Dc in each of the next 13 stitches. Dc2tog. <15>
Row 16: Ch 1. Turn. Sc2tog. Hdc in each of next 2 sts. Dc in each of next 7 sts. Hdc in each of the next 2 sts. Sc2tog. <13> Mark the last stitch.
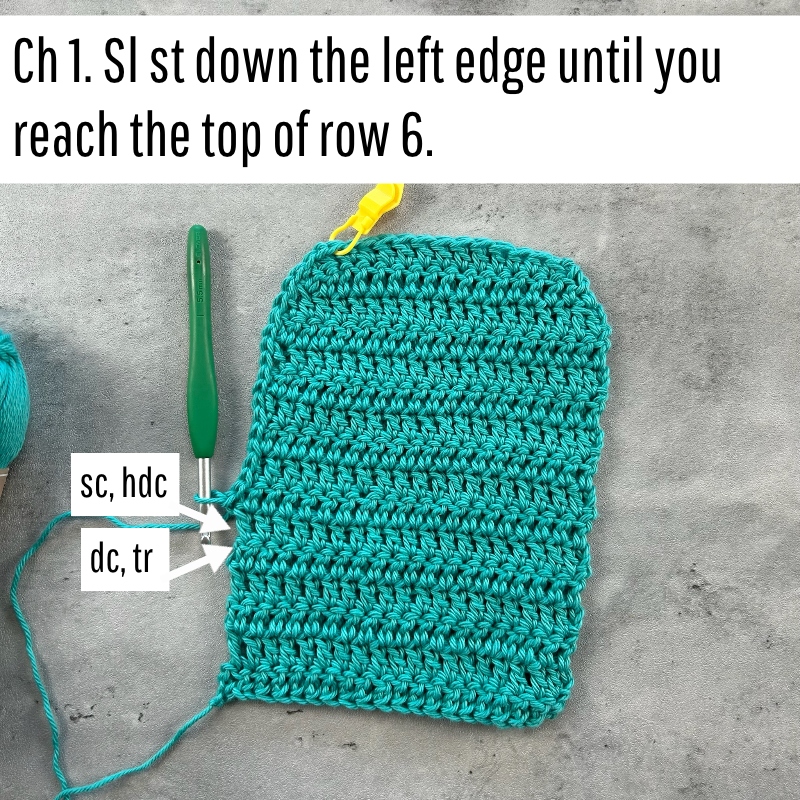
Edging & thumb:
Ch 1. Sl st down the left edge until you reach the top of row 6 (2 sl st per dc row).
Row 1 of thumb: Work (sc, hdc) in the side of row 6, (dc, mod tr) in side of row 5. <4>
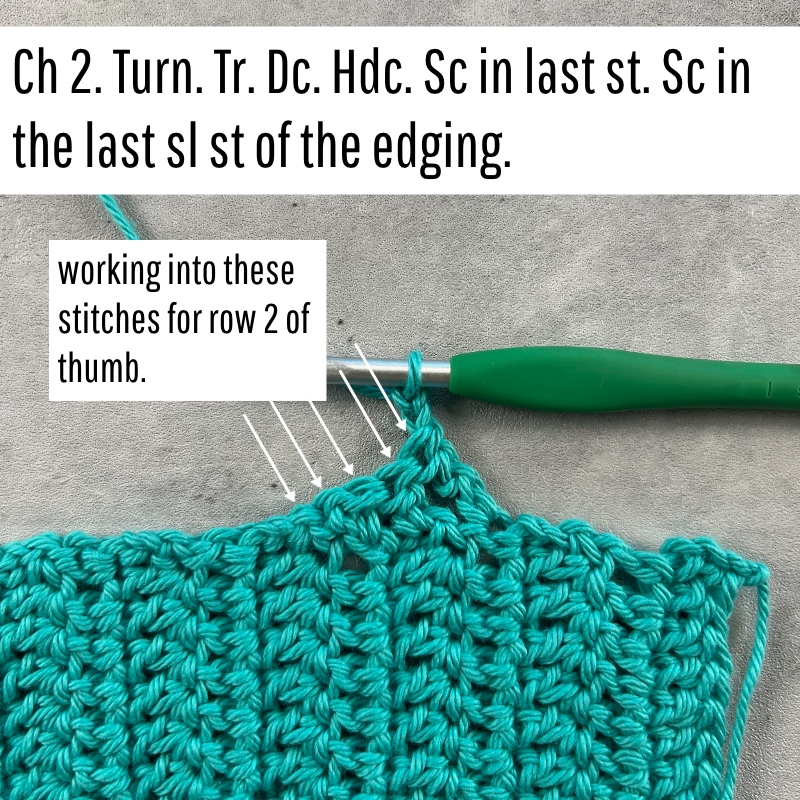
Row 2: Ch 2. Turn. Tr in same st. Dc. Hdc. Sc in last st. Sc in the last sl st of the edging. <5>
Row 3: Ch 2. Turn. Hdc in same st and across.
Row 4: Ch 1. Turn. Hdc2tog. Hdc. Hdc2tog. <3>
Ch 1. Turn. Sl st down the edge of the thumb (for sides of rows, approx. 1 st in sc and hdc rows, 2 st in dc rows)
Continue to sl st around the whole mitt until you reach the stitch marker. Sl st to the first sl st. Finish off and weave in the ends.
Side 2 (using Scrub-ology):
Note: The scrubby yarn worked up at a larger gauge for me than the size 4 cotton. So, side 2 instructions are adjusted to make both sides match up as closely as possible. However, if you work differently than me with scrubby yarn and you find your scrubby side is coming out too small, you can just use the instructions for side 1 to see if it is a better fit for you.
Row 1: Fdc 18.
Row 2: Ch 2. Turn. Dc in same st and in each st across. <18>
Rows 3 – 11: Repeat Row 2.
Row 12: Ch 1. Turn. Sc in same st and each st across.
Row 13: Ch 1. Turn. Dc2tog. Dc in each of the next 14 stitches. Dc2tog. <16>
Row 14: Ch 1. Turn. Dc2tog. Dc in each of the next 12 stitches. Dc2tog. <14>
Row 15: Ch 1. Turn. Sc2tog. Hdc in each of next 2 sts. Dc in each of next 6 sts. Hdc in each of next 2 sts. Sc2tog. <12> Mark the last stitch.
Edging & thumb:
Ch 1. Sl st down the left edge until you reach the top of row 5 (2 sl st per dc row).
Row 1 of thumb: Work (sc, hdc) in the side of row 5. Work (dc, mod tr) in the side of row 4. <4>
Row 2: Ch 2. Turn. Tr. Dc. Hdc. Sc in last st. Sc in the last sl st of the edging. <5>
Row 3: Ch 2. Turn. Hdc across.
Row 4: Ch 1. Turn. Hdc2tog. Hdc. Hdc2tog. <3>
Ch 1. Turn. Sl st down the edge of the thumb (for sides of rows, approx. 1 st in sc and hdc rows, 2 st in dc rows)
Continue to sl st around the whole mitt until you reach the stitch marker. Sl st to the first sl st. Finish off and weave in the ends.
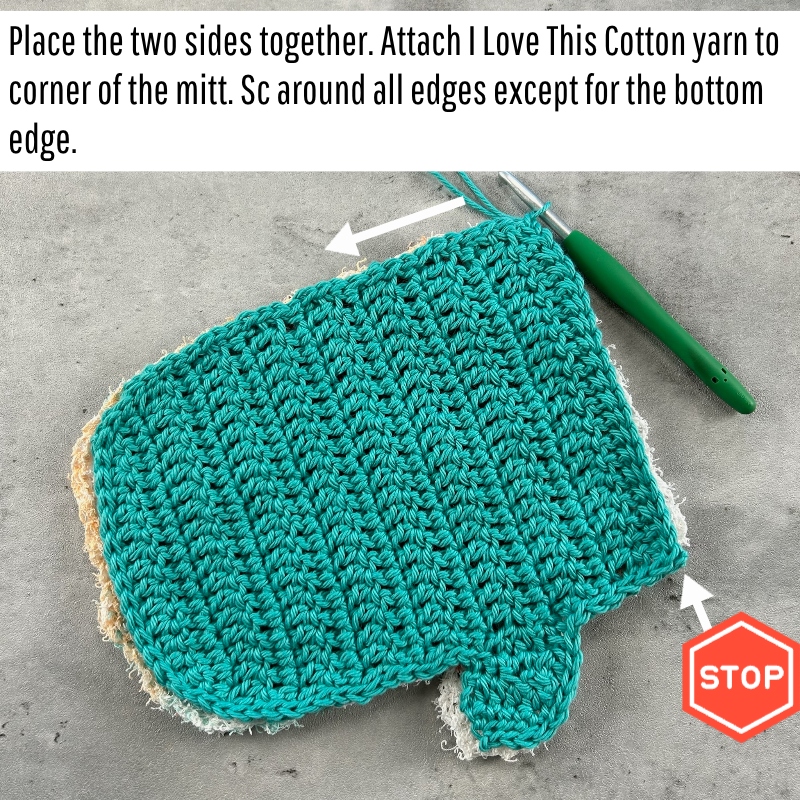
Sewing the Sides Together:
Place the two sides together. Attach I Love This Cotton yarn to the corner of the mitts (the side without the thumb). Optional: If you would like a loop to hang your mitt, chain the desired length of stitches and sl st into the same st. Sc the two sides together, around all edges except for the bottom edge.