DIY Clay Cheese Board Markers
Introducing a set of elegant markers designed specifically for labeling your cheese board made of clay. These markers are not only functional but also add a touch of sophistication to your cheese presentation. Crafted with high-quality materials, these markers are durable and long-lasting, ensuring that they will withstand frequent use. Whether you prefer a classic rectangular marker or a more whimsical shape, there is a marker to suit your style. These markers are easy to clean and maintain, making them a practical addition to your cheese board accessories. Elevate your next cheese tasting experience with these stylish and practical clay cheese board markers.
Supplies:
- Polymer clay
- Rolling pin or acrylic clay roller
- Small cookie cutters
- Letter stamps
- Baking sheet
- Parchment paper or aluminum foil
- Oven
- Safety glasses
- Drill and small drill bit or Dremel tool — I used a 1.6mm twist drill bit from this set
- Scrap wood
- Clamp
- Toothpicks
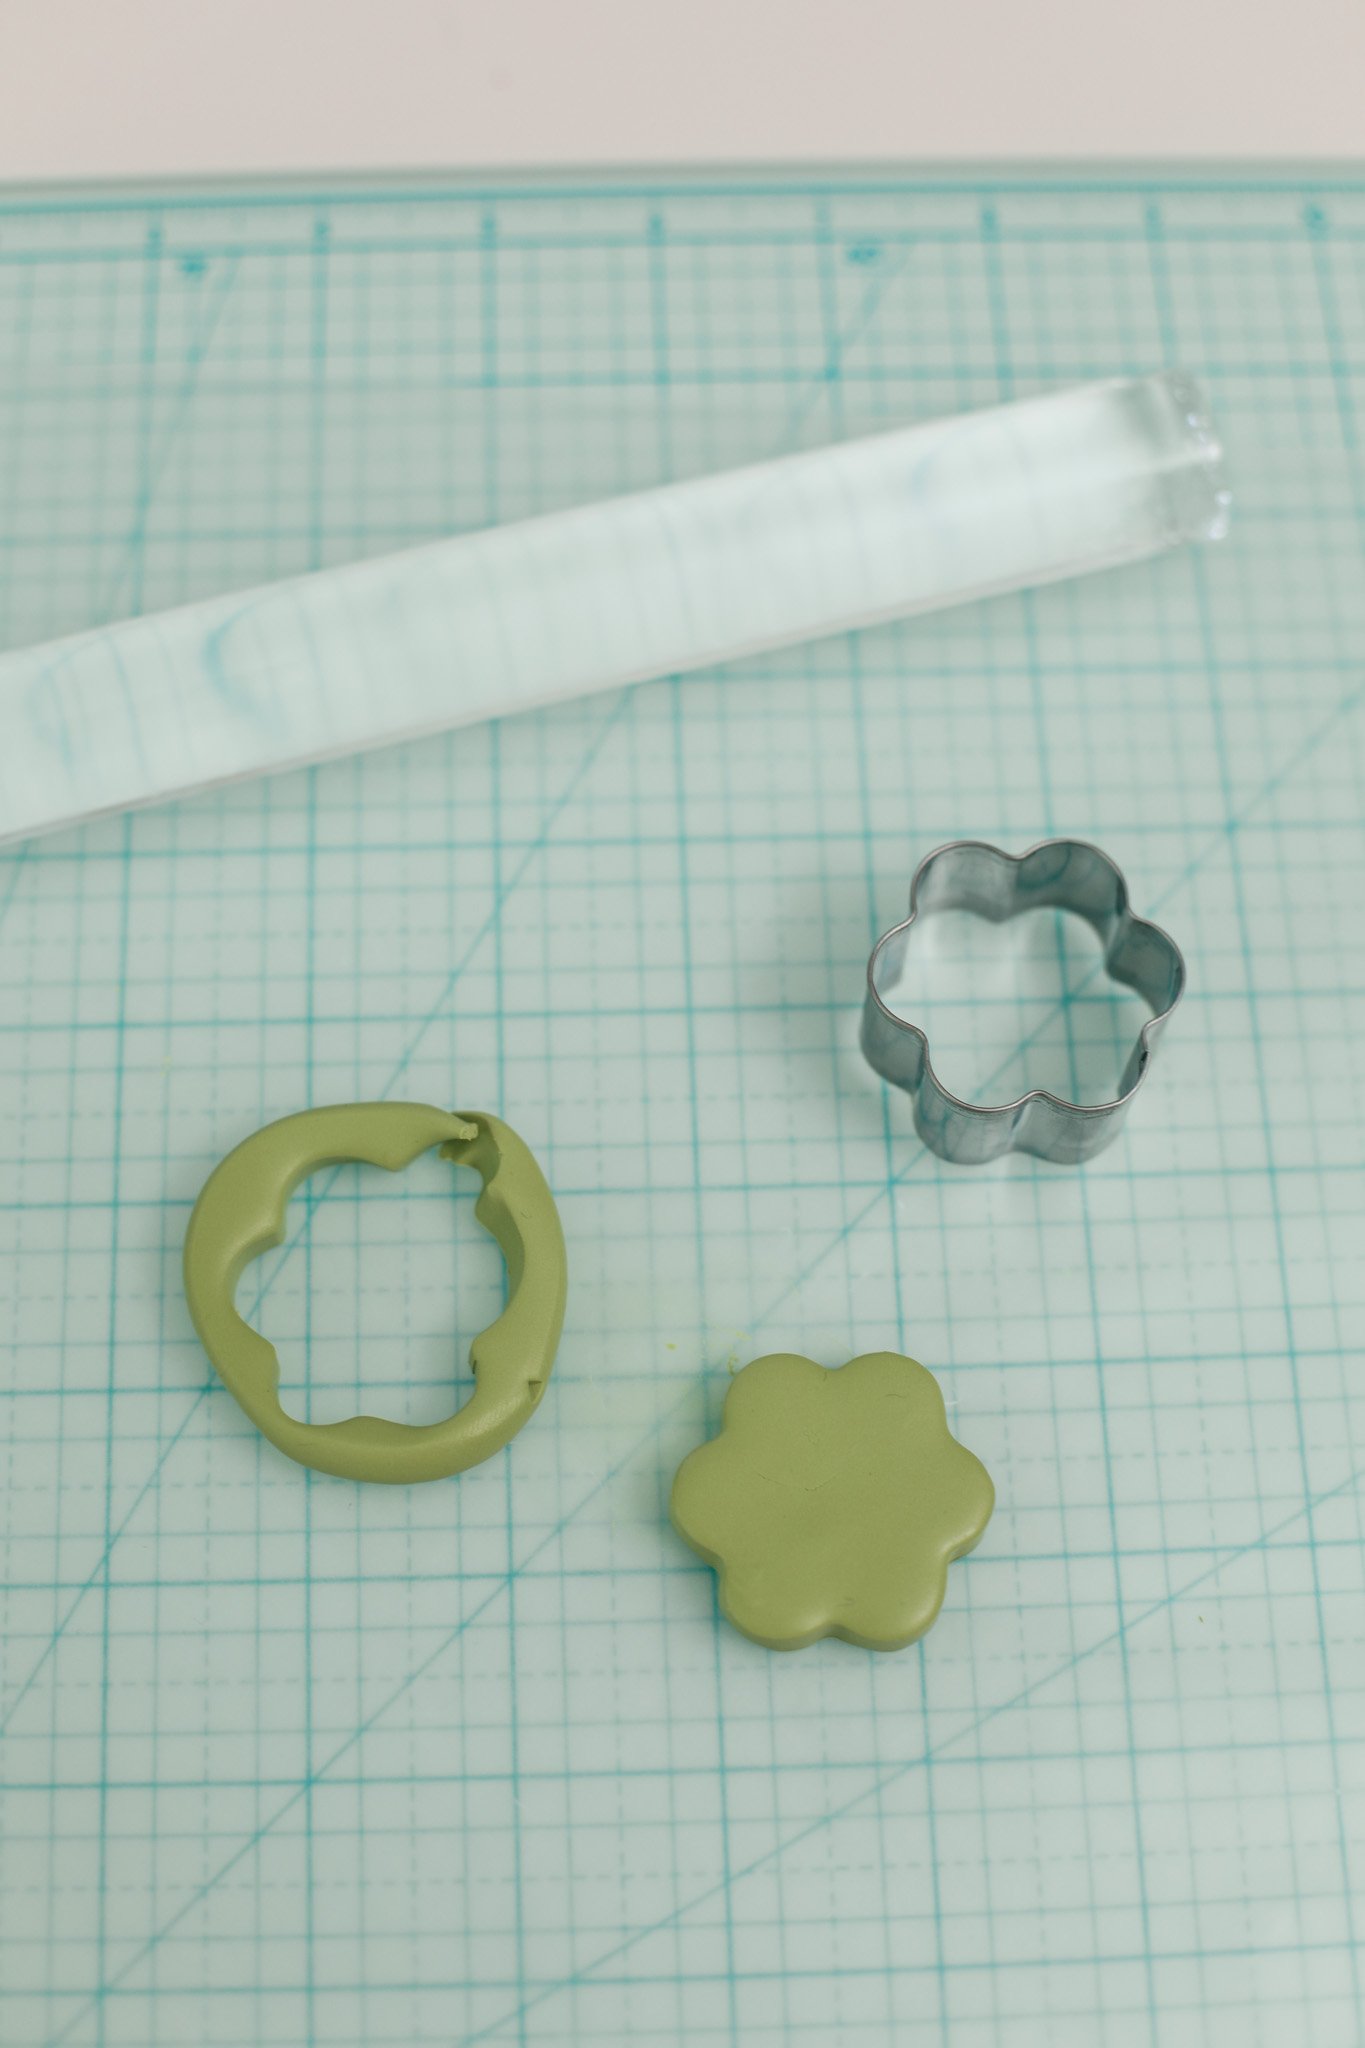
To begin you are going to cut out your shapes from the polymer clay. Work the clay in your hands, pulling it apart, until your clay has a softer more pliable texture. Then use a rolling pin to roll out a flat piece of clay that is roughly 1/4 inch thick.
Press your mini cookie cutters into the clay and pull off any excess clay from the edges. Then go around and smooth out the edges of your shape with your fingers.
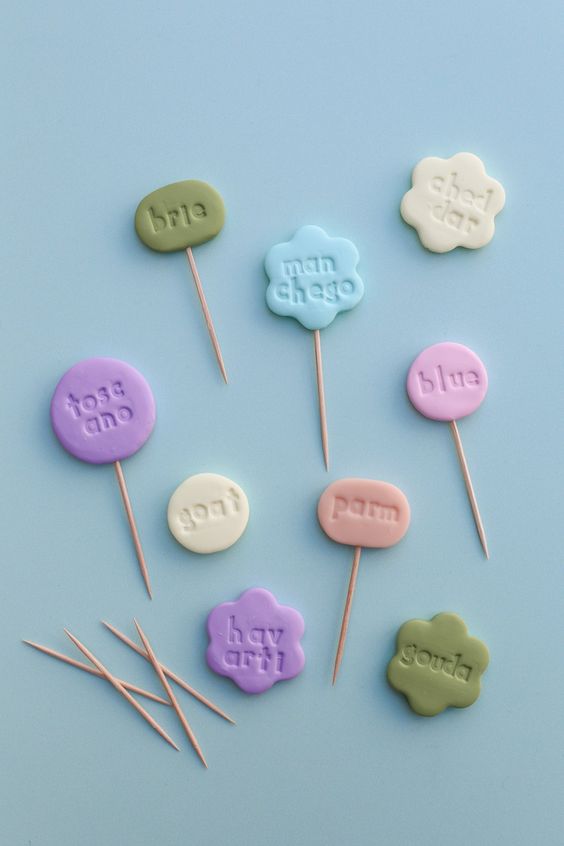
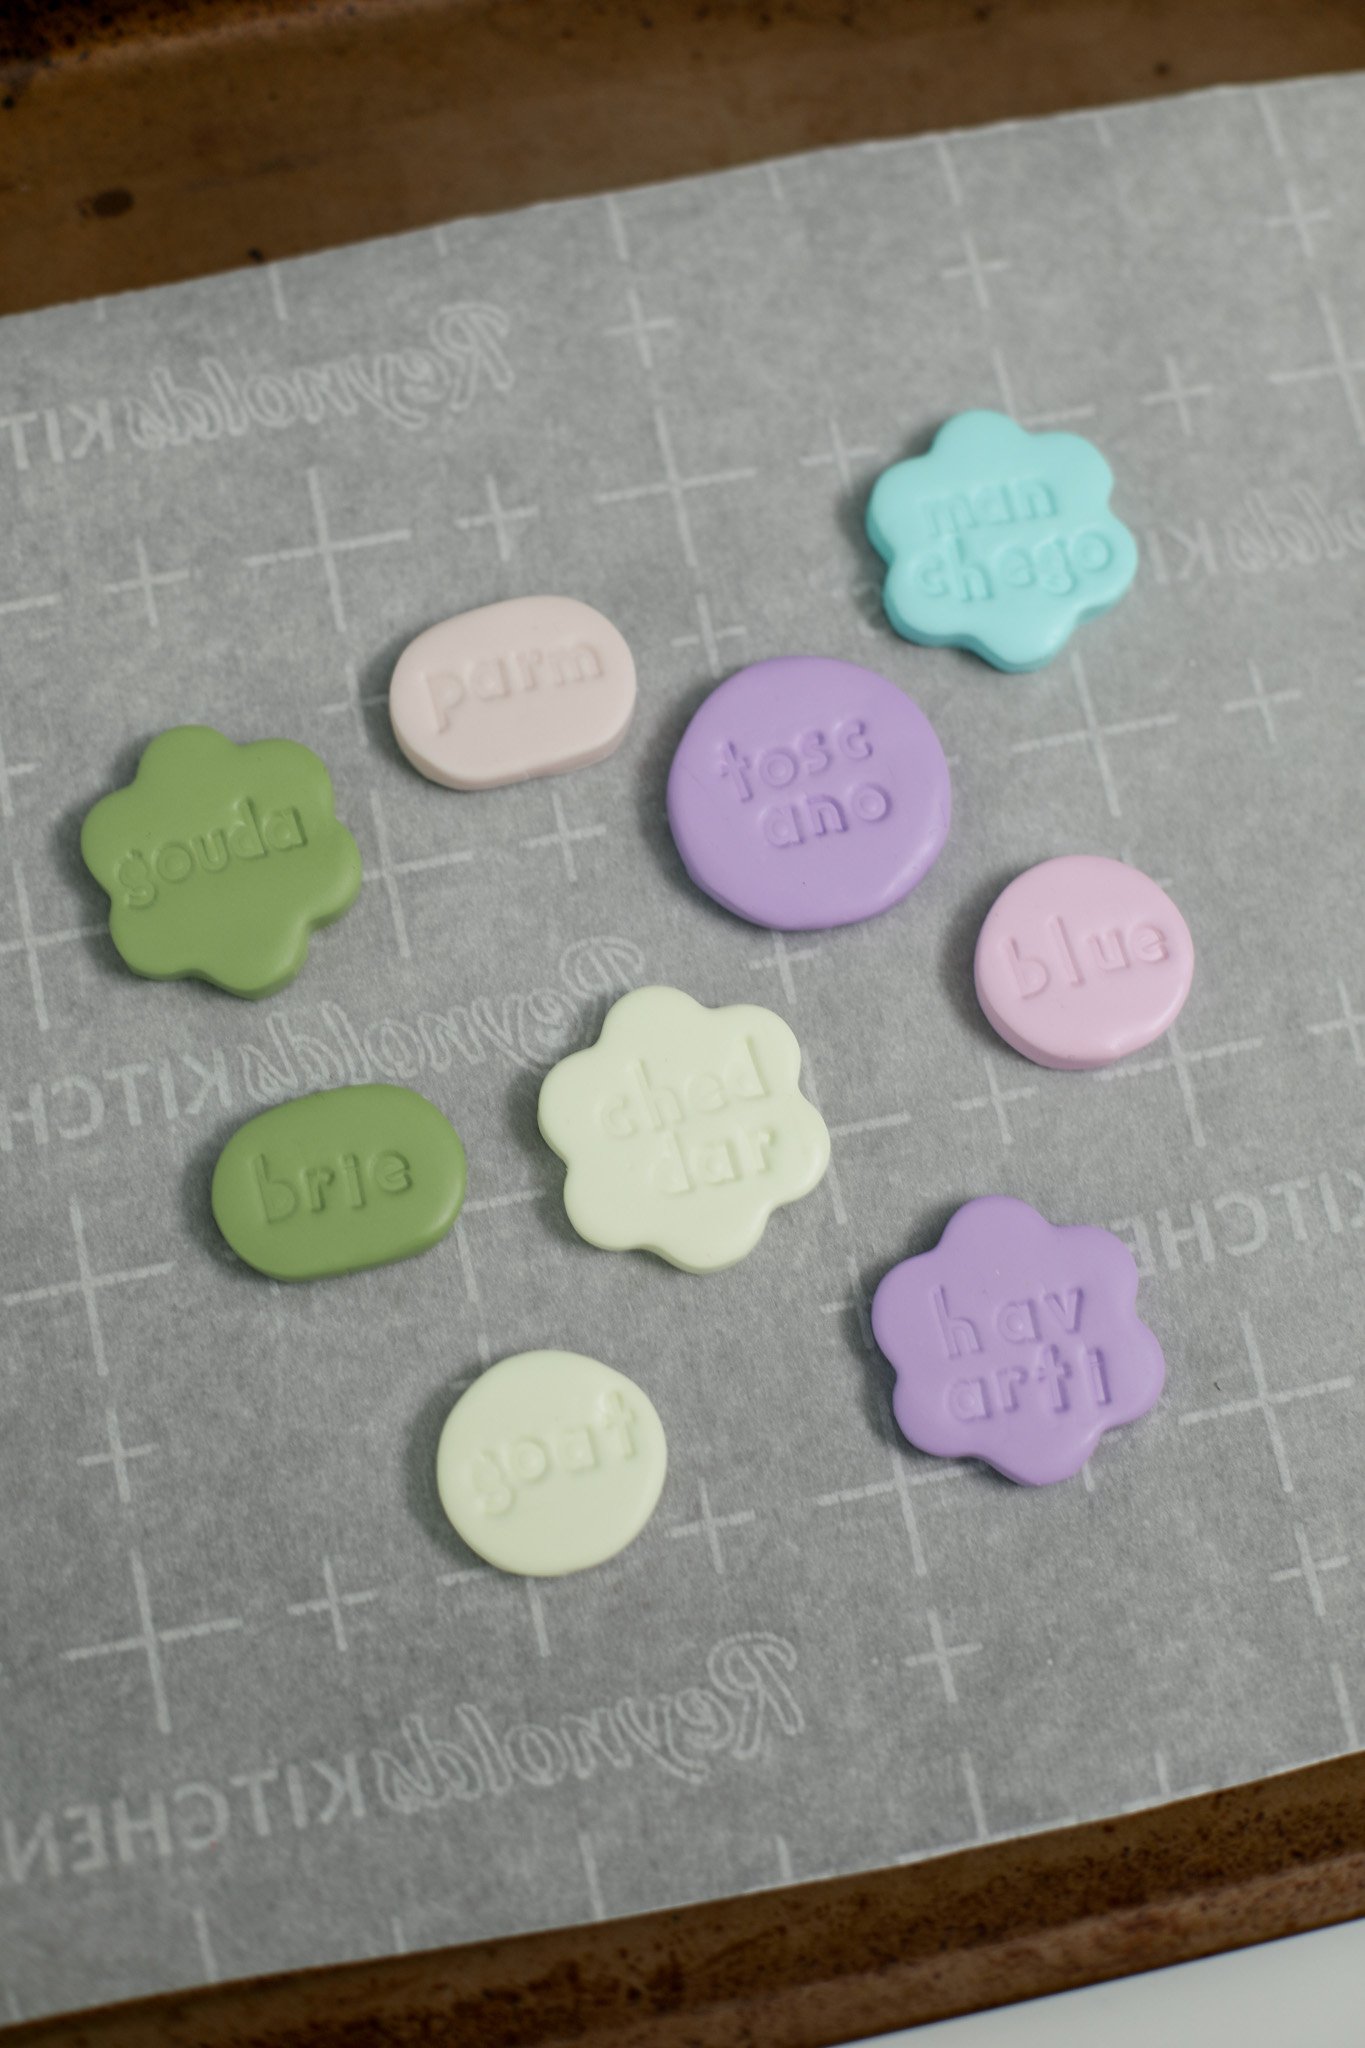
I used a mix of shapes and clay colors. My flower shapes were about 1.5 inch in diameter, the circles were 1 or 1.5 inch, and the ovals were about 1.5 inch long.
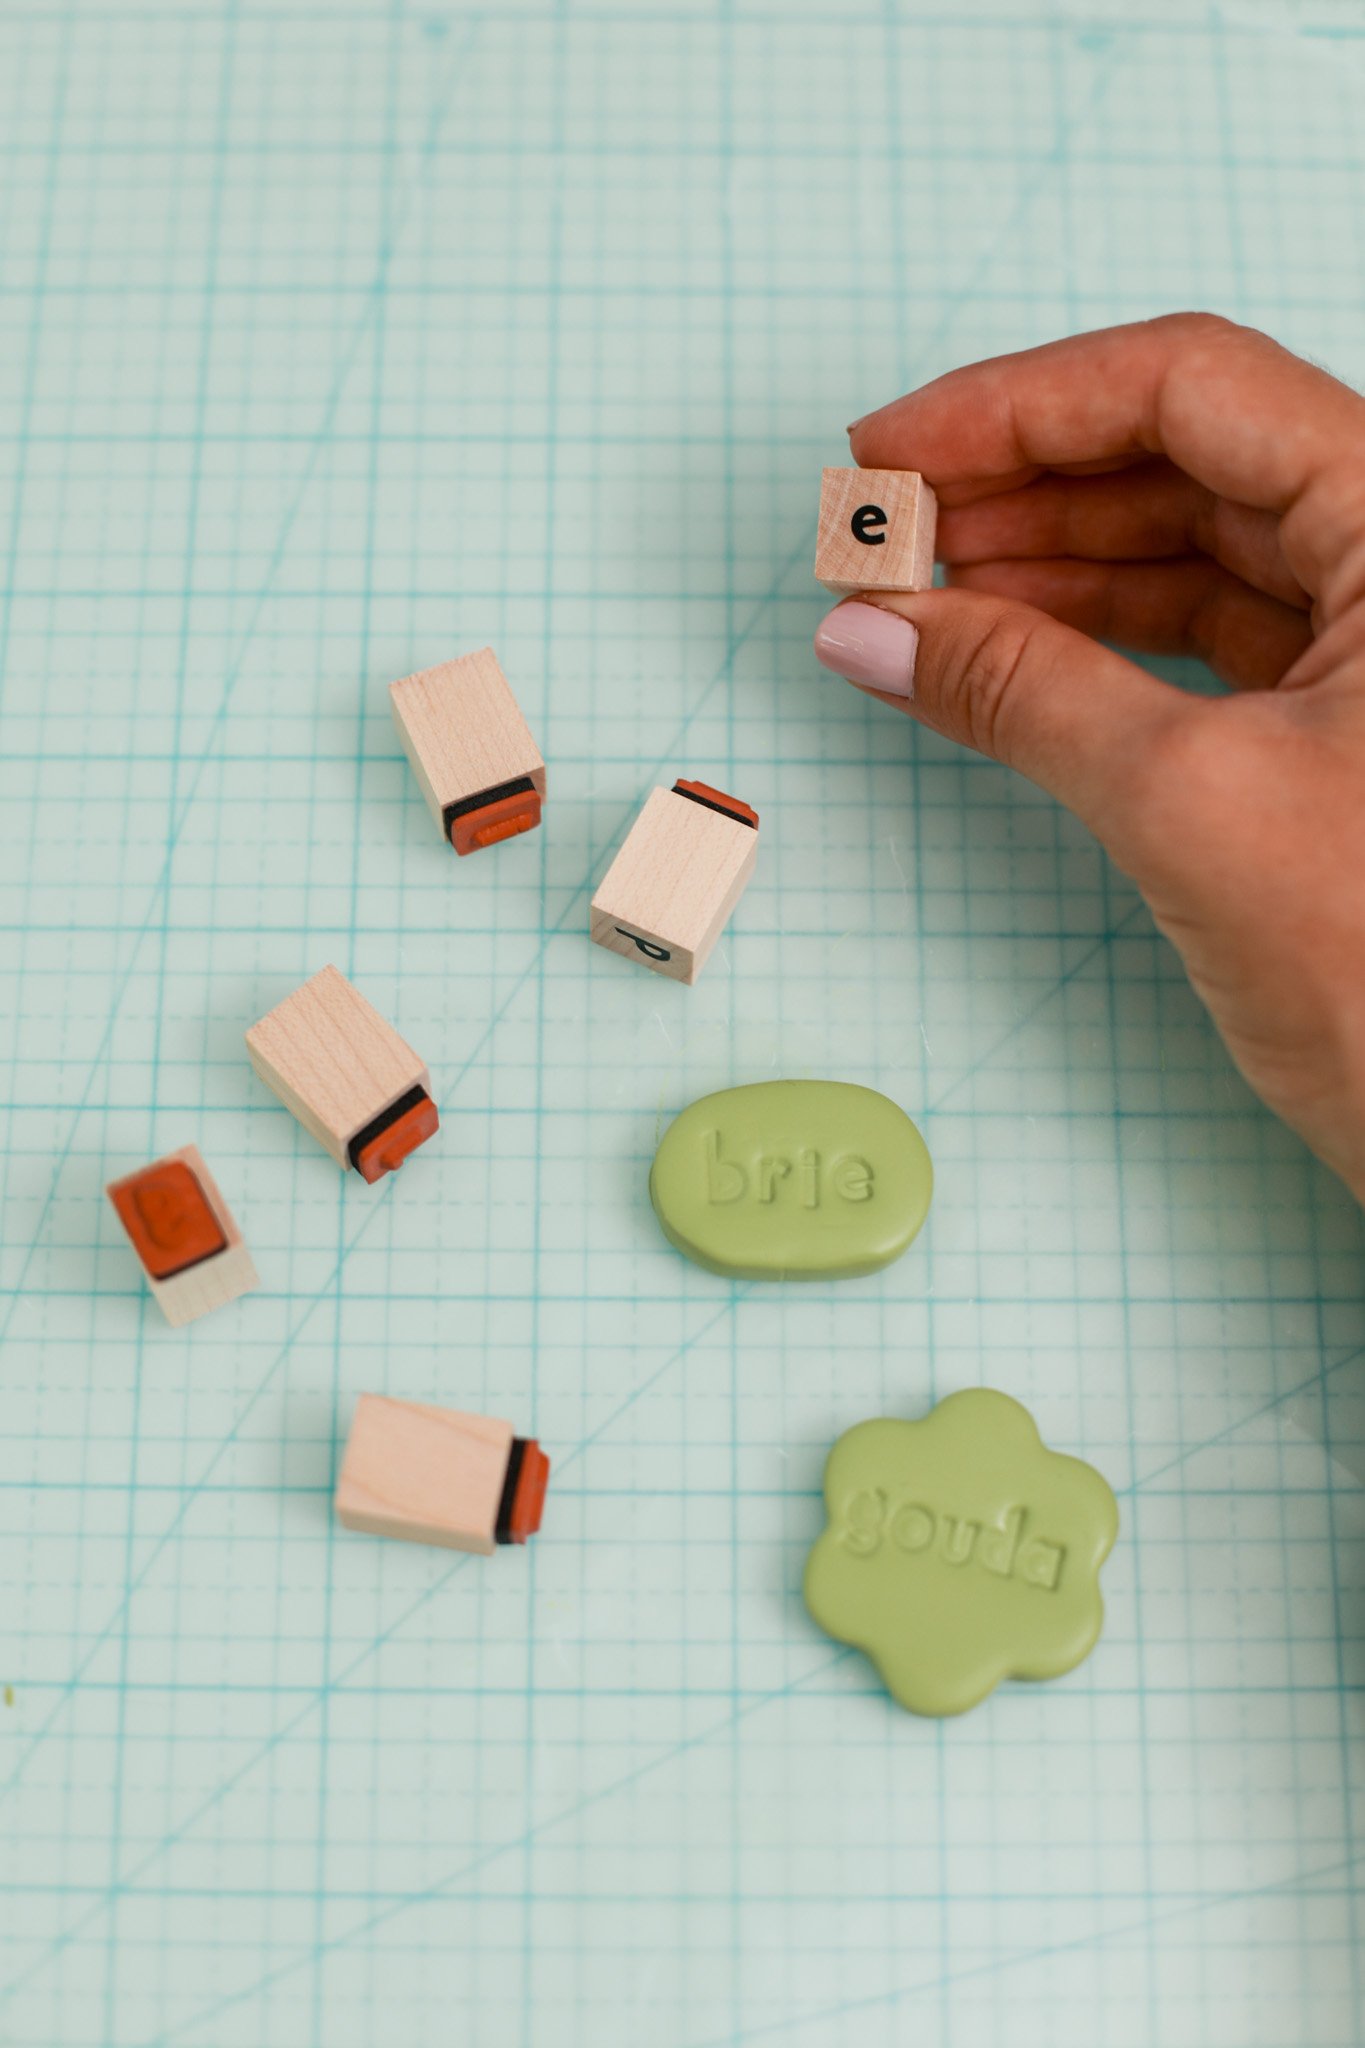
Next, you are going to press in your letters to create the cheese type text. For this I just used a simple set of lowercase rubber stamps. Gently press each letter into the clay to spell out your cheese types. I included the following cheeses in my set, but feel free to customize to your favorites!
cheddar
manchego
havarti
gouda
toscano
goat
blue
parm (parmesan)
brie
Place your shapes onto a baking sheet with parchment paper. Bake your clay according to your polymer clay instructions. For the FIMO clay that I used, I baked my cheese markers for 30 minutes at 230 degrees F (or 110 degrees C).
Allow the pieces to fully cool.
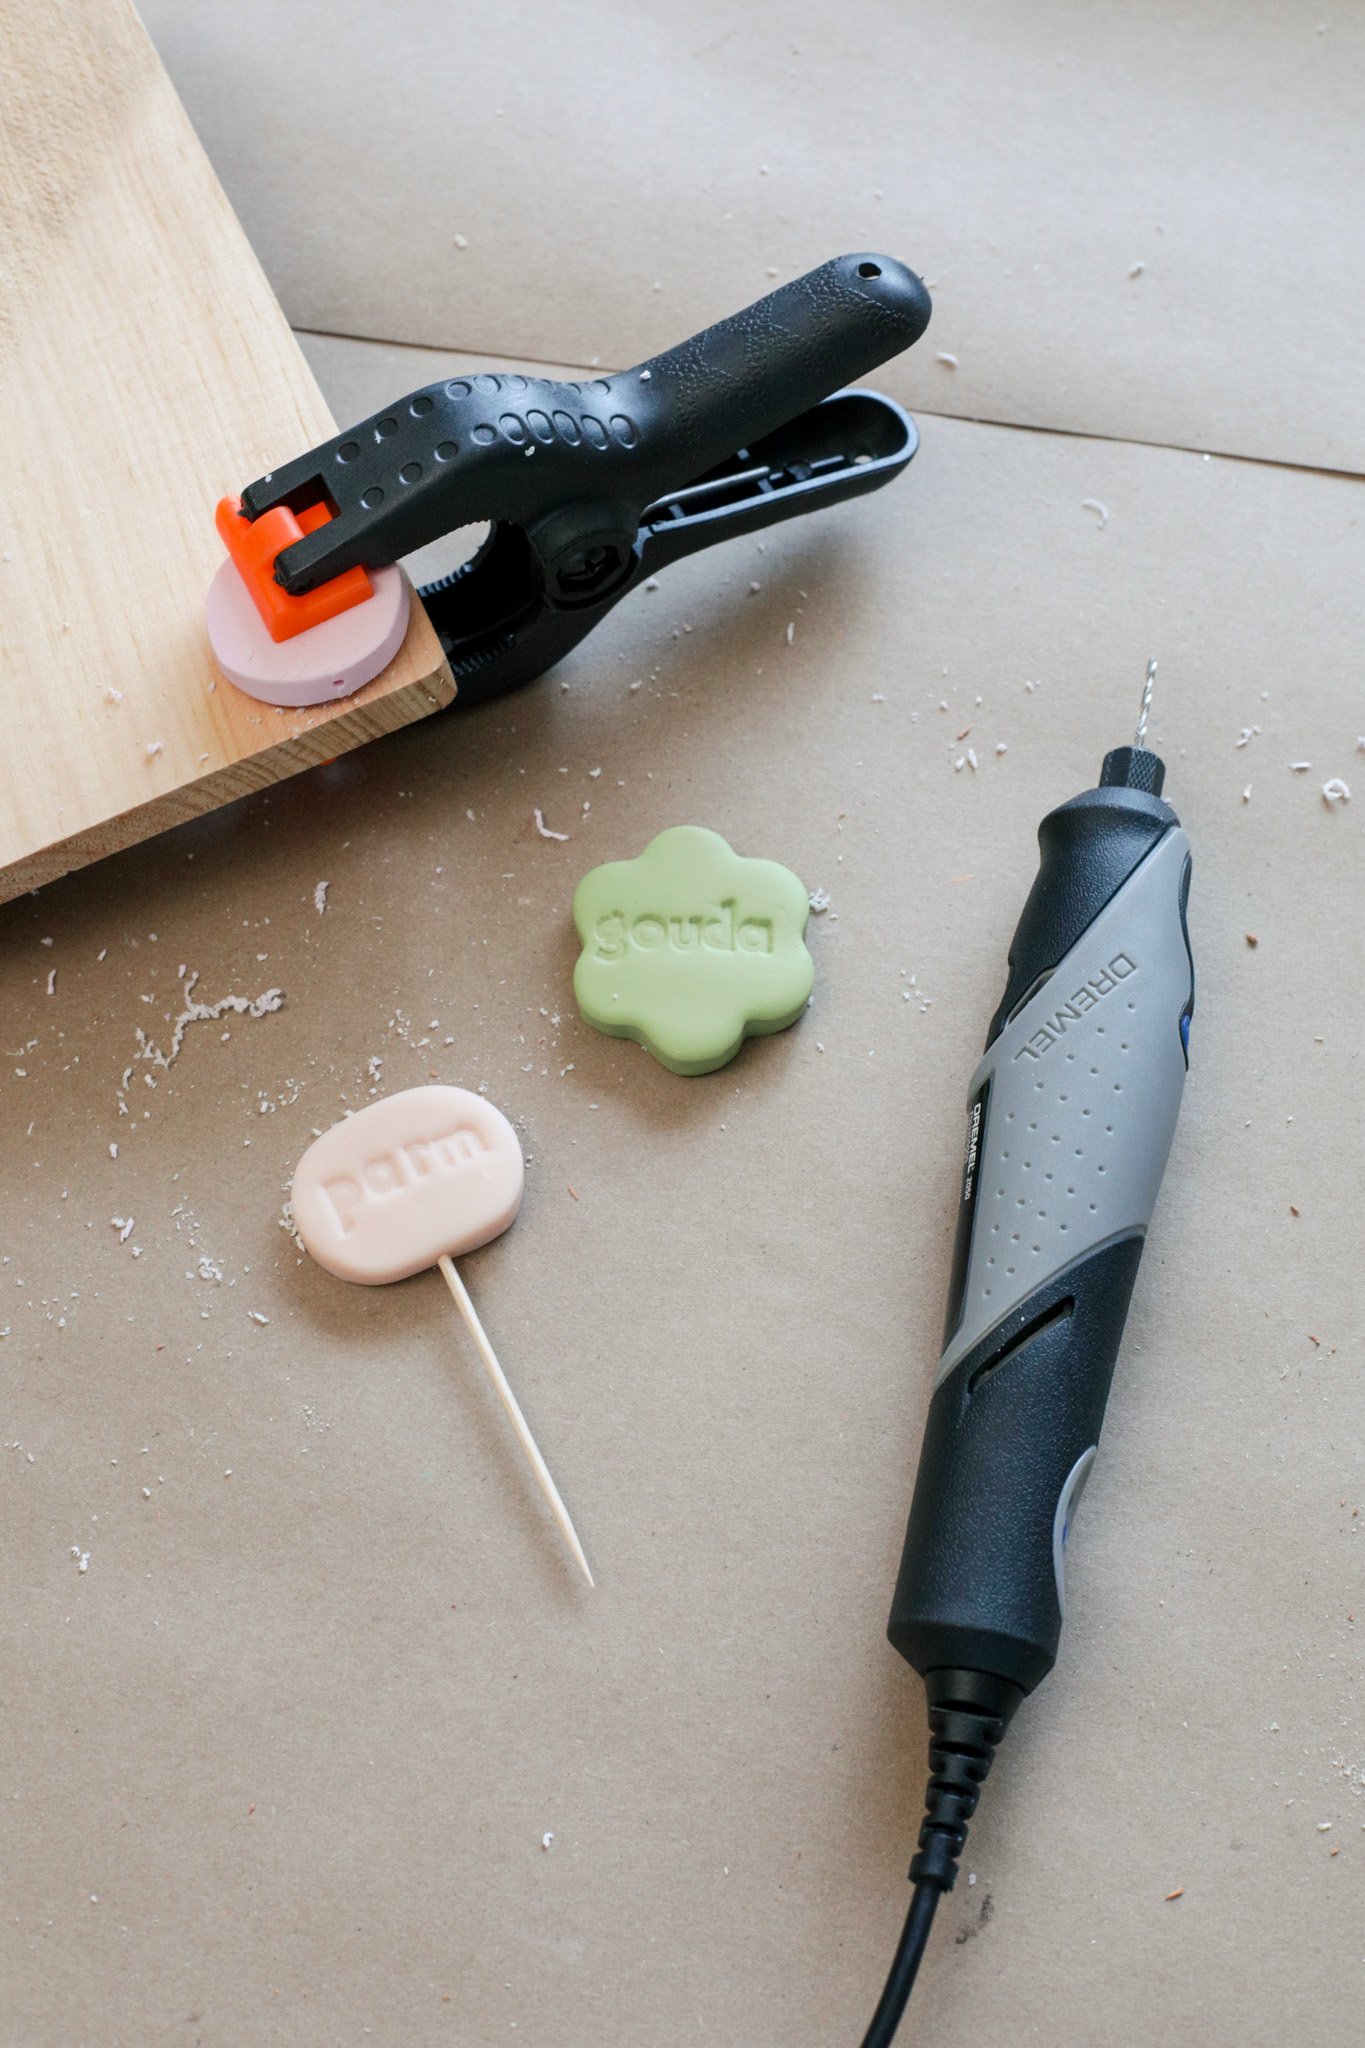
Once cooled, you are going to add the hole in the marker where you can stick a toothpick to stab into your cheese.
You are going to use a drill with a small drill bit (or I used my Dremel tool) to add a small hole in the bottom of each clay piece. Be sure to wear safety glasses while doing this step because the extra clay will fly everywhere.
To make the pieces more stable while drilling, I clamped them down to a piece of scrap wood so that I had something to hold onto while pressing in the drill. Be sure to drill as straight as possible through the clay marker so that the toothpick will be able to be inserted straight. You may have to make the hole then try sticking in a toothpick, then drill some more, and repeat until you have a deep enough hole to keep the cheese marker secure.

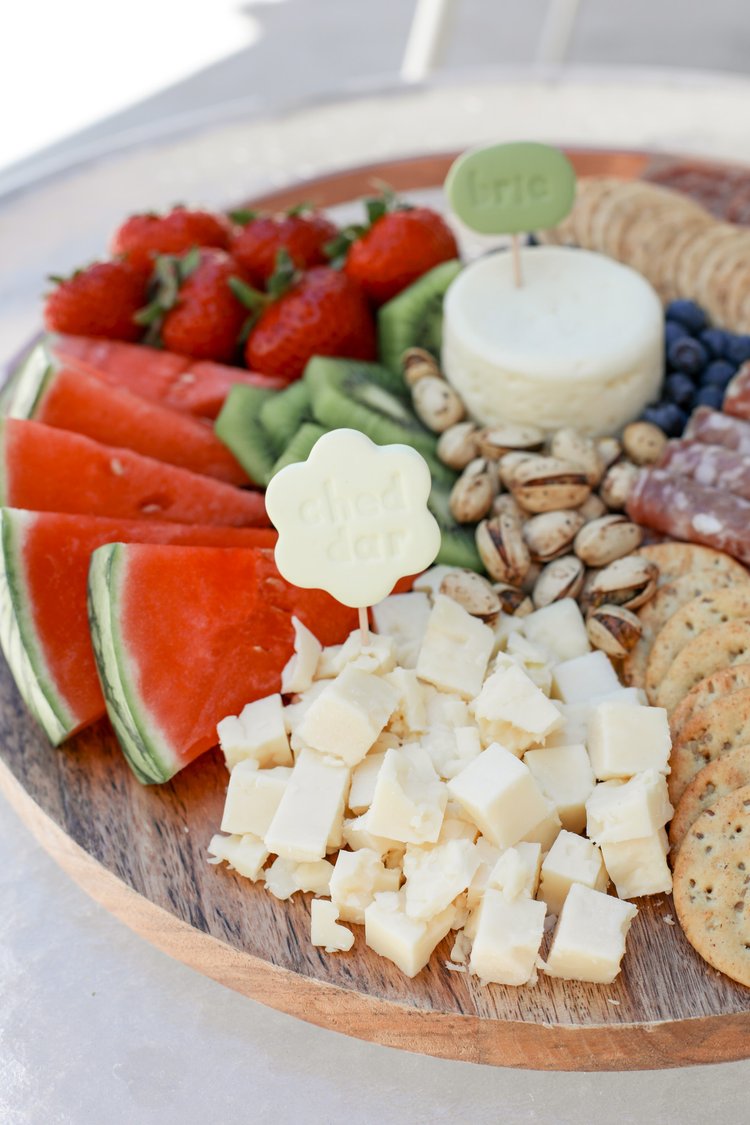
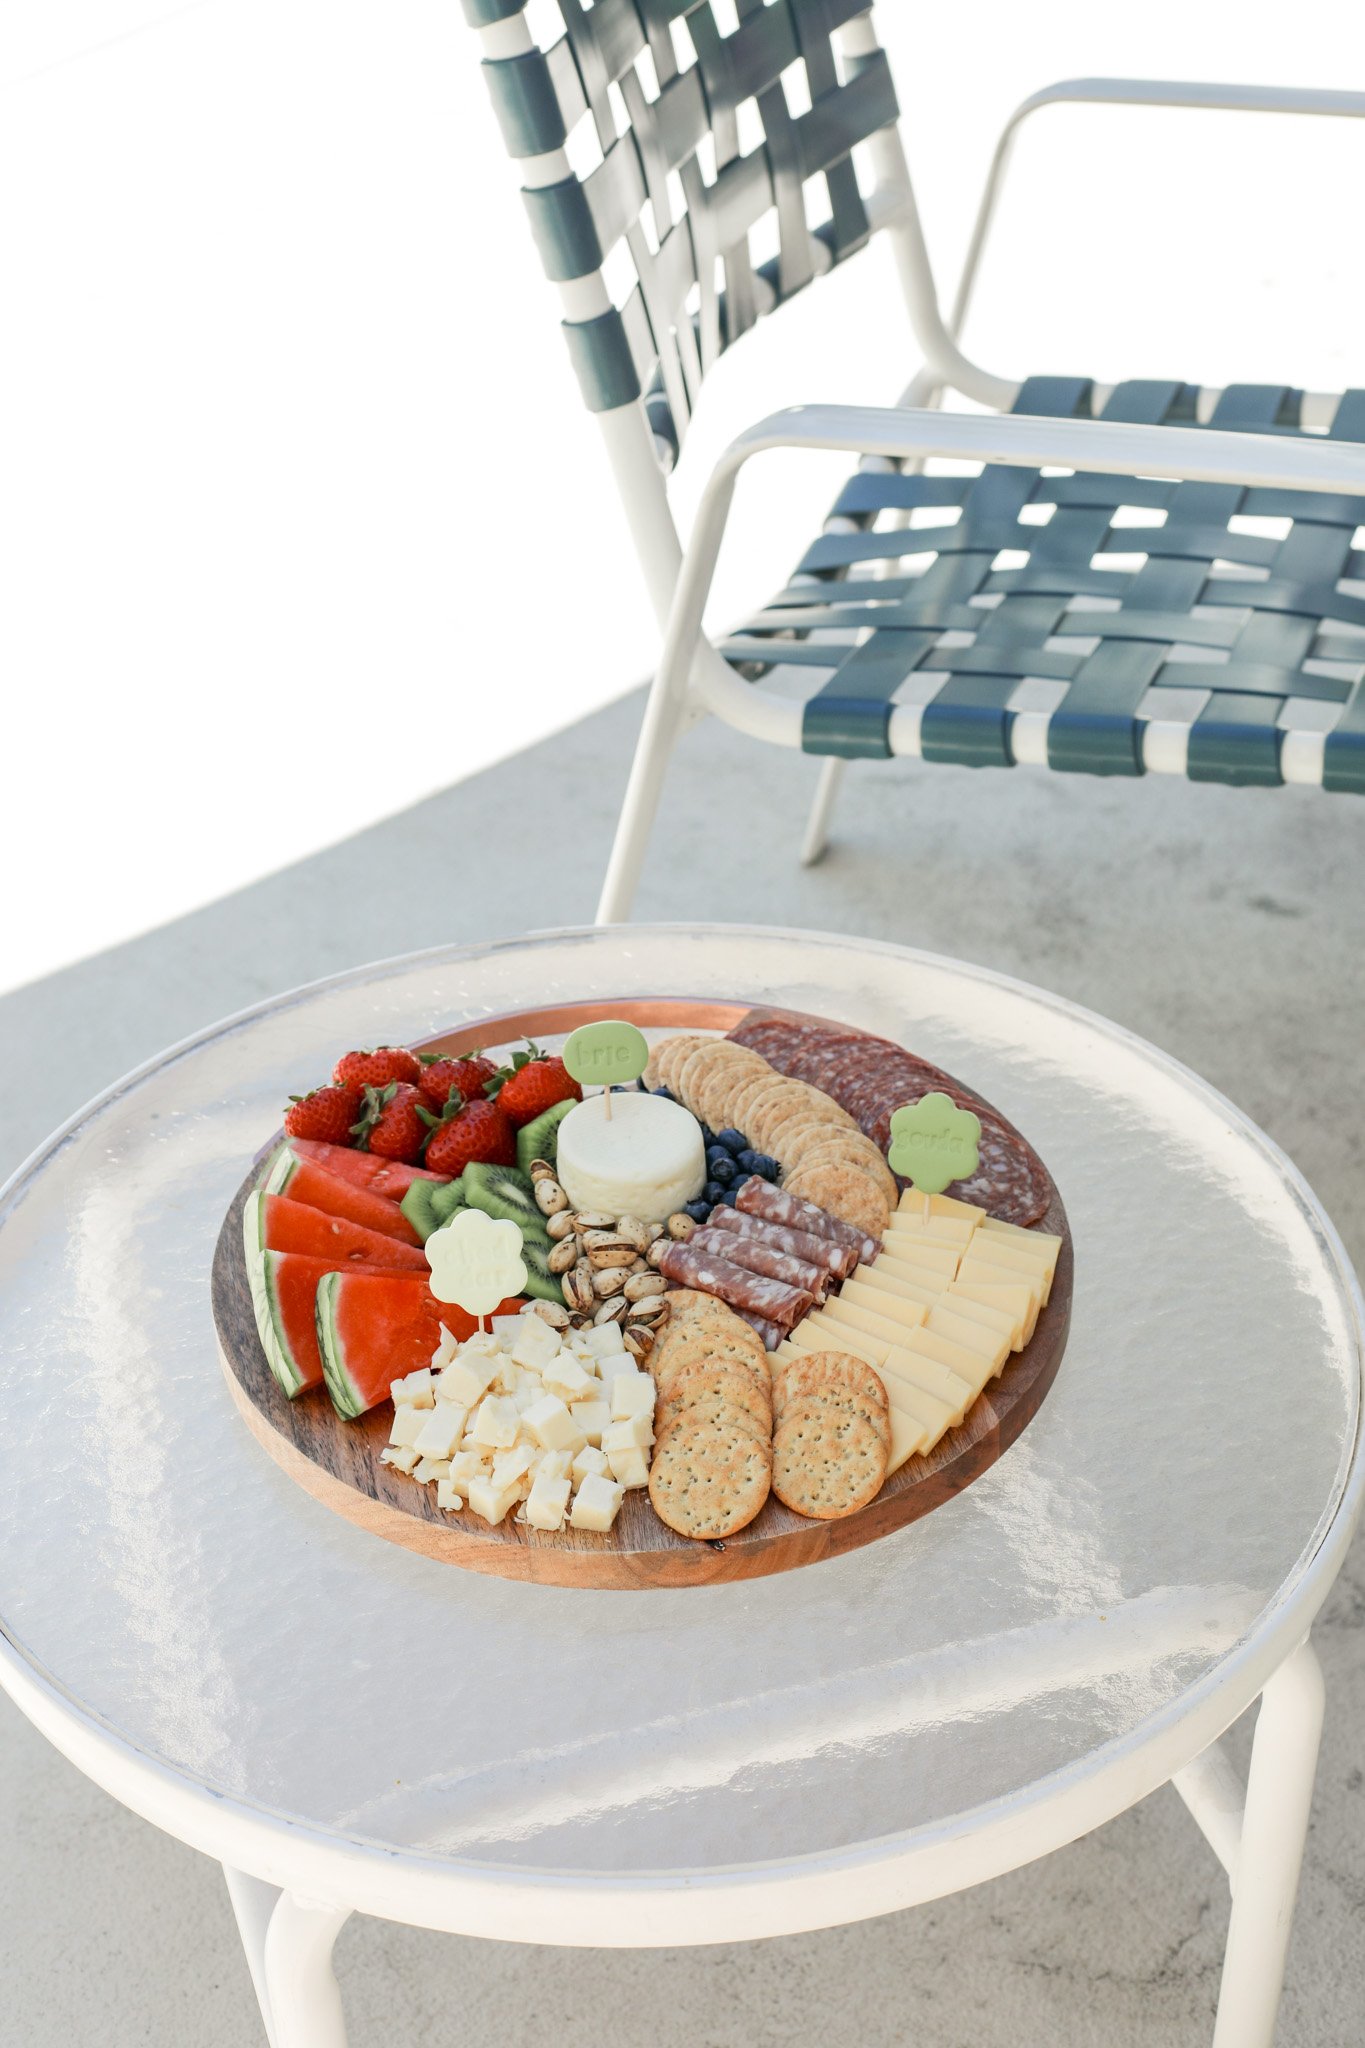
Now all that is left to do is add your toothpicks and setup your cheese board! You can easily throw away your toothpick and add a new one to reuse the markers again and again.