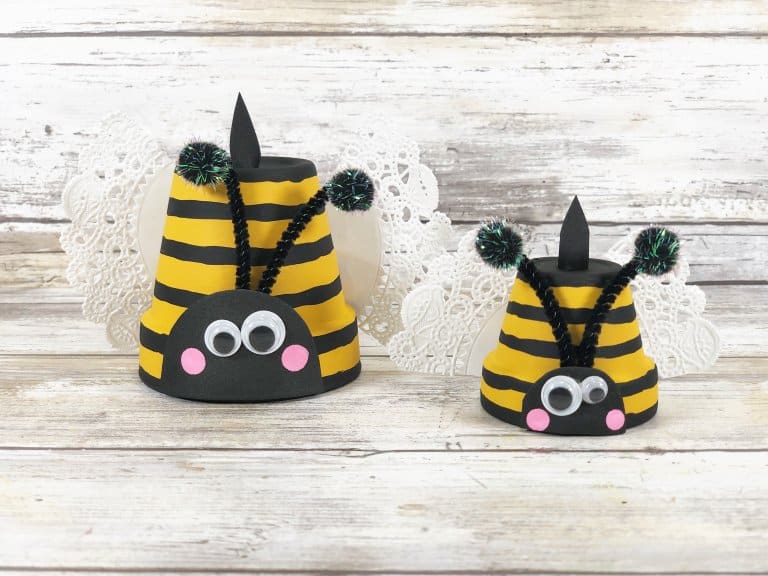
Bee Plant Pot
Imagine a whimsical addition to your garden that not only adds a touch of charm but also supports the local ecosystem. The Buzzing Bee Plant Pot is a unique and innovative creation that combines functionality with environmental consciousness. This one-of-a-kind pot is designed to attract and nurture bees, those tiny pollinators that play a crucial role in our ecosystem. Crafted with care, the Buzzing Bee Plant Pot features vibrant colors and intricate patterns that mimic the natural beauty of flowers. Its shape and size are perfectly suited to accommodate a variety of plants, allowing you to create a stunning display of blossoms and foliage. But what sets this pot apart is its thoughtful design that includes special features to attract bees. From the vibrant colors that catch their attention to the textured surface that provides a landing spot, every detail has been carefully considered to make this pot a haven for these essential creatures.
Supplies needed:
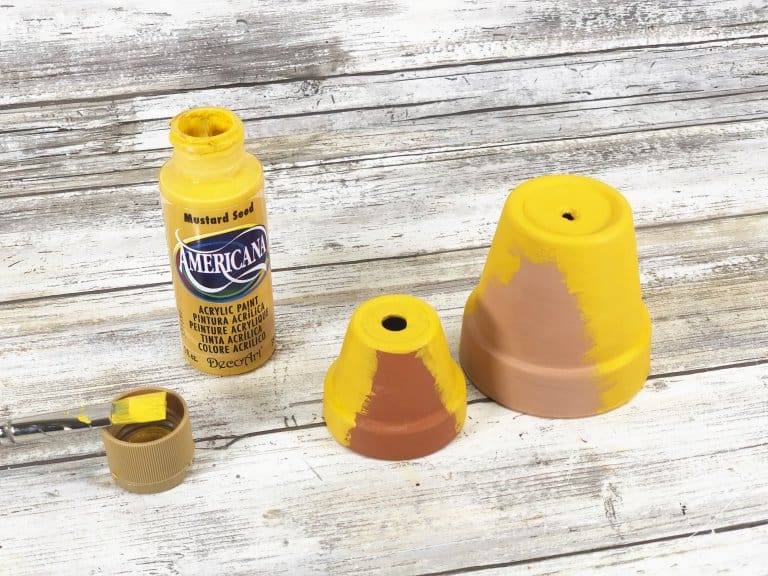
- Dollar Store Terracotta Clay Pots – 2.5” and 1.5” in diameter
- Acrylic Paint – Yellow, Black, Pink
- Craft Foam – Black
- Googly Eyes, Four
- Pom Poms – Black, Four
- Chenille Stem – Black, One
- Small White Paper Doilies, Two
- Glue Gun and Glue Sticks
- Scissors
- Paintbrush
- Pencil with New Eraser
How to create a clay pot bee:
1. Gather all materials and then remove the packaging and labels.
2. Basecoat both clay pots with yellow acrylic craft paint. Let the paint dry and then apply a second coat, if necessary.
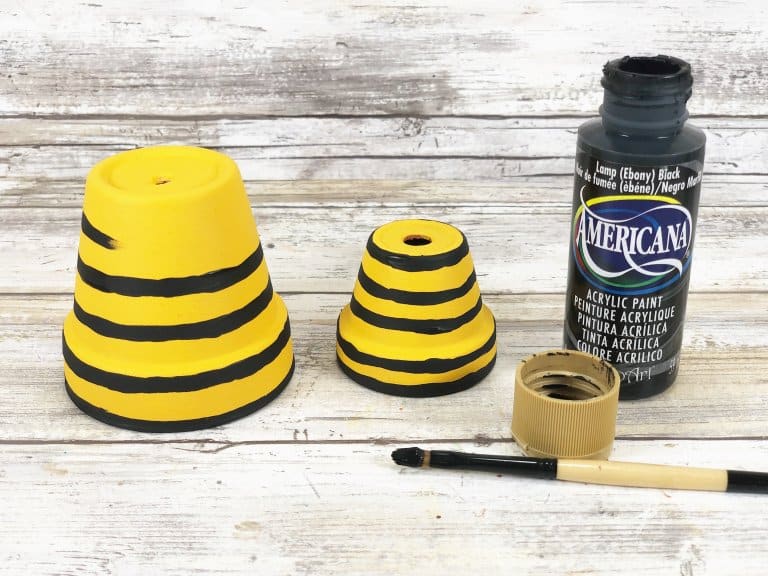
3. Paint horizontal stripes with black paint from the top to the bottom of each clay pot. Set aside to dry. Apply a second coat, if necessary.
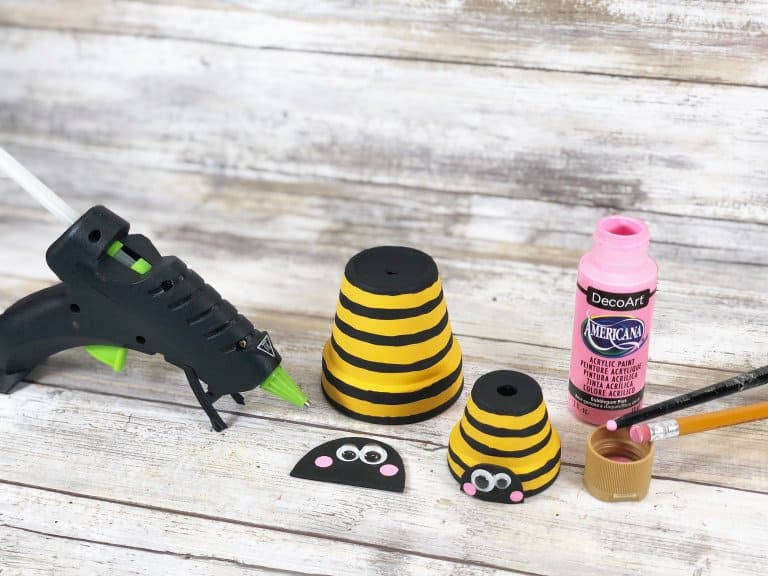
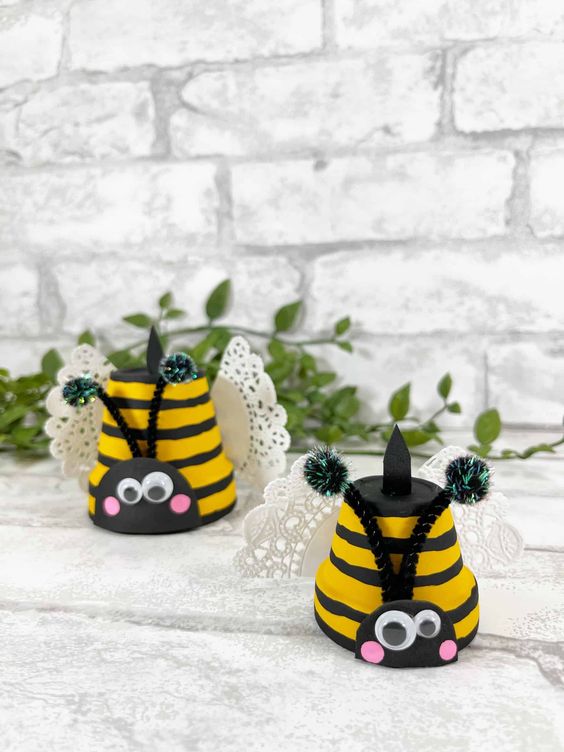
4. Cut a larger and smaller half circle from black craft foam. Attach two wiggle eyes to each Bee head with a glue gun and glue sticks.
5. Add polka dot cheeks by dipping a new pencil eraser into pink acrylic craft paint. Set aside to dry.
6. Use the glue gun to attach Bee heads to bases of clay pots.
TIP: You can use liquid craft glue instead of hot glue for this project, but you will have to wait for it to dry.
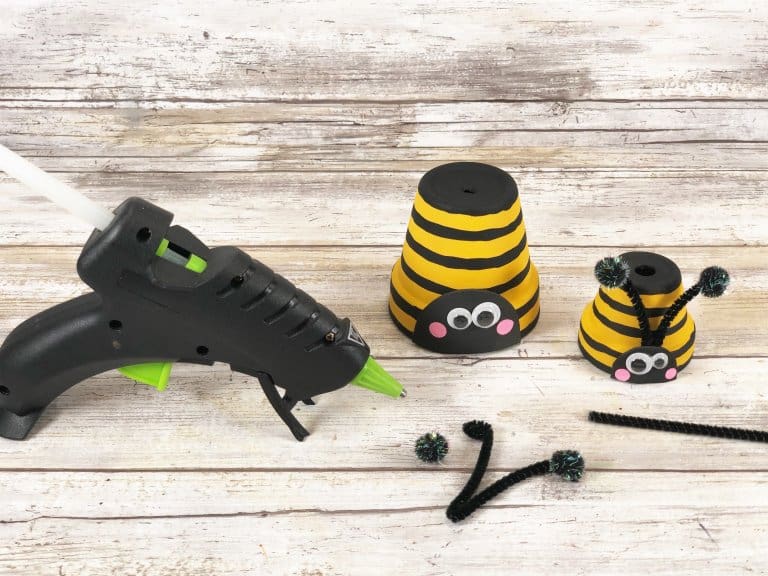
7. Cut a 12” chenille stem in half and fold both sections in half. Attach a black tinsel pom pom to the cut end of both sets of antennae with a glue gun and glue sticks.
8. Glue the folded end to the back of the Mama and Baby Bee heads.
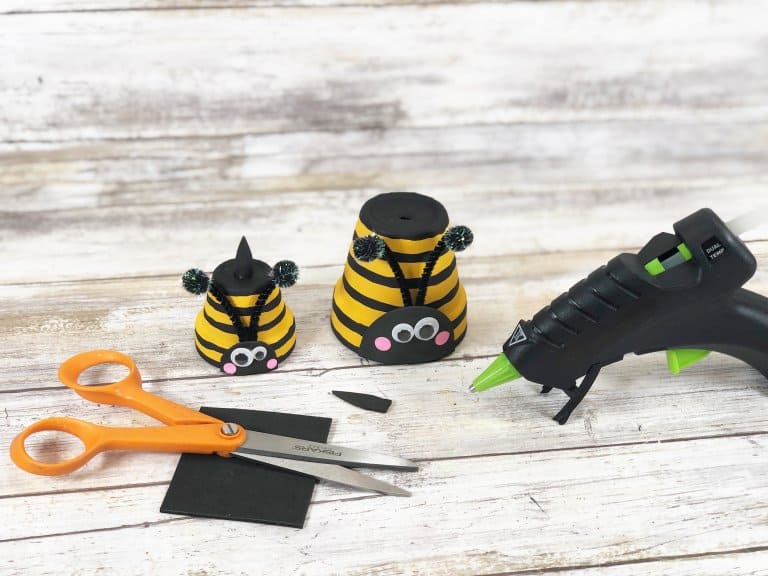
9. Cut two long skinny triangles from black craft foam and secure in the drainage hole in the bottom of the pot with a glue gun and glue sticks.
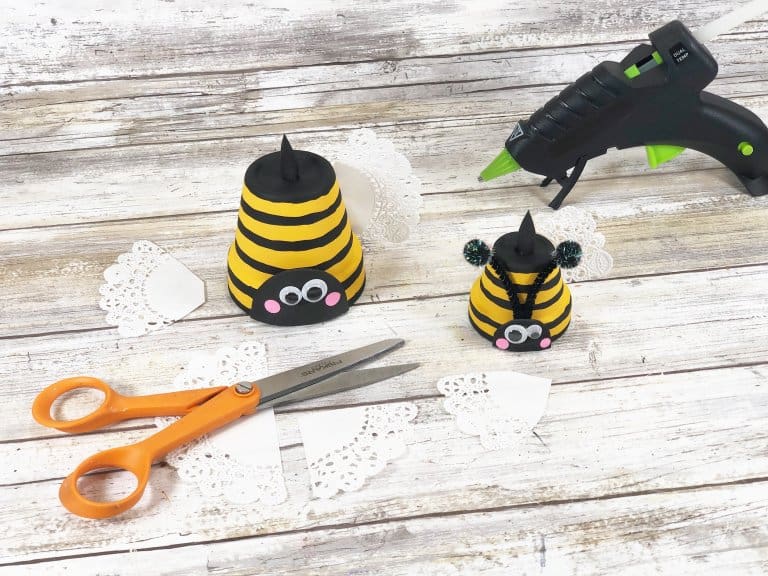
10. Cut small white paper doilies in quarters and attach two to the back of Mama and Baby Bee using a glue gun and glue sticks.
Tips and tricks:
- You don’t have to buy new pots for these crafts. Give a new look to old clay pots instead.
- The end of the season is the perfect time to pick up some pots, either at home improvement, gardening, or craft stores. They are usually clearing out their leftover terracotta pots, meaning you get a great deal.
- Using spray paint is a great way to get quick, even coverage on your pots.
- A decoupage medium, like Mod Podge, does a great job of sealing your DIY project and prolonging its life.