How to make a clay heart dish for jewelry
Crafted with love and attention to detail, this exquisite clay heart dish is the perfect accessory for storing and displaying your precious jewelry. Its unique design and delicate curves make it a stunning addition to any vanity or dresser. The smooth surface of the dish ensures that your jewelry remains scratch-free and protected, while the heart shape adds a touch of romance and elegance to your space. Whether you use it to hold your favorite rings, earrings, or bracelets, this heart dish will add a touch of beauty and sophistication to your daily routine. It's not just a dish, it's a statement piece that reflects your unique style and personality.
Materials:
- Air dry clay
- Acrylic paint
Tools:
- A clay cutting tool or a knife
A thin paintbrush
How to Make a Clay Heart Dish for Jewelry
Step 1: Knead the air-dry clay between your hands until it’s softened and ready for shaping.
Step 2: Roll the clay with a rolling pin until about 1/2 inch thick.

Step 3: Using a clay cutting tool or a knife, cut out the heart shape.
Step 4: Curve up the edges. Let the heart shaped clay dish dry for 24 hours.
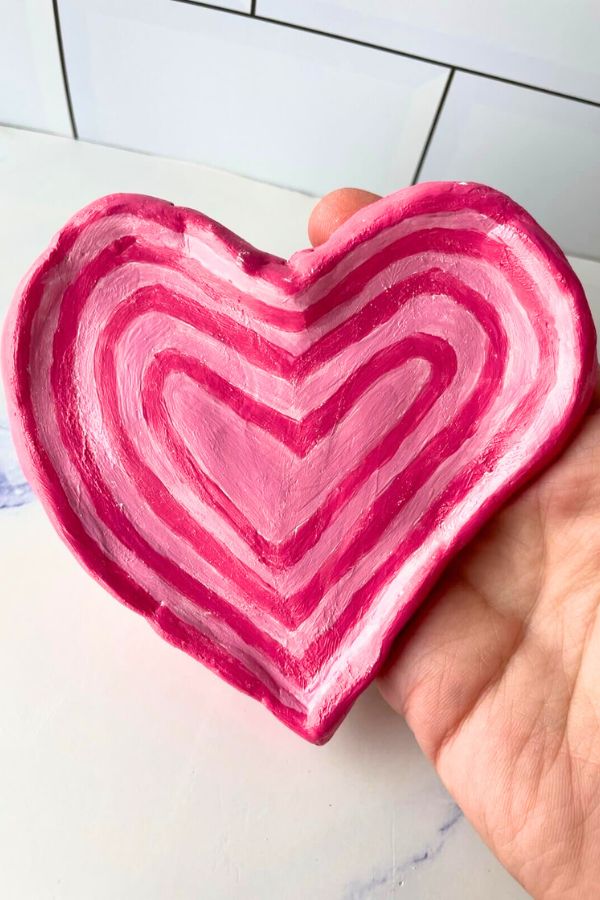
Step 5: Using a small paintbrush, paint around the edges with a darker color. Then switch to the lighter color and paint another round. Keep repeating this until you reach the middle and the tray is painted.
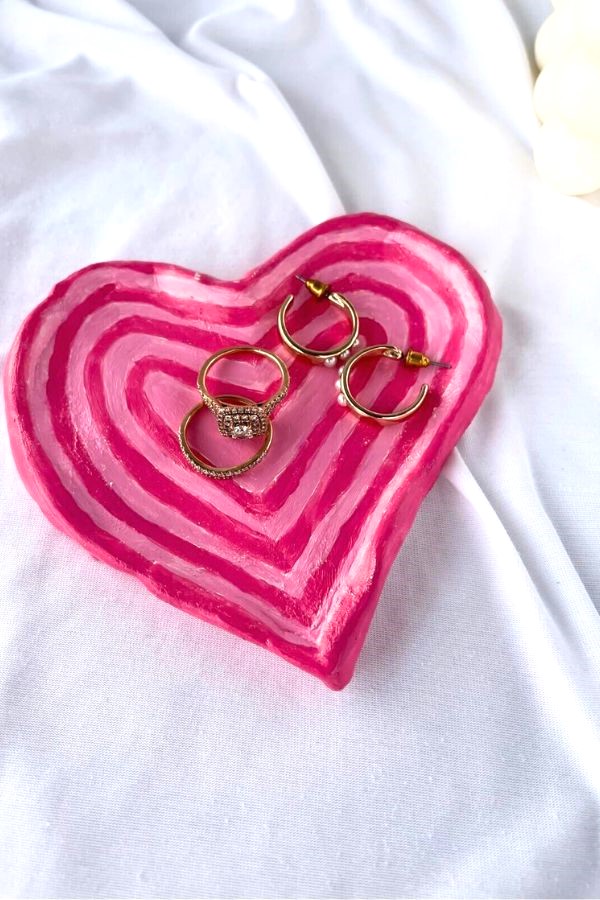
Once the paint is dry, your DIY heart clay tray is ready to use! Place your rings or other small jewelry items on it for a cute and aesthetic display. This easy DIY project is perfect for a rainy day or a fun craft night with friends. Give it a try and enjoy your new handmade jewelry dish!