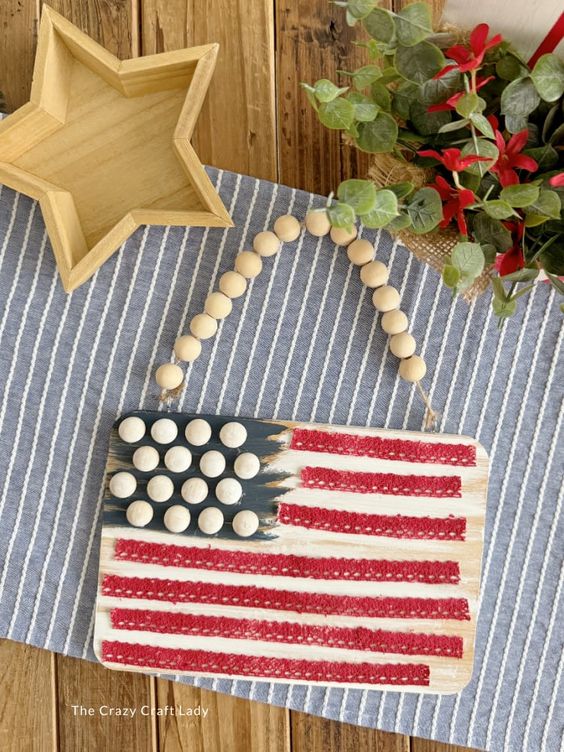
Cutting Board American Flag
Creating a Cutting Board American Flag is a wonderful way to add a patriotic touch to your kitchen decor while still being practical. By arranging different types of wood into the iconic flag pattern, you can showcase your love for your country in a unique and functional way. Not only does it serve as a useful tool for meal prep, but it also makes for a great conversation starter when guests come over. Whether you display it proudly on your countertop or use it to serve up delicious snacks, this DIY project is sure to bring a smile to your face every time you see it. So grab your tools and get ready to show off your crafting skills while celebrating the red, white, and blue!
Materials
- Bamboo cutting board (Dollar Tree)
- Wood Beads (whole, 1.5cm)
- Wood Half Balls
- Craft Paint (white, blue, red)
- Twine
- Ribbon (lace from Dollar Tree)
- Ziploc bag
- Parchment paper
- Water
- Screw eye hooks
Tools
- 1" paint brush
- Scissors
- Pencil
- Pin vise
- Hot glue gun and glue sticks
- Optional: Silicone fingertip protector
Instructions
- Dry fit wooden half balls. These will be the "stars" for the flag. Start by dry fitting them first so you know what background paint color to paint where. Use a pencil to mark where the star area will be.

Paint the stripes area white. Using the 1" flat paintbrush, paint the stripes area white. Also paint the edge of the cutting board as well. This will give the final project a finished look.

- Paint the stars area. Then, paint the stars area blue. Let both areas dry completely.
- Paint the half balls white. I use the Ziploc bag, water, and splash of paint method to easily paint the balls. Give the bag a good shake to ensure complete coverage. Let the half wood balls dry on a piece of parchment paper.

Dry fit ribbon. Dry fit and cut strips of ribbon down to size. You'll notice I used white lace, but I will be painting them red. Feel free to use red ribbon instead.

- Paint the ribbon red. (skip this step if you have red ribbon) Lay the ribbon pieces on a sheet of parchment paper. Paint full coverage on one side of your ribbon and set them aside to dry.
- Dry fit ribbon and beads. You'll want to dry fit first so you can get everything into position before securing.
- Hot glue attachments. Secure all embellishments in place with hot glue. Use tiny dabs of hot glue for the stripes and a nice dab for the wood beads.

- Make pilot holes in the top of the cutting board for hanging. Use a pin vise or screwdriver tool to make 2 holes in the top of the cutting board.
- Attach the screw eyes. Screw the eye hooks into the holes you created in the top of the cutting board.

String beads onto twine. I strung on about 16 beads onto the twine. If the twine end begins to fray, wrap it with a small piece of tape. Once the ends are cut, run them through the screw eyes and double knot them.

- Hang your sign! Now you have a festive 4th of July sign for the holiday season! Enjoy!