Painted Halloween Mason Jars Craft
Painted Halloween Mason Jars are a wonderful way to add a touch of spooky fun to your home decor during the fall season! These crafty creations involve transforming simple mason jars into delightful Halloween-themed decorations. You can let your creativity run wild by painting the jars with eerie designs like ghosts, pumpkins, or black cats. Once finished, you can place LED candles inside them for a charmingly eerie glow that will set the perfect festive mood. Whether you're looking to spruce up your mantel, tabletop, or front porch, these Painted Halloween Mason Jars are a fantastic DIY project that's sure to bring a smile to your face and delight to your Halloween festivities!
Supplies List for this Halloween Mason Jars Craft
- Mason Jars – I always use these 16oz mason jars because there’s a logo only on one side which leaves the other sides blank and perfect for decorating. Also there’s no cutting required because the top is two separate pieces and you can remove the center piece. If you want something NON- BREAKABLE – use these plastic mason jars instead!
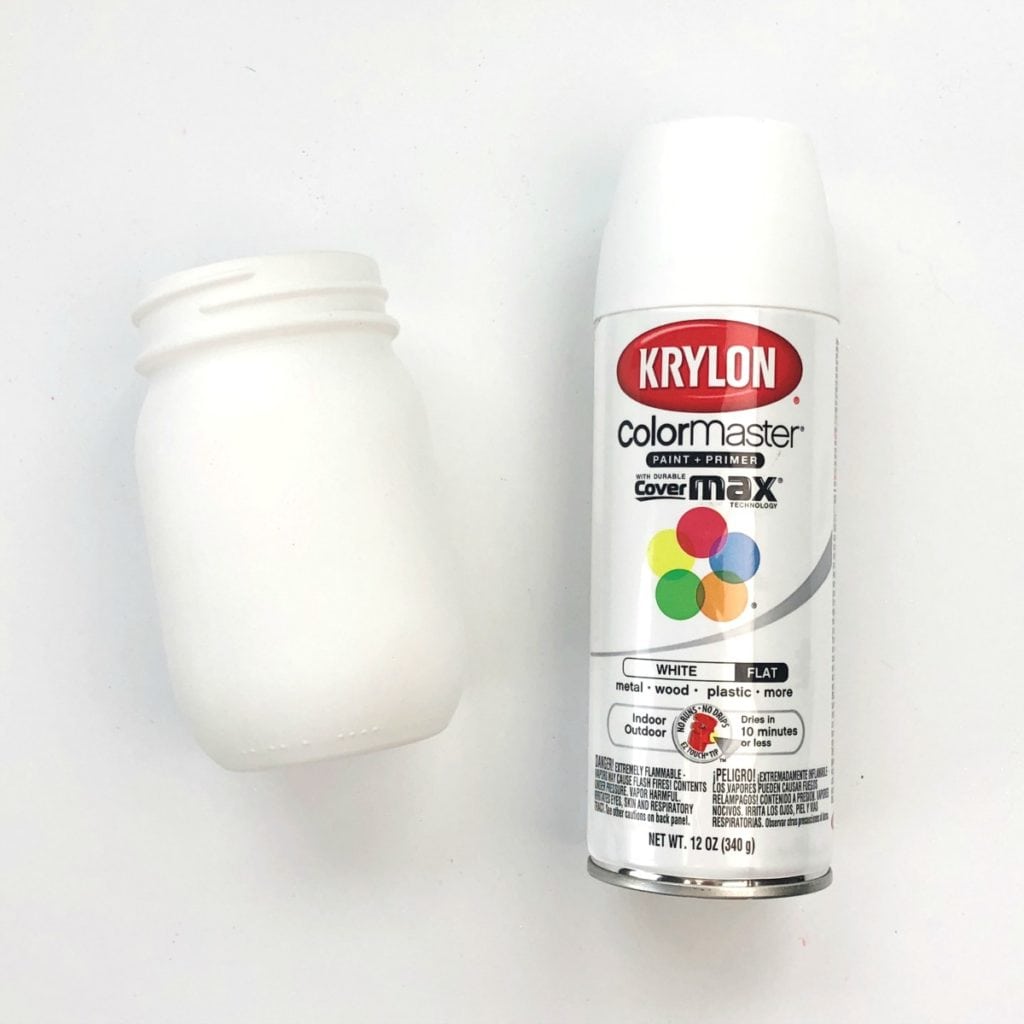
- White Primer – This is my SECRET WEAPON for mason jar crafts. It’s my favorite primer because it’s a flat primer and paint in one. You can also use the black version if your design has a bunch of black in it.
- Paint Markers – If you don’t have paint markers yet, I highly suggest getting a set! I use these extra fine point markers in both the regular colors and pastel colors all the time on rocks, wood and more. But the full set has all the colors and a few more.
- Acrylic Paint – I like both Martha Stewart Living Acrylic Paint and FolkArt Multi-Surface Paint.
- Paint Brushes – I like both foam paint brushes and flat paint brushes for covering mason jars with acrylic paint.
- Sealant (optional) – I often use this matte spray sealant or this gloss spray sealant depending on if I want shine or a matte finish but most of the time I don’t even seal my finished jars and they still hold up amazingly!
How to Paint Halloween Mason Jars: Step by Step Directions
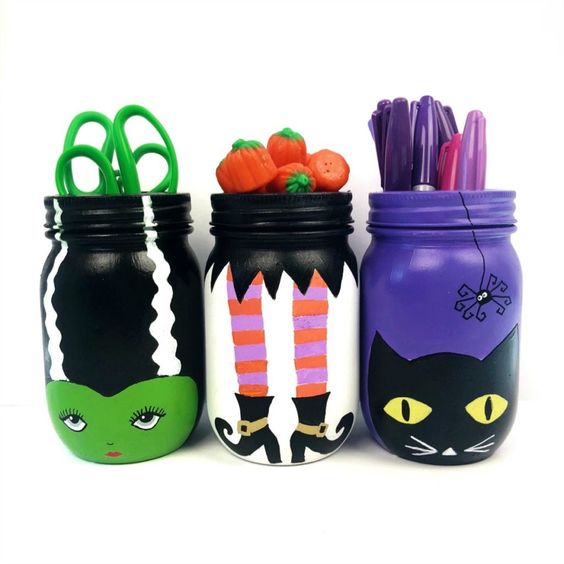
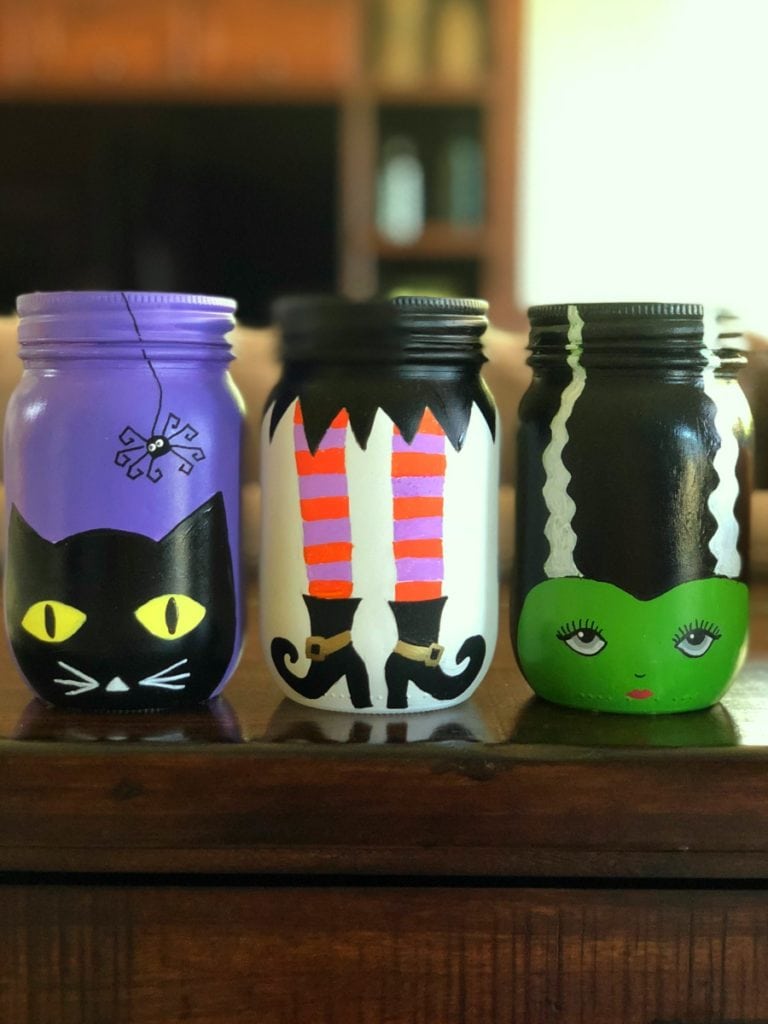
Here is how to paint the three different Halloween mason jar designs I created.
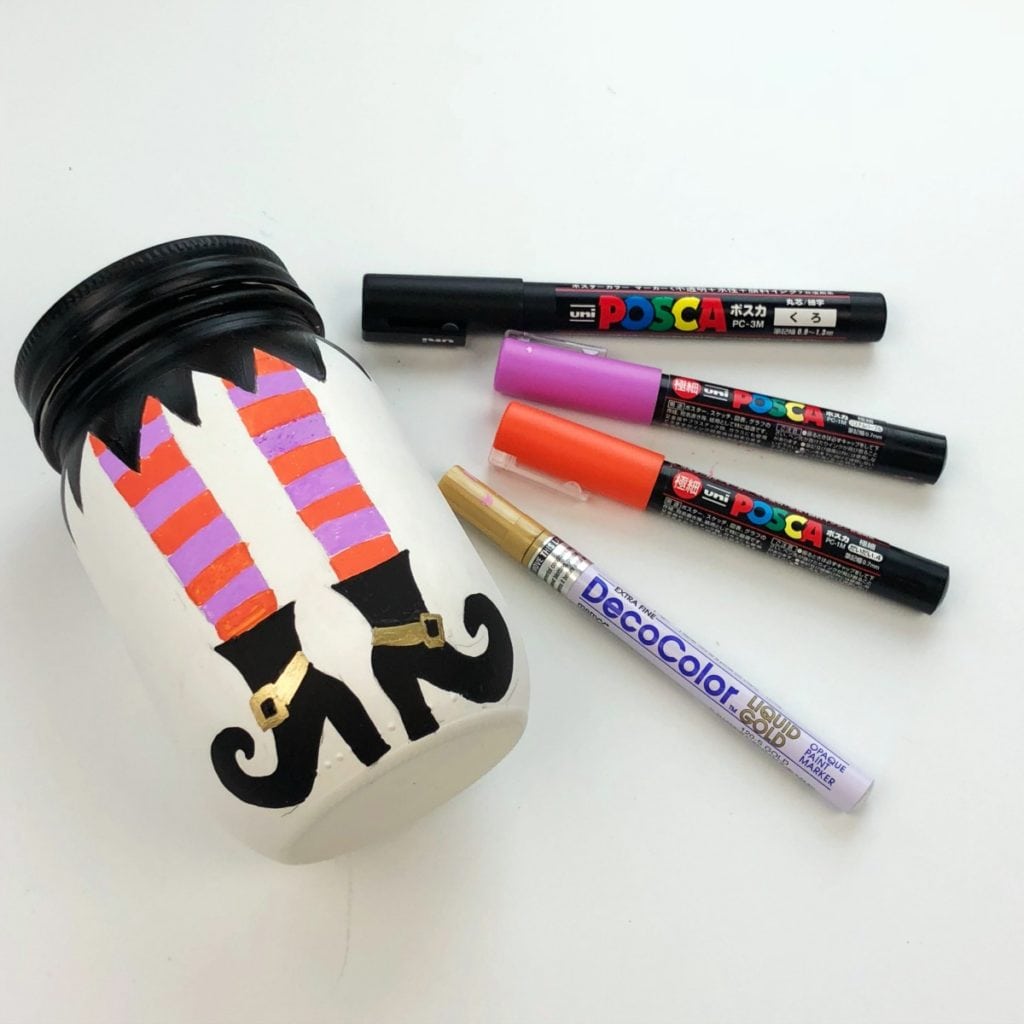
Painted Witches Legs Jar

- Spray your mason jar with a white, flat paint primer. Place jar mouth down on a piece of cardboard outside and spray evenly. You might need two coats of primer, but it dries very quickly.
- Lightly sketch your design onto the jar using a pencil.
- Paint the large details, like the skirt, using acrylic paint.
- For the other details (including the shoes), I used paint markers from this regular colored set and the light purple from this set. As well as this gold paint marker for the shoes. I like paint markers because they are very easy to control compared to a paint brush and they make it easy to create crisp lines.
Mason Jar Spray Painted White
Sketching the Witch Drawing onto the Jar

Painting the Design and Adding Details
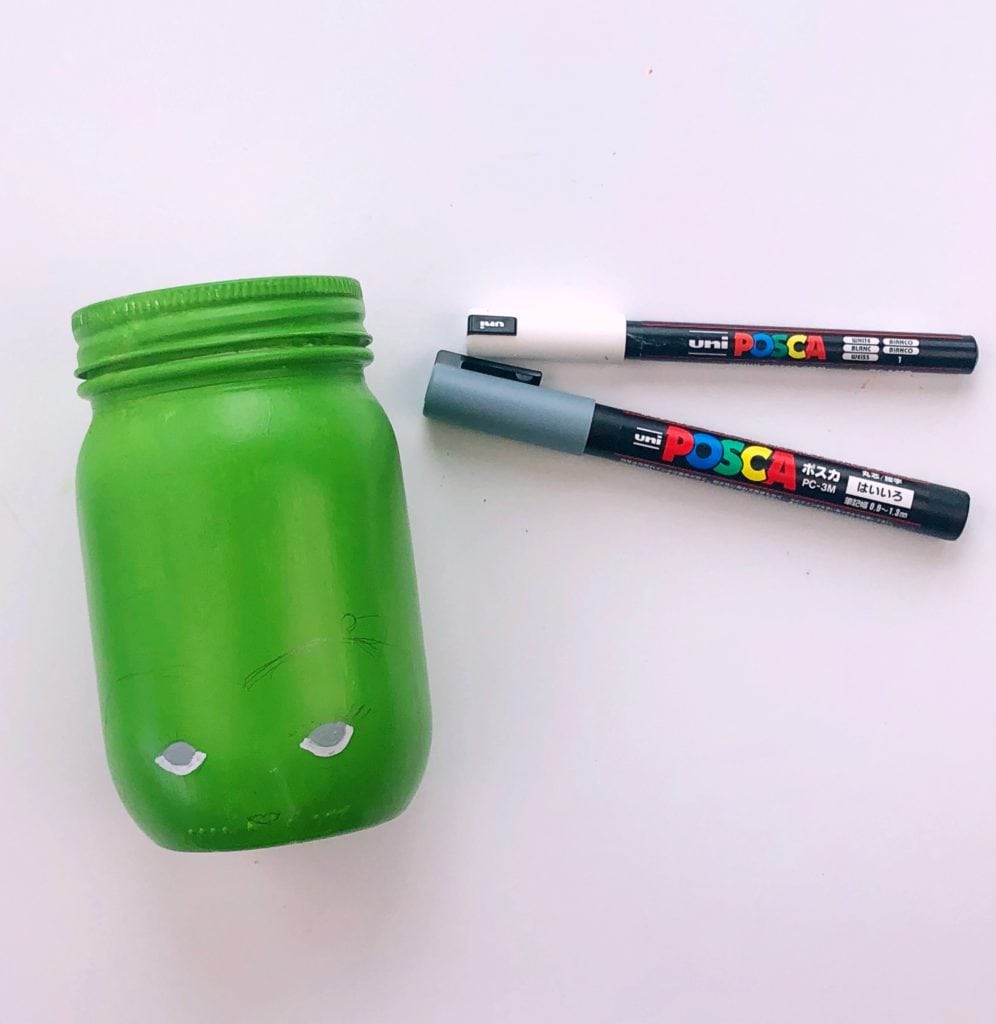
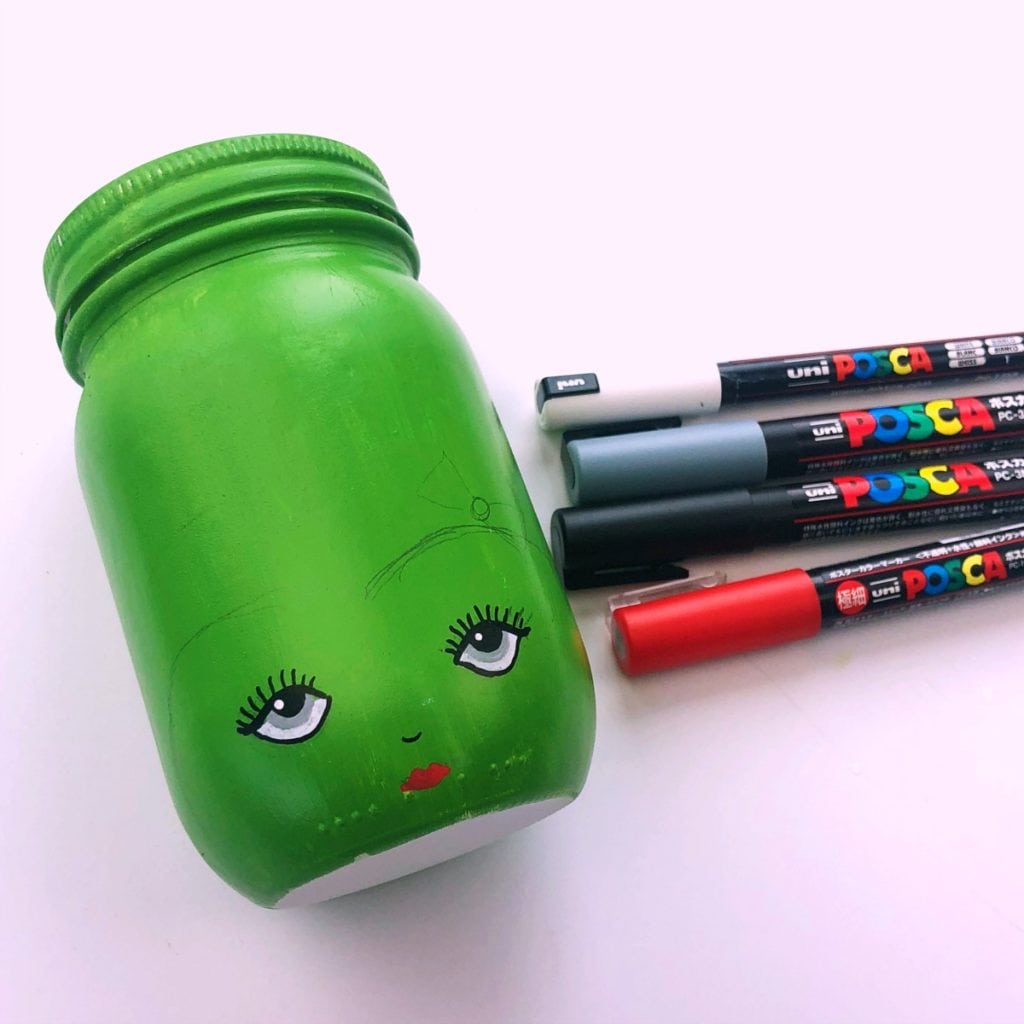
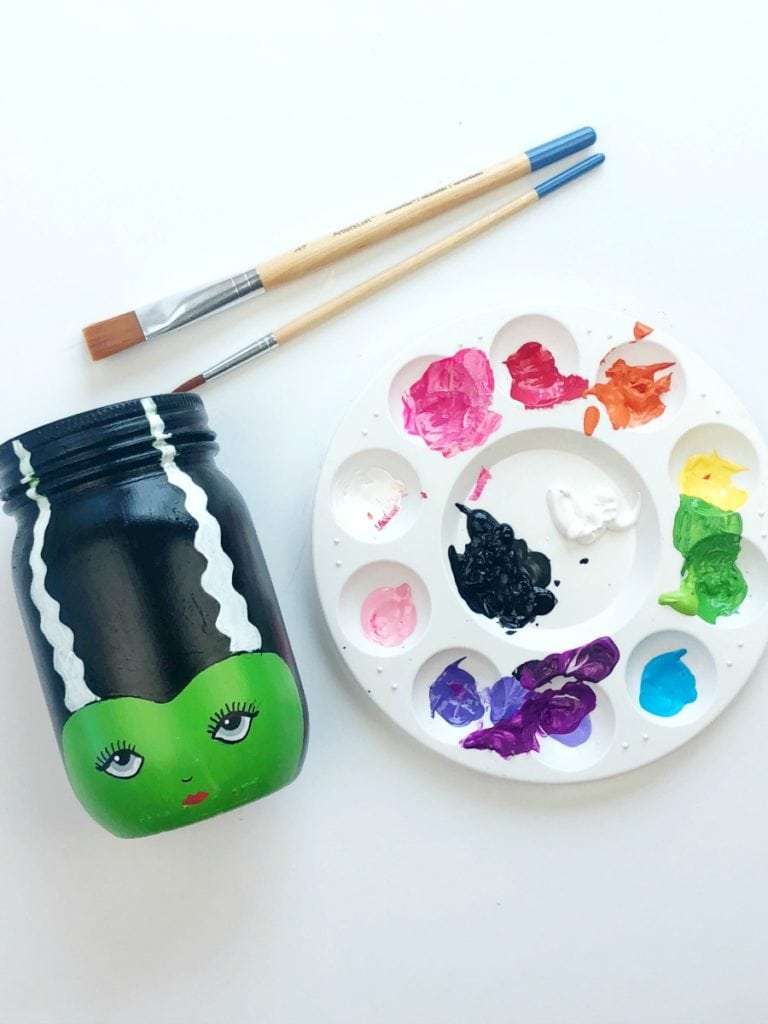
Bride of Frankenstein Painted Mason Jar

I did this jar a little backwards since at first I thought I was going to create Frankenstein instead of the bride of Frankenstein. But I’ll tell you below how I would recommend creating the jar!
- Start with primed jar using this white, flat paint primer. Place jar mouth down on a piece of cardboard outside and spray evenly. You might need two coats of primer, but it dries very quickly.
- You DO NOT need to paint the entire jar green!! Just paint the face green using acrylic paint (and yes, I know that the bride of Frankenstein didn’t have a green face, but I took a little creative freedom).
- For the eyes, use white, gray and black paint markers. And a red paint marker for the lips.
Paint the hair with black and white acrylic paint.
Painted Jar With Bride of Frankenstein Drawing Outlined
Adding Details to the Eyes With Paint Marker
Painting Details With a Brush
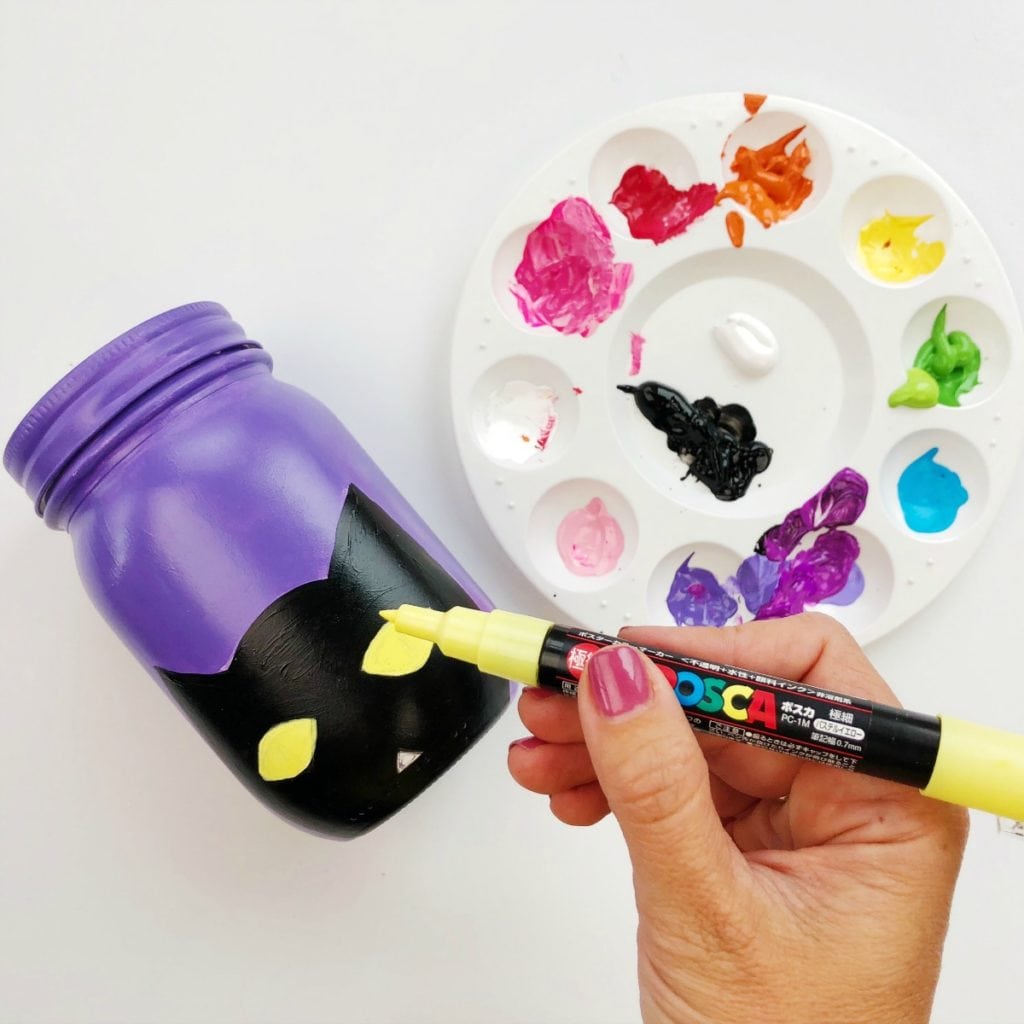
Black Cat Mason Jar:
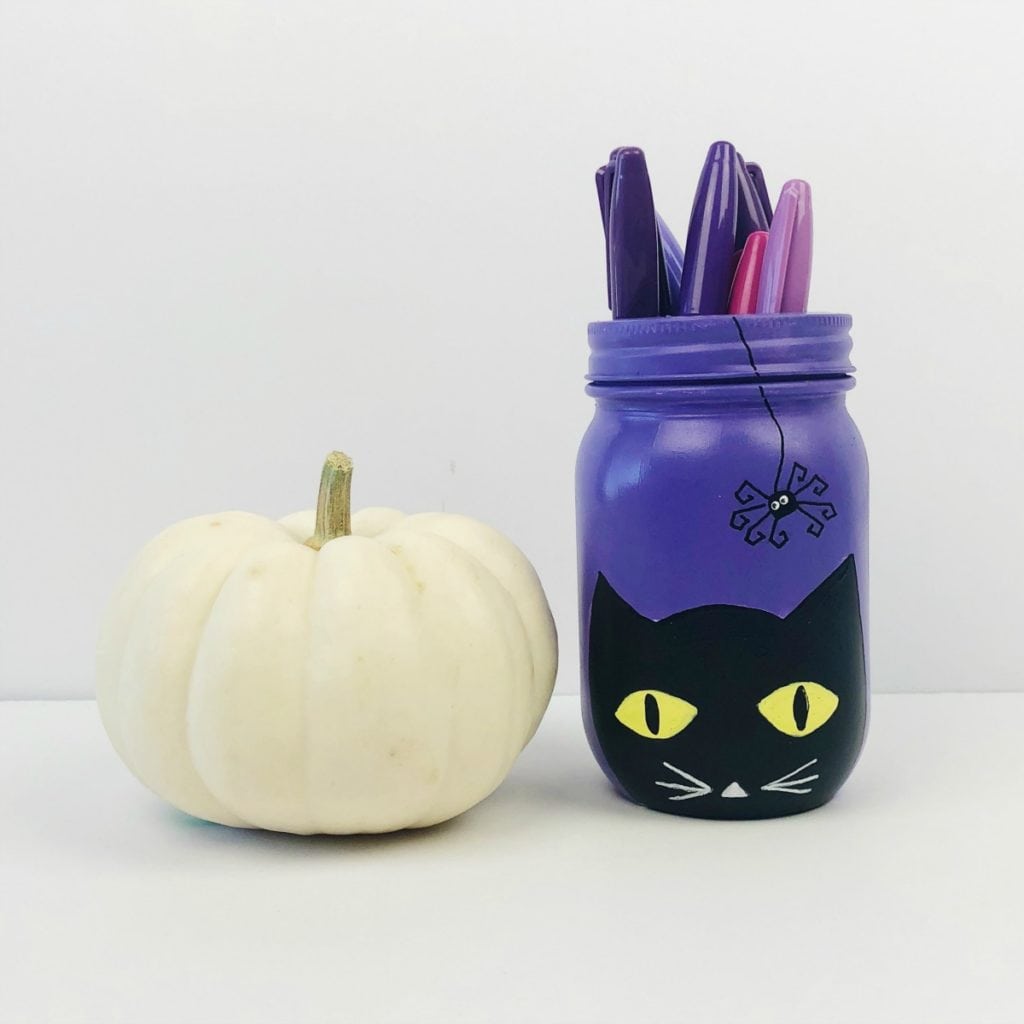
- Start with primed jar using this white, flat paint primer. Place jar mouth down on a piece of cardboard outside and spray evenly. You might need two coats of primer, but it dries very quickly.
- Lightly sketch the outline of the cat face onto the jar.
- Paint the background with purple acrylic paint and the cat with black acrylic paint.
- Using paint markers, add details to the cat: whiskers, nose, and eyes.
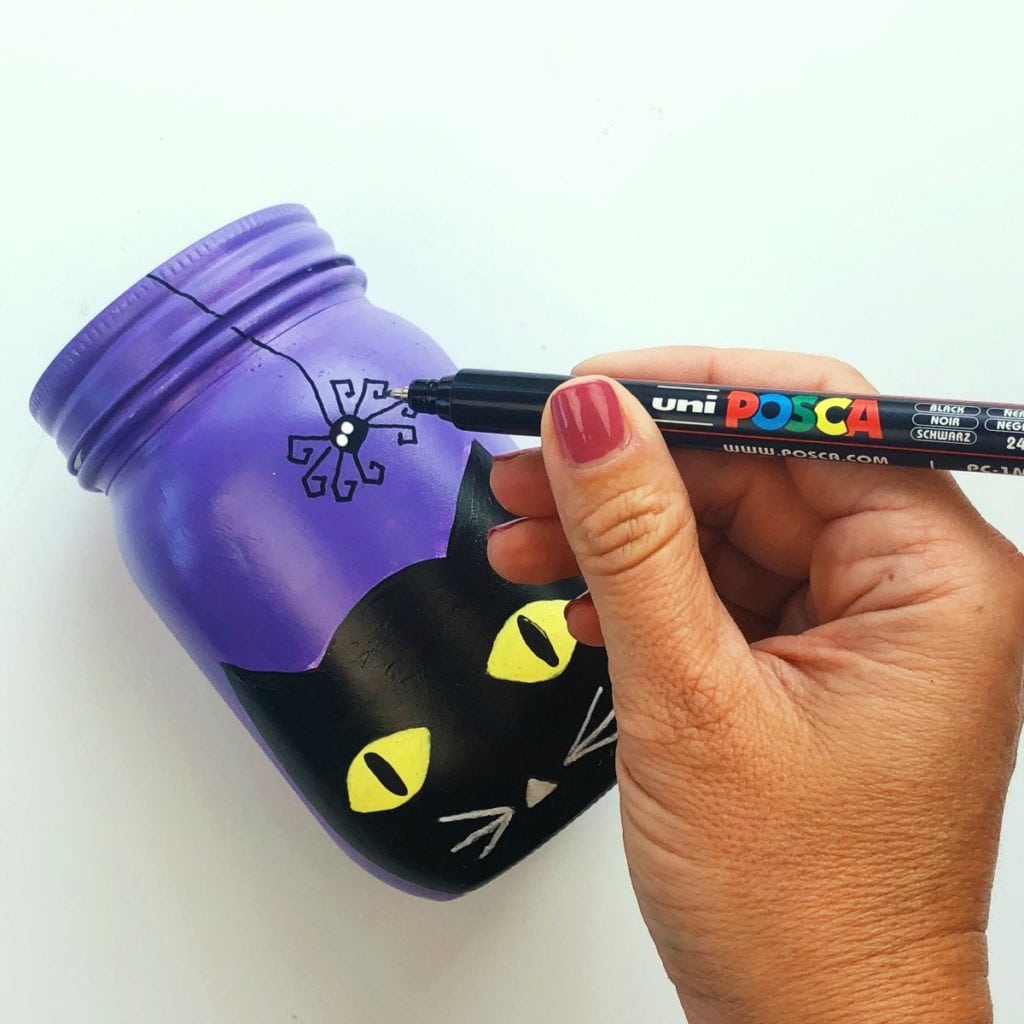
- Using paint markers, draw a little cute spider hanging down over the cat.
Adding the Eyes to a Painted Black Cat Mason Jar
Drawing the Spider With Paint Markers