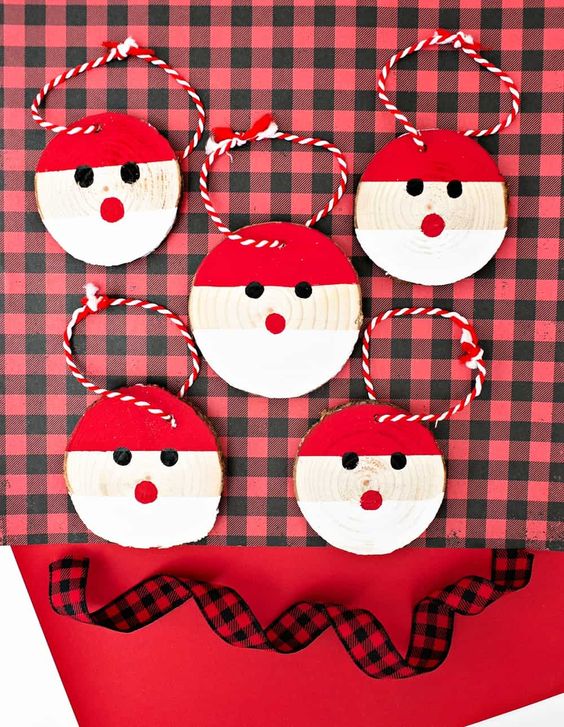
DIY Santa Woodslice Ornament
Creating a DIY Santa Woodslice Ornament is a delightful way to add a touch of festive charm to your holiday décor. To make this adorable ornament, start by painting a wooden slice white as your base. Once dry, paint Santa's hat and face using red and flesh-colored acrylic paint, respectively. A fluffy white pom-pom and a tiny black dot for the eyes will bring Santa to life! Feel free to add additional details like a rosy-cheeked blush or a cheery smile for extra personality. Finish off with a loop of ribbon to hang on your tree or gift to loved ones, spreading joy and holiday spirit everywhere! Crafting these whimsical ornaments is not only fun but also a wonderful way to personalize your decorations and celebrate the joy of the season.

Santa Woodslice Ornament – Materials:
- Plain Woodslice Ornaments
- Acrylic paint in red black and white
- Painter’s tape
- Paintbrushes
INSTRUCTIONS
- Use painter's tape to mark off the top third of your wood slice and paint that red.
- Use your black paint to color in two black eyes.
- Use painter's tape to mark off bottom third of woodslice and paint white.
- After the white has dried paint a red nose.
- Thread your twine that came with the woodslice plain ornaments and make a knot. Hang up and enjoy on your tree!
Notes
If you want to preserve the paint on the woodslice, try adding a layer of Mod Podge once the paint has fully dried or spraying a protective varnish over it.