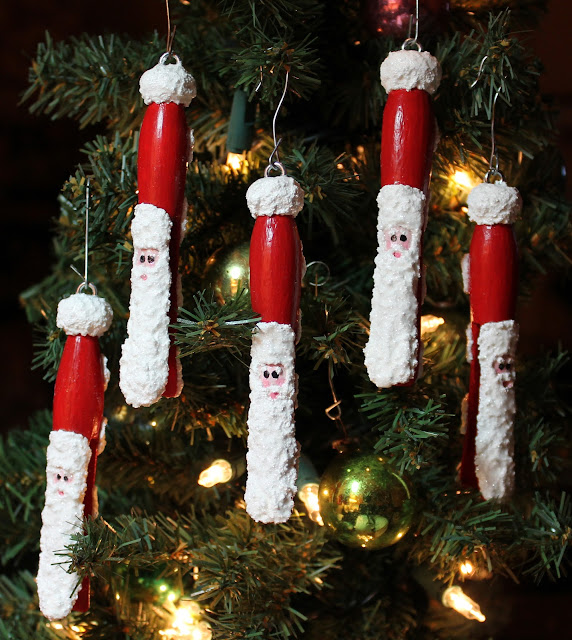
Cute Clothespin Santa
The Clothespin Santa is a delightful and classic craft activity perfect for the holiday season. Bringing joy and creativity together, this charming project is a favorite among families and children alike. By combining simple materials like clothespins, cotton balls, and paint, you can easily assemble your own jolly Santa Claus ornament. Whether you're looking to add a festive touch to your home decor or seeking a fun activity for a winter afternoon, the Clothespin Santa is sure to bring smiles and warm holiday cheer to all who create and admire it. So, grab your supplies, get ready to spread some Christmas magic, and enjoy crafting your very own Clothespin Santa this season!
Clothespin Santa
MATERIALS
oTraditional Clothespin (the kind without the spring)
o1/2" Screw Eye (used in picture framing, and available at Lowe's hardware)
oAcrylic Paints (Red, Flesh, and Black)
oDecoArt's SNOW-TEX (available at craft stores such as JoAnn's or Michaels)
oGlitter (I used Martha Stewart's Crystal Fine Glitter in iridescent white)
TOOLS
oPaint Brush
HOW TO...
1. SECURE THE HOOK. I've learned from experience that the art of ornament making always begins with figuring out how you're going to attach the ornament to the tree. So for these, I found one of those little hooks used at the back of frames to string the wire in one of my countless junk drawers. It was about an inch long and it turns out was too big because it split the wood. Undeterred, I went to Lowe's and bothered one of the sales guys to help me find the smallest version of this thing which I soon learned was called a "screw eye." He took me over to the screw aisle. (Yes, there's an entire aisle devoted to screws as it turns out.) It a took a while but we finally found the smallest "screw eye" in the store -- the 1/2" size. (OK, those of you with dirty minds can laugh now, but there's simply no way to discuss screws without using the word screw.)
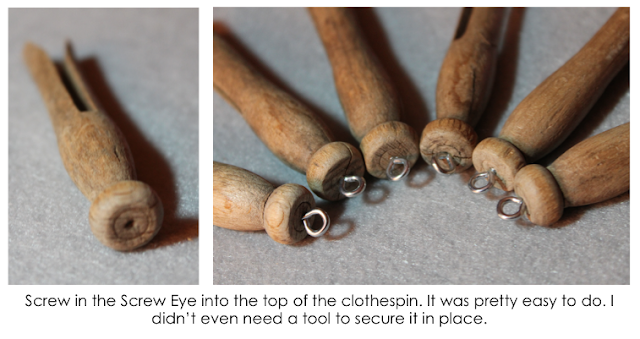
And let me just say this, Jason must have spent 10 minutes with me helping me to find my $1.29 purchase. I find it amazing in this day and age to find any store with that kind of service. Thank you, Lowes!
2. PAINTING TIME. My clothespins were really old and weathered so I primed them to begin with. You can skip this step if you'd like and go straight to painting the body of the clothespin red. Be sure to paint everything but the pom-pom cap, including the inside of the "legs' of the clothespin.
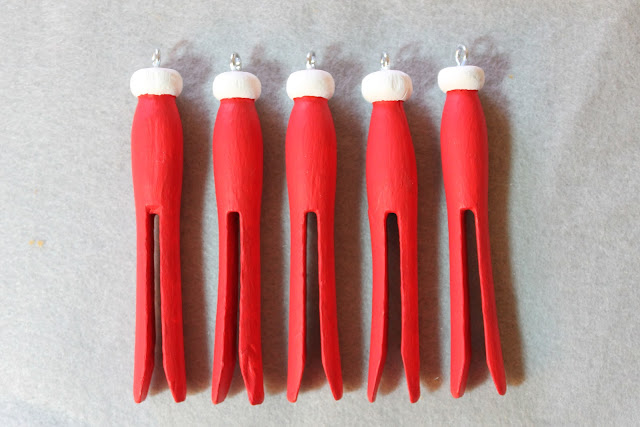
I love that it already looks festive and we're not nearly done yet!
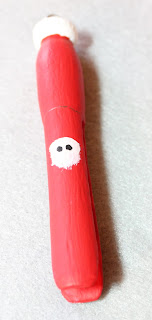
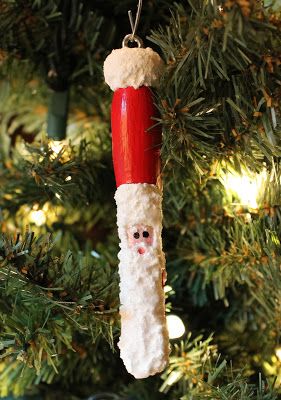
3. FACE TIME. Pencil in the top of the brim of the cap at the top of the legs. Draw an inverted triangle about half an inch below that and paint it in with flesh tone. (I actually painted the entire face at this step, but found I needed to go over it all again after applying the SnowTex.)
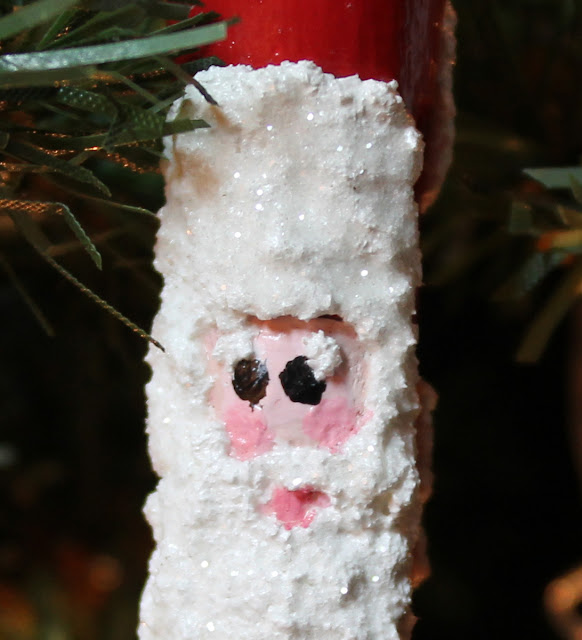
4. SNOW TIME. Now for the fun part! I love SnowTex. It makes everything look good -- especially when you're a hacker crafter like me! Apply the SnowTex with your paint brush covering the entire pom pom, leaving enough of the hook at the top to hang the ornament later.
Then paint the brim of Santa's hat, the sideburns on either side of his face, and his beard all the way down to the bottom of the clothespin, and don't forget Santa's mustache.
5. MORE FACE TIME. When it's dry, go in and add the detail to the face. And if you've got the room, add some SnowTex eyebrows -- they're super cute!
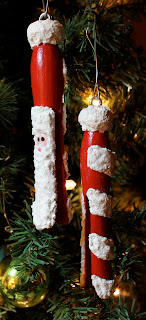
6. WHAT'S ON THE BACK? Another trick to making ornaments is to remember that there's a 50/50 chance the "back" of the ornament will wind up being the front of the ornament when you hang it on the tree. Ornaments tend to have a mind of their own that way.
I experimented first with making the same design on both sides. It came out really cute, but the idea of a two-faced Santa bothers me, so I chose a simpler solution -- candy cane stripes made with SnowTex on the back. That way, if the ornament decides it wants to face into the tree, it will still have strong, graphic appeal.
For this, I drew 1/2" lines up the back of the clothespin and simply painted a SnowTex candy cane strip. Note that when you get to the top, you'll have to stop the strip half-way around so that it doesn't appear on the front. I visually followed the split of the leg all the way up to mark the half-way line.
7. SHELLAC TIME. Once it's fully dry, seal the entire ornament with the shellac of your choice.
8. GLITTER TIME. Once that's fully dry, go back over the SnowTek on the front and back of the ornament with a little more shellac and sprinkle it with glitter for a super-snowy effect!