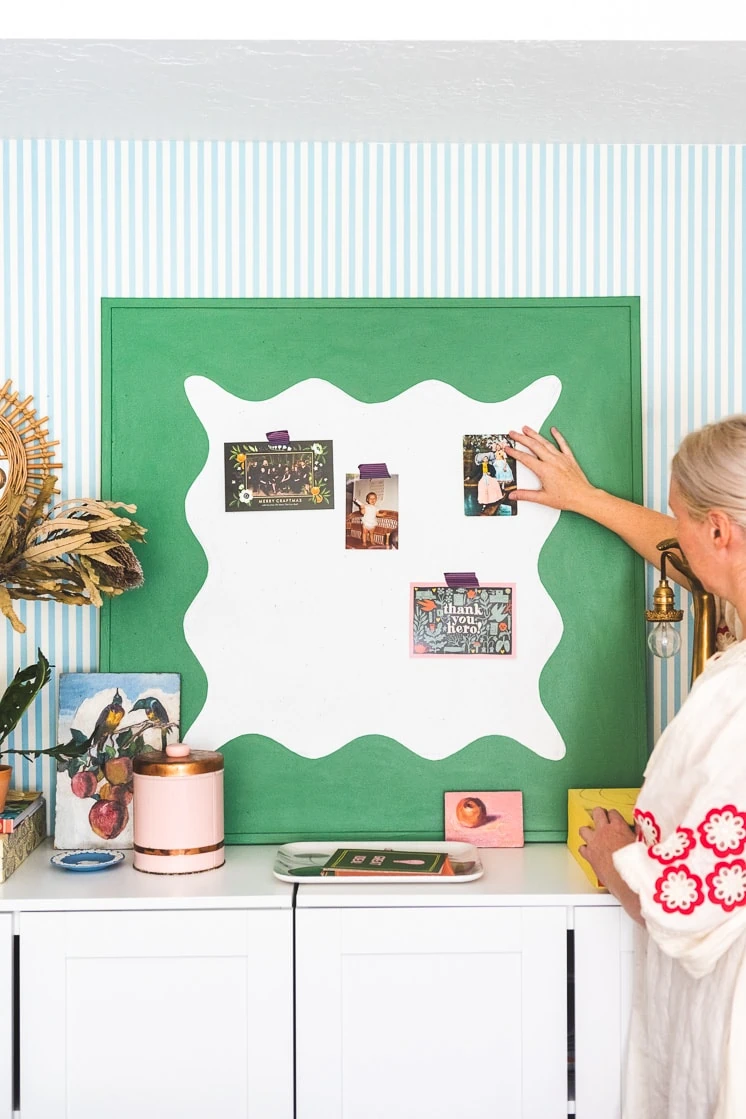
Are you looking for a fun and creative way to display your favorite photos, notes, and mementos? Look no further than this Scallop Wave DIY Pinboard! With just a few simple materials and a little bit of time, you can create a stunning pinboard that will add a touch of whimsy and style to any room. You can arrange them in any pattern or design you like, creating a personalized display that reflects your unique style. Hang your Scallop Wave DIY Pinboard on the wall using adhesive hooks or nails, and enjoy the satisfaction of knowing you created a beautiful and functional piece of decor with your own two hands. Get ready to showcase your memories and inspirations in a truly eye-catching way! This project is not only easy to make but also allows you to unleash your creativity and customize it to match your personal style.

Materials:
- White bulletin board
- Pencil
- Ruler
- Scissors
- Cardstock paper
- Paint
- Paintbrush
Instructions
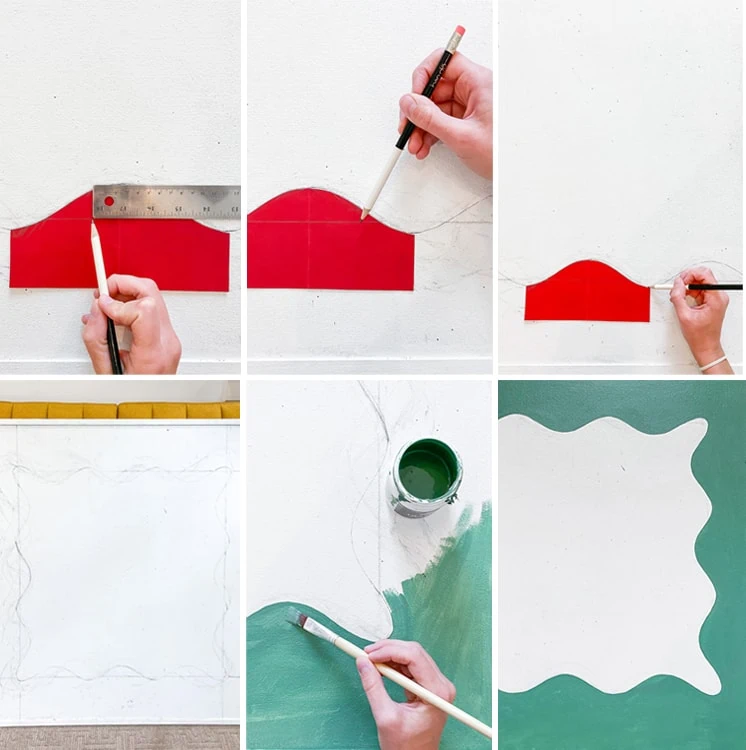
– Measure the bulletin board & decide how thick you want your scalloped border to be.
– Use a ruler to draw guiding lines showing how far the border will extend, based on the thickness you chose. (Our board’s scalloped border was about 5 inches thick from the edge of the board).
– Measure the space left on the middle of the bulletin board between your guiding lines. Decide how many scallops you want on each side and then divide the length of the available space by the number of scallops. This will tell you how large each scallops should be.
– Use your ruler to measure and mark the desired length of your scallop onto a piece of card-stock paper. Once you have the length drawn, create the scallop shape and cut it out. This will be your stencil. (You could trace something round like a bowl or free hand this. Folding the card stock in half is a good way to check that the sides of your scallop are symmetrical.)
– Follow the guiding lines as you trace the scallop stencil across your bulletin board. This will keep your peaks even across the edges.
– Complete the look by rounding the corners into similar shapes, you can use the same stencil if there’s room or freehand it.
– Fill in the boarder with paint, 1-2 coats depending on the thickness of your paint.
-Let it dry and your DIY scallop wave pinboard is complete! Fill it with inspiration picks for the next project you want to tackle