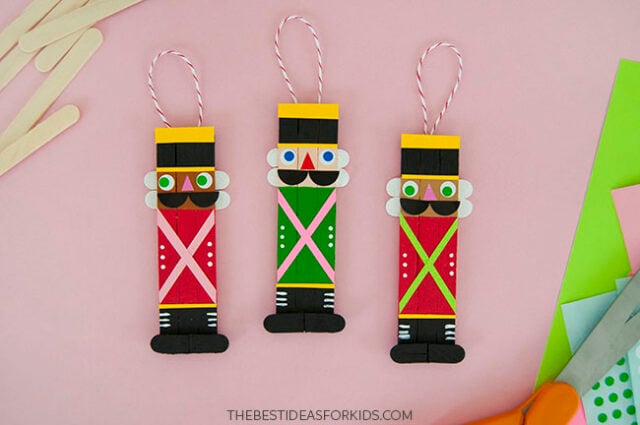
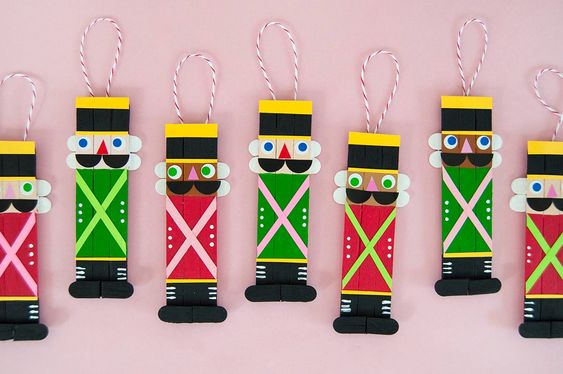
Popsicle Stick Nutcracker
Imagine the joy of creating your very own Popsicle Stick Nutcracker! These charming little crafts are a wonderful way to get creative and add a touch of festive cheer to your home. With just a few simple materials and a whole lot of imagination, you can transform humble Popsicle sticks into delightful nutcracker characters that are sure to bring a smile to your face. Whether you're crafting with your little ones or enjoying some relaxing me-time, making Popsicle Stick Nutcrackers is a fun and easy DIY project that will surely brighten up your day. So grab your paints, glue, and of course, those trusty Popsicle sticks, and get ready to create your very own little holiday helpers!
Supplies Needed
- Popsicle sticks – to form the nutcracker’s body
- Hot glue gun – used with adult assistance
- White glue or tacky glue – for attaching the paper details. You can also use the tacky glue to glue the popsicle sticks together but you must allow time for it to fully dry before painting.
- Round dot stickers – we used 6mm, 8mm and 16mm sizes. You can also use paper for the face or googly eyes for the eyes.
- Colored cardstock – for details on the nutcracker’s clothing
- Acrylic paint – red, green, black, white, and various shades for skin tones.
- Paintbrushes – small to medium-sized work best here
- Scissors – for trimming the stickers and paper. A stronger pair of scissors is recommended (adults may need to help with the cutting).
- String or twine – to turn the nutcracker into an ornament
How to Make Popsicle Stick Nutcrackers
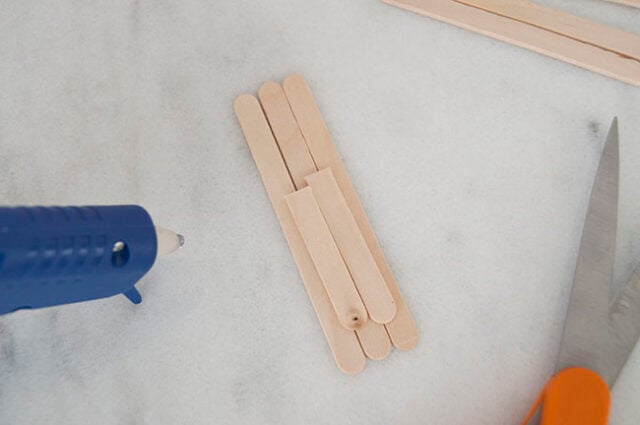
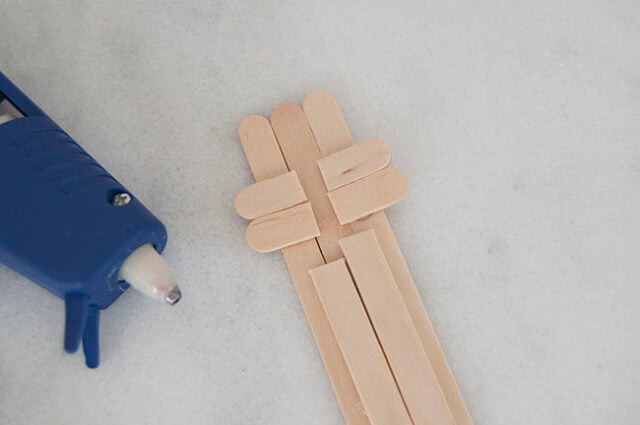
1. Assemble the popsicle stick nutcracker body.
Lay 3 popsicle sticks side by side on your work surface.
Cut another popsicle stick in half, and with adult assistance, hot glue the 2 short pieces onto the seams of the 3 popsicle sticks.
You can also glue 1 regular stick on an angle across all 3 to stick them together.
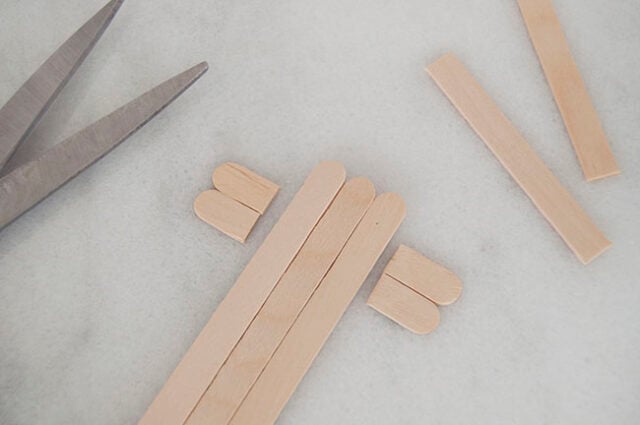
2. Make the nutcracker’s hair.
Cut the ends off of 2 popsicle sticks, so that you have 4 short pieces that are each about 3/4″ long.
With the back side of the nutcracker facing up, hot glue (with adult assistance) the popsicle stick pieces onto it, about 1″ down from the top edge.
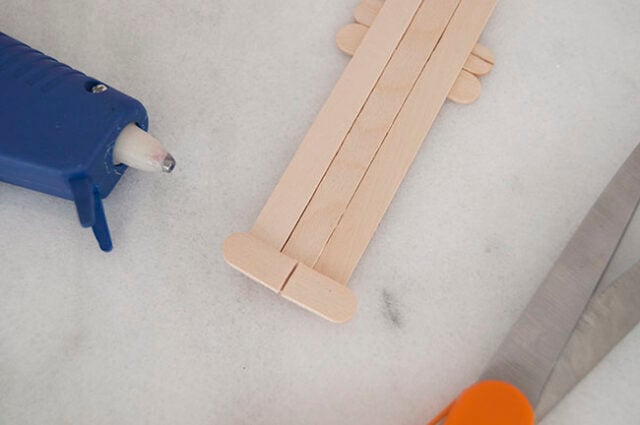
3. Make the nutcracker’s feet.
Cut the ends off of another popsicle stick, so that you have 2 more 3/4″ pieces. Glue these two pieces to the front of the nutcracker, rounded ends pointing out, forming the feet.
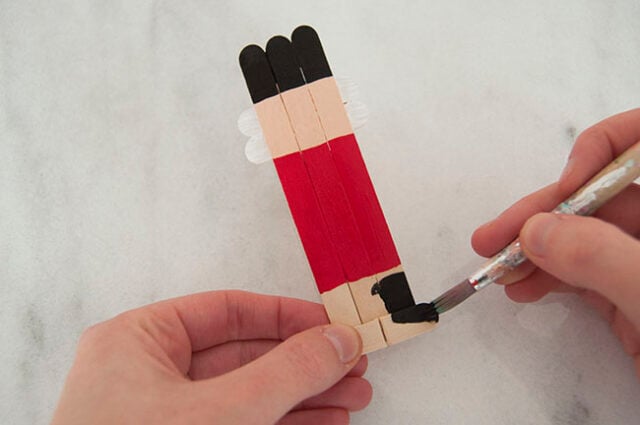
4. Paint the nutcracker.
Pick your paint colors and start painting!
Paint the 1″ portion at the bottom of the nutcracker black, forming his boots.
Paint the top black too, stopping where the hair begins, to make the hat.
Paint the hair white. Then paint the face the color of your choice.
Paint the middle section red, green, or any other color you’d like! Let dry completely.
5. Add the paper details.
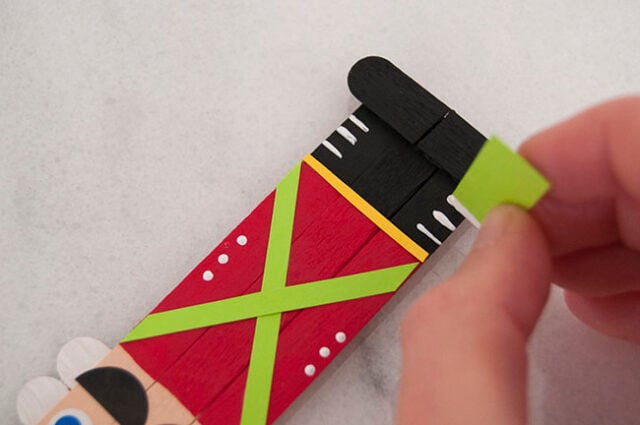
Cut strips of yellow paper and use glue to adhere them to the tops of the boots and the bottom and top of the hat.
We made the trim at the top of the hat just over 1/4″ wide and the trim on the bottom of the hat and boots approximately 1/8″ wide.
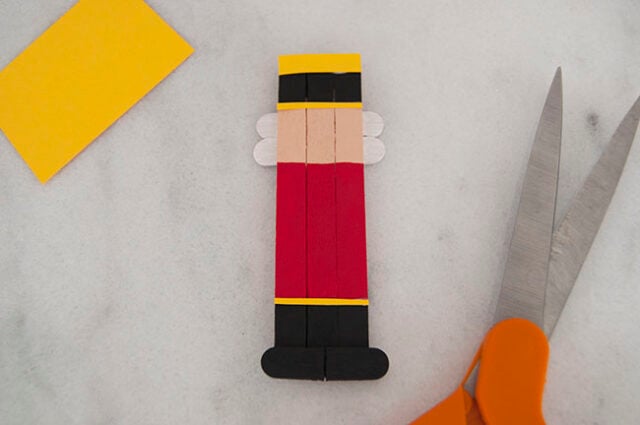
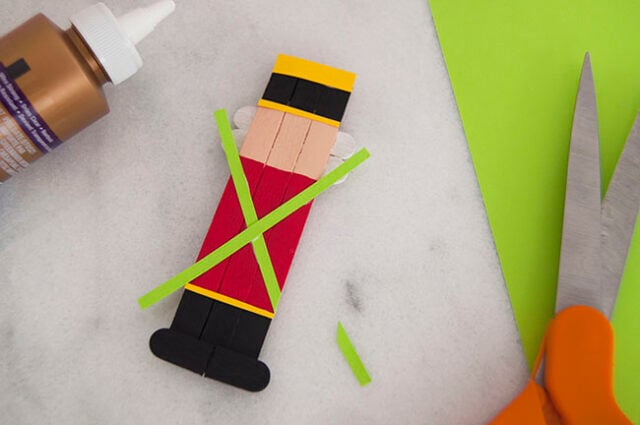
6. Decorate the nutcracker’s jacket.
Cut 2 strips of paper in a color that contrasts the painted jacket – we used green on this one and a few shades of pink on the other ones.
The strips pictured are a generous 1/8″ wide. Use white glue to secure them into an X shape on the nutcracker’s body, and trim away the excess.
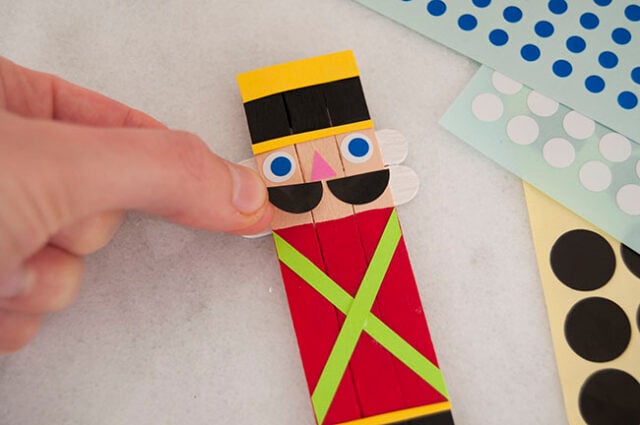
7. Make the nutcracker’s face.
For the eyes: Place 2 small white dot stickers onto the nutcracker’s face and then stick 2 smaller colored dot stickers on top to form the eyes. (The white circle stickers pictured are 8mm and the blue/green ones are 6mm.) You can also choose to paint these on, or use googly eyes instead.
For the nose: Cut a pink dot sticker into a triangle and stick it in place. Or you can cut pink paper and glue it on.
For the mustache: To make the mustache, cut a black dot sticker in half and stick both pieces under the nose. The black office stickers used here are 16mm across. You can also use black paper to make the mustache.
8. Add the final painted details.
Use the end of a paintbrush to paint tiny white buttons onto the sides of the nutcracker’s jacket.
Cut a small scrap of paper and dip one edge into white paint. Use this edge almost like a stamp to create narrow lines on the boots to look like laces. Or paint these lines on. Let dry.
9. Add string or twine for hanging.
Cut a piece of string or ribbon and tie an overhand knot to form a loop. With adult assistance, hot glue the knot of the loop onto the back of the nutcracker. Let dry.

These nutcrackers are fun activity to make for Christmas! They make great gifts and look fabulous on the Christmas tree!