DIY Snowman Magnet
Creating your own DIY snowman magnet is not just a fun craft project; it's a delightful way to add some festive cheer to your fridge or any magnetic surface! To start, gather your supplies - some white, black, and orange felt, small googly eyes, a magnetic strip, glue, and scissors. Cut out two circles from the white felt for the snowman's body and head, then add a small black top hat and orange carrot nose. Glue on the googly eyes and assemble the pieces to create your adorable snowman. Finally, attach a magnetic strip to the back and voila - you have a cute snowman magnet ready to brighten up your space and spread some winter joy! So grab your materials, get creative, and enjoy making your very own snowman magnet that will surely bring a smile to your face every time you see it!

Things You Will Need
Pen
Magnets
Scissors
Highlighter
Glass pebble
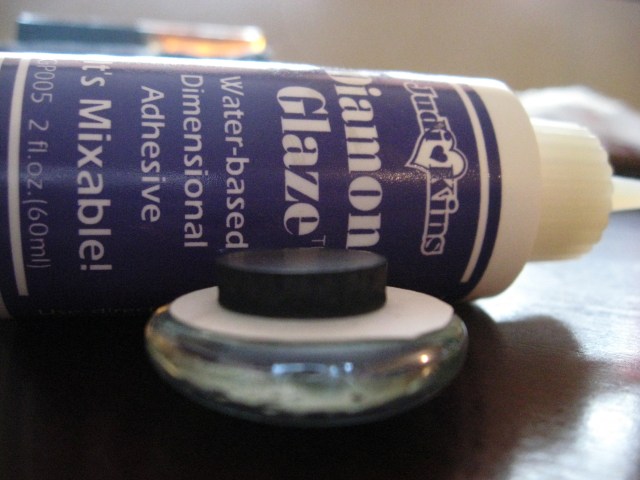
Diamond glaze
Construction paper
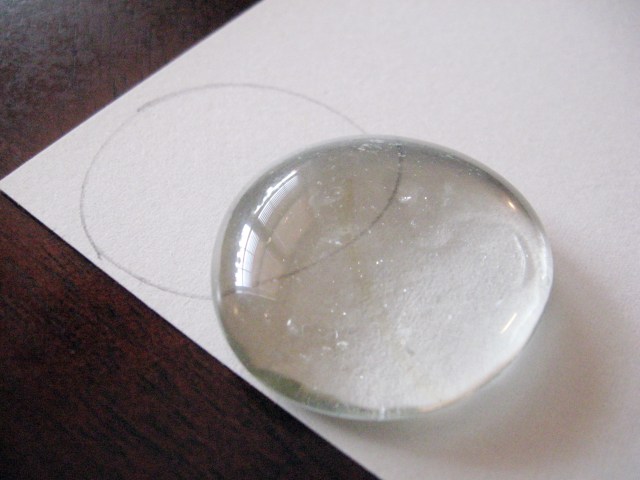
Step 1
Trace your glass pebble on the construction paper and cut it out.
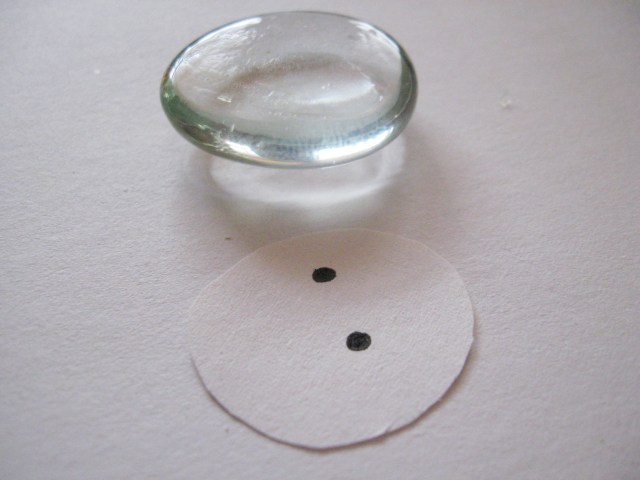
Step 2
Flip the cut out piece over and draw two round dots on it with your pen. These are going to be the snowman’s buttons.
Repeat steps 1 and 2 until you have all three pieces of the snowman.
Step 3
Put a drop of glue on the back of the glass pebble and lay the circle of construction paper (face down) on top of the glue.
Let that dry and repeat with the magnet.
Let it dry for an hour or two.

When everything is dry, go ahead and stick it to your fridge.
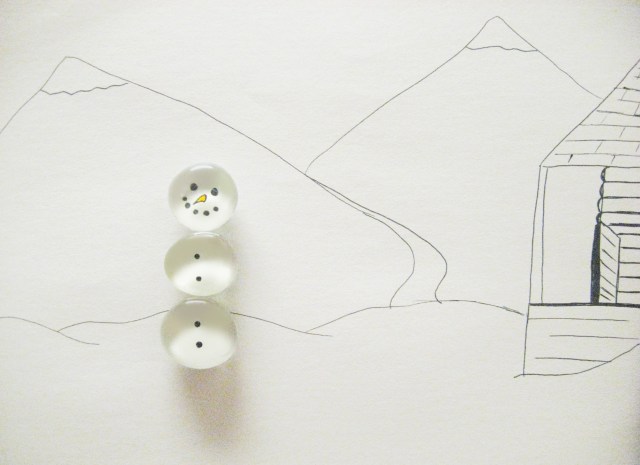
This is such a good project to do with kids. They’ll love to draw the snowman’s face, for sure! Make a few of them. You could even draw a scene on some paper and put your new snowman magnets on top of it.