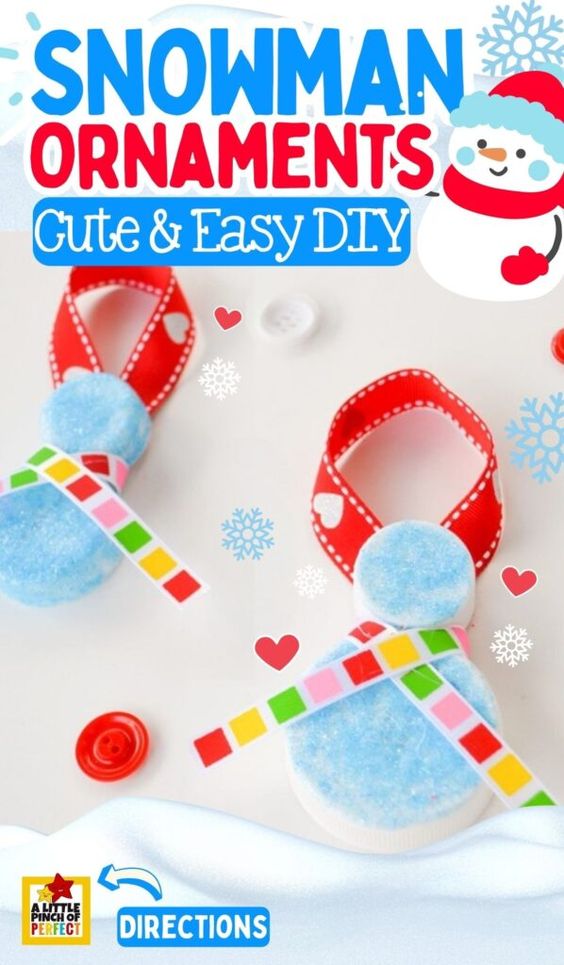
Homemade Milk Cap Snowman Ornaments
Creating homemade milk cap snowman ornaments is a delightful way to bring a touch of whimsy to your holiday decor. To make these charming ornaments, you can repurpose milk caps into adorable snowmen with some paint, felt, and imagination. These DIY ornaments are not only fun to make but also make great keepsakes or thoughtful gifts for friends and family. So, gather your craft supplies and let your creativity shine as you bring these cheerful snowmen to life in your home this holiday season.
Supplies:
- 1 White milk cap
- 1 White small cap (Like from a 2-liter bottle)
- Extra Fine Light Blue Glitter
- Paintbrush
- Mod Podge
- Hot glue gun and glue (for adults to use)
- Christmas Ribbon
Directions:
Step 1: Make the Snowman Glittery
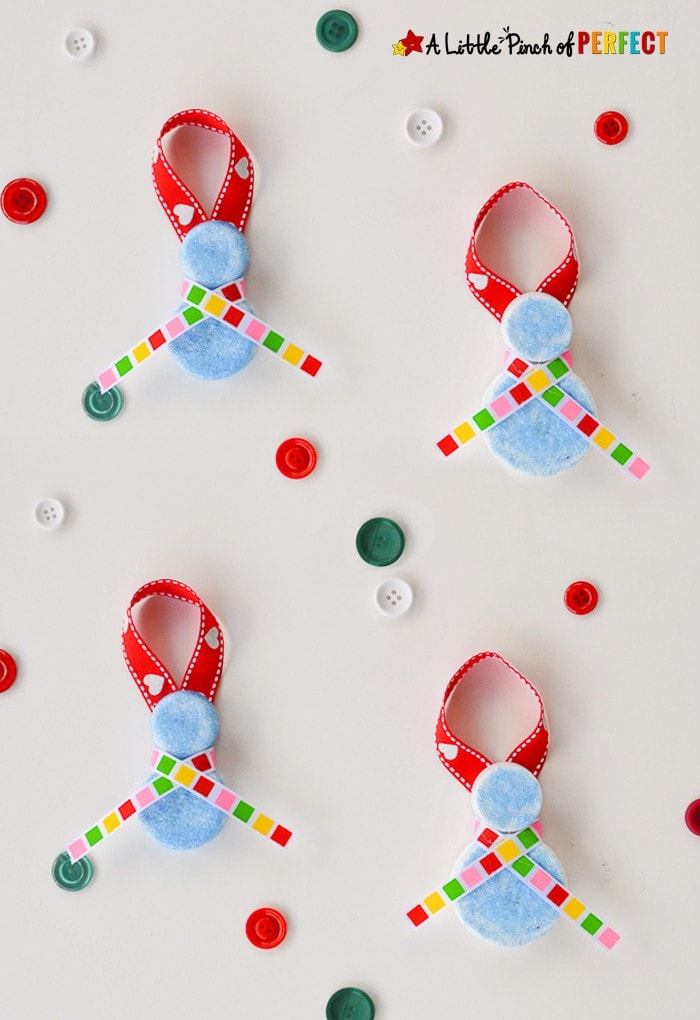
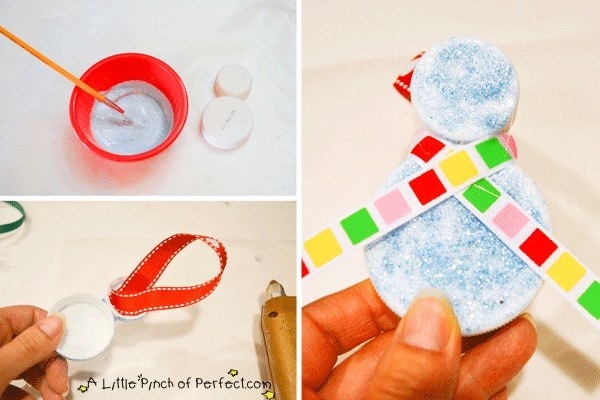
Mix a small amount of Mod Podge with blue glitter together and paint it on the milk caps. You need two milk caps per snowman craft, 1 large lid for the body and 1 small lid for the head. You may need to do a few layers to make sure your ornament is extra glittery.
Step 2: Build the Snowman
Once the Mod Podge dries, use your hot glue gun to glue the milk caps together (parent step). Then wrap a piece of ribbon around the neck of the snowman, and glue it in place.
Step 3: Make the Snowman an Ornament
Make a loop of ribbon and hot glue it to the back of the snowman’s head.
Optional:
- Use black puffy paint or googly eyes to make eyes.
- Glue on tiny buttons on the body.
- Glue a small triangle on the face for a nose.