Crochet Thanksgiving Turkey
If you're looking to add a creative touch to your Thanksgiving decor, why not try making a crochet Thanksgiving turkey? This fun and festive DIY project is a great way to showcase your crafting skills and bring a homemade charm to your holiday celebrations. With just a hook, yarn, and some basic crochet stitches, you can create a cute and colorful turkey that will be the talk of your Thanksgiving table. Whether you're a seasoned crocheter or new to the craft, this project is sure to bring joy and warmth to your home during the holiday season. So grab your supplies, get cozy, and let your creativity soar as you crochet your very own Thanksgiving turkey masterpiece!
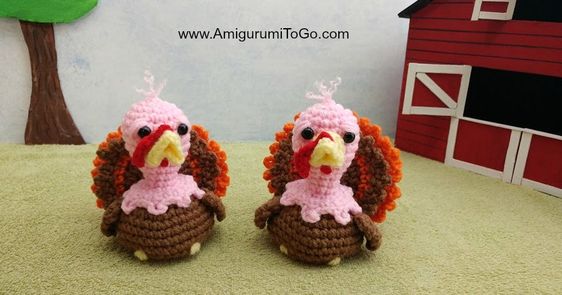
Supplies:
worsted weight yarn in brown, beige, red and yellow
4mm hook
blunt end yarn needle for sewing
scissors
polyester stuffing
9mm eyes
Abbreviations:
st = stitch
sc = single crochet
hdc = half double crochet
FLO = front loops only
BLO = back loops only
ch1 = chain one
sl st = slip stitch
2tog = crochet 2 stitches together
f/o = finish off
How to read the rows when working in the round:
Add a maker at the end of row 2 and move that marker each time you finish a row. Each row has a sequence. Example: 1sc then 2sc in next st means repeat that sequence 1sc then 2sc in next st followed by 1sc then 2sc in next st over and over to the end of that particular row. The number inside the parentheses ( ~ ) is the number of stitches you should have at the end of that particular row.
Magic ring:
Many parts of this amigurumi begin with a magic ring. I have 2 short video tutorials that will show you 2 different methods of making a magic ring. Use the one that is
easiest for you.
Important notes about this pattern:
The beak can be sewn on at the same time you install the eyes so make the beak before you start the head. I've given you 2 options for the beak. The first option has to be shaped once it's sewn in. If you would rather not shape the beak then try option 2, the closed beak, it's a simple beak but it will work fine too. I've also shown how to sew the beak on before the head is stuffed and after. Watch the videos and decide when you would prefer to sew it on.
Open Beak: Option 1 with yellow
1) magic circle with 5sc (5)
2) 2sc in each st (10) work the starting yarn tail into this row
3) In the BLO, 1sc in each loop (10)
4) 3sc in the next 2st, 2tog, 1sc in the next st, 3sc in the next 2st, 2tog, 1sc in the last st (16)
5) *we only use up 8st of this row. 1sc in the next 7st then sl st the next st. These last 7st you put in is the top of the beak and will stick out further than the bottom. f/o leaving a tail for sewing. Weave the yarn tail down in between rows 3 and 4 and knot off.
Closed Beak: Option 2 with yellow
1) magic circle with 6sc (6)
2) 1sc in each st (6)
3) 1sc in the next 2st then 2sc in the next st (8)
4) 1sc in the next 3st then 2sc in the next st (10)
sl st next st and f/o leaving a tail for sewing
Snood: make 1 with red
1) ch9
2) fold chain and sc through both sides across, crochet around the starting yarn tail if you can, then ch3.
f/o leaving a tail for sewing.
Head and body: Starting at the top of the head with lighter color
1) magic circle with 6sc (6)
2) 2sc in each st (12)
3) 1sc then 2sc in the next st (18)
4-8) 1sc in each st for 5 rows
9) 1sc then 2tog (12)
Eyes go in between the 5th and 6th row with 3 visible stitch holes between them, they can also be placed further apart, up to 5 visible stitch holes between them. If unsure, view part 1 of the video. You can sew the beak on now or wait unto the end to do it, whatever is easiest for you. Again, all of this is shown in part 1 of the video. If you do it now, the top edge of the beak goes just under the 5th row. Please see assembly section below for photos. Sew the snood and add eyelids after the turkey has been stuffed and closed.
10) 1sc in the next 4st then 2tog (10)
stuff head
11-13) 1sc in each st for 3 rows
14) 1sc then 2sc in the next st (15)
15) in the FLO, 1sc in each loop (15)
16) 1sc in the first st then ch4, 1sc through the sc you made before starting the ch, then 1sc in the next 2st, ch4, 1sc through the sc you made before starting the ch, then 1sc in the next 2st. Repeat this sequence all the way around until you have 2st left in the row. 1sc into the next st then sl st the last st of the row. Ch3
17) The ch3 is a bridge to the loops inside the neck. Fold down row 16 to expose the loops inside the body. Switch to body color in the 1st loop then 1sc in the next loop then 2sc into the 3rd loop. Then repeat to the last loop in the row, 1sc in the next 2 loops and 2sc into the 3rd loop (20) Cut the lighter color free then knot the color change yarn tails together, trim short and leave them inside the neck.
18) 1sc in the next 3st then 2sc in the next st (25)
19) 1sc in the next 4st then 2sc in the next st (30)
20) 1sc in the next 5st then 2sc in the next st (35)
21-23) 1sc in each st for 3 rows
24) 1sc in the next 3st then 2tog (28)
25) 1sc in the next 2st then 2tog (21)
26) 1sc then 2tog (14)
stuff the body
27) do not add a marker, 1sc in the next 2st then 2tog, repeat this sequence 4 times (10)
f/o leaving a tail for sewing. Weave in and out of the remaining st, stuff more into the body as needed then pull yarn tail to close gap. Knot off and hide yarn tail inside body. Use this yarn tail to sew each point around the neck down.
Wings: with brown make 2
1) magic circle with 6sc (6)
2) 2sc in each st (12)
3) 1sc in next 4st then 2tog (10)
do not stuff
4) ch2 then 1sc through both sides, ch2 then 1sc though both sides, repeat sequence across closing up the wing.
f/o leaving a tail for sewing. Bring the yarn tail in between the 1st and 2nd row on the edge, knot it off and use it for sewing the wing to the body.
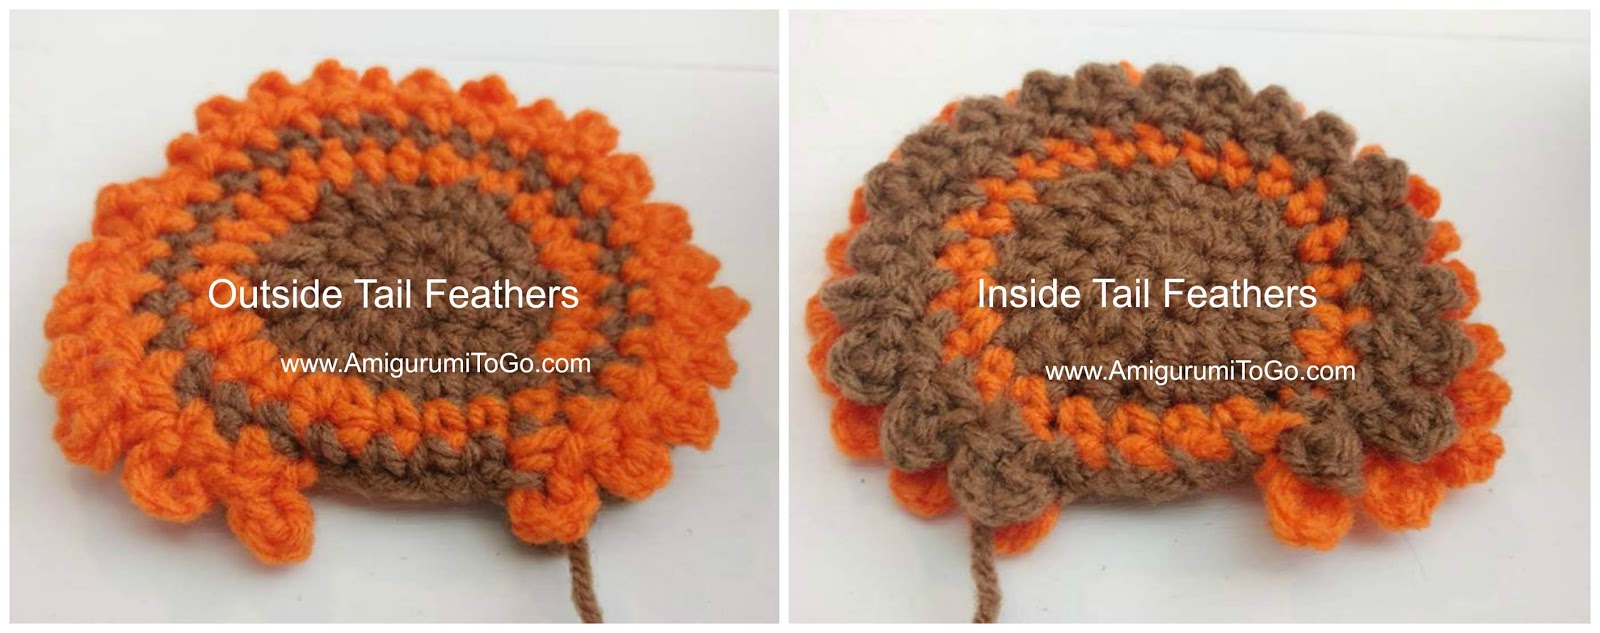
There are 2 separate pieces for the Tail Feathers that get sewn together. Alternate between colors, do not break free when switching colors. Please see part 2 of the video tutorial if unsure.
Outside Tail Feathers: starting with brown
1) magic circle with 6hdc (6)
2) 2hdc in each st (12)
3) 2hdc in each st (24)
4) 1sc in the next 3st, switch to orange on the 4th st, then repeat the following sequence to the marker, 1hdc in the next 3st then 2hdc in the next st (29)
5) 1sc in the next 3st then switch to brown in the 4th st, 1sc in each st to the marker (29)
6) 1sc in the next 3st then switch to orange in the 4th st then ch4, 1sc through the sc you made before starting the ch, 1sc in the next st, ch4, 1sc through the sc you made before starting the ch, 1sc in the next st. Repeat this sequence to the marker, slip stitching the very last st in this row.
f/o and weave in yarn tail. Cut free from the brown leaving a tail for sewing
Inside Tail Feathers: starting with brown
1) magic circle with 6hdc (6)
2) 2hdc in each st (12)
3) 2hdc in each st (24)
4) 1sc in the next 3st, switch to orange in the 4th st, 1sc in the next 20st (24)
5) 1sc in next 3st, switch to brown in the 4th st then ch4, 1sc through the sc you made before starting the ch, 1sc in the next st, ch4, 1sc through the sc you made before starting the ch, 1sc in the next st. Repeat this sequence to the marker, slip stitching the very last st in this row. f/o leaving a tail for sewing. Cut free from the orange and weave in yarn tail.
Sew the two pieces together, wrong sides together. Sew the flat edges together then sew around the inside brown part.
Assembly: All of the assembly is shown in part 2 of the video tutorial, in the same order as given below.
1) Sew the tail feathers to the back of the turkey with the inside tail feathers (smaller piece) facing the back of the turkey. Place the turkey on the table, place the tail feathers in position with the bottom of the feathers sitting on the table as well, pin or just hold the feathers on that spot then whip stitch the flat edge of the feathers to the row just under them. Then stitch a few times though the feathers to the back of the turkey so the feathers stand up on their own.
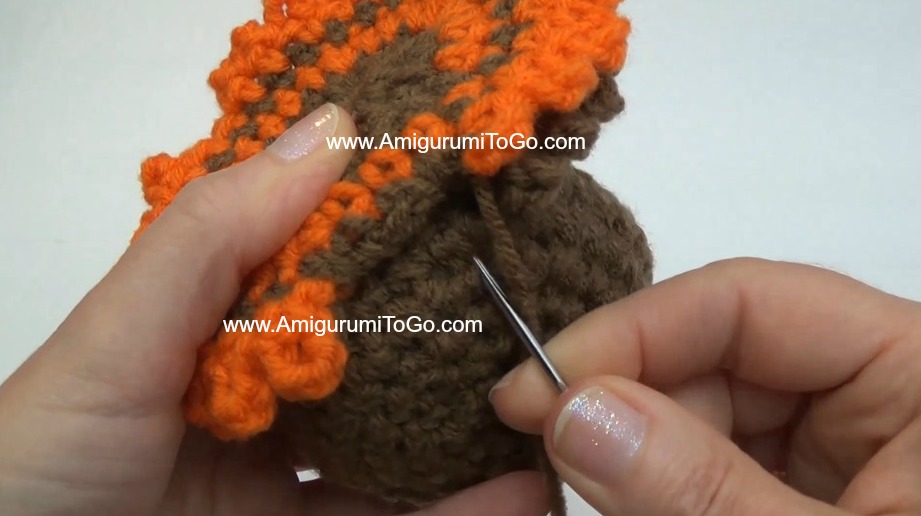
2) Sew the wings on. Pin them in place and determine where they look best to you. The ruffled edge of row 4 should be facing downward. Whip stitch around the top of row 1 to the body leaving the bottom of the wings free of stitches.
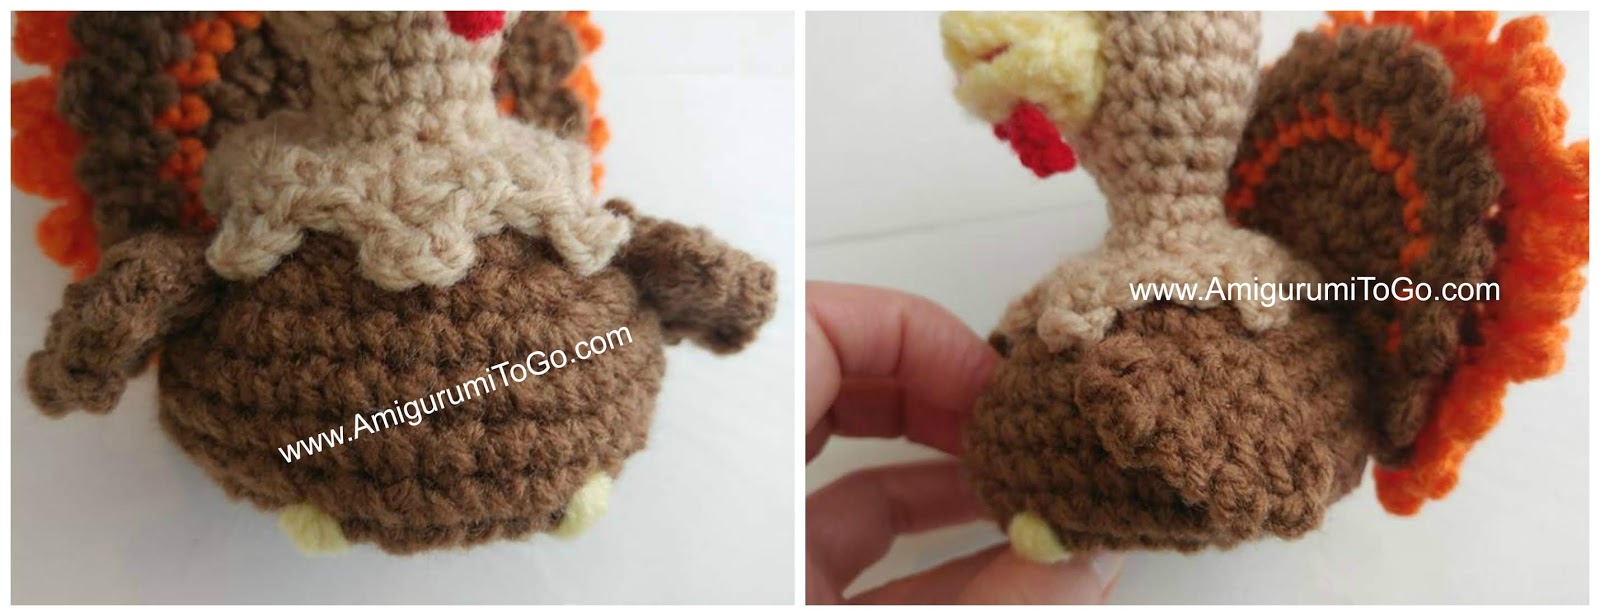
3) If you haven't sewn the beak in already, do it now. The last 7st you crocheted for the beak is the top of the beak and sticks out further than the bottom.
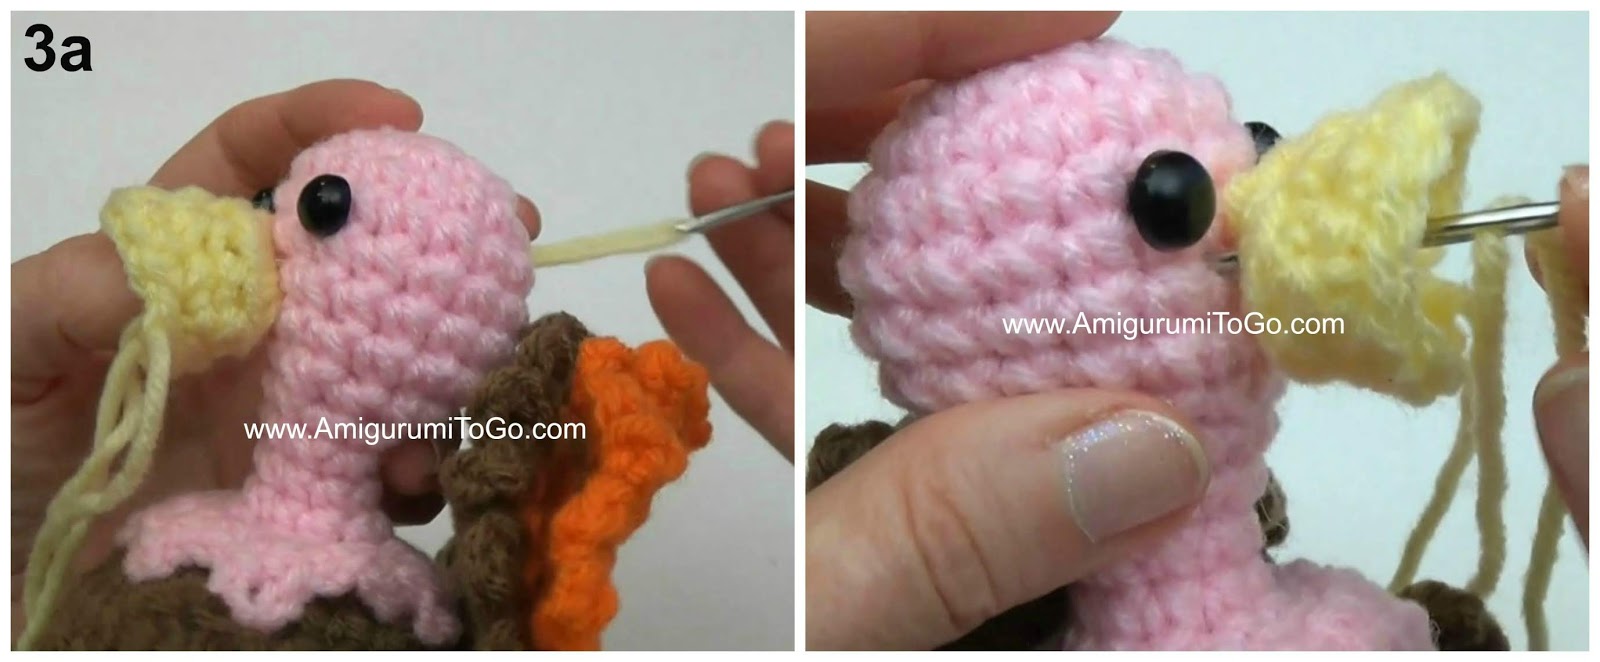
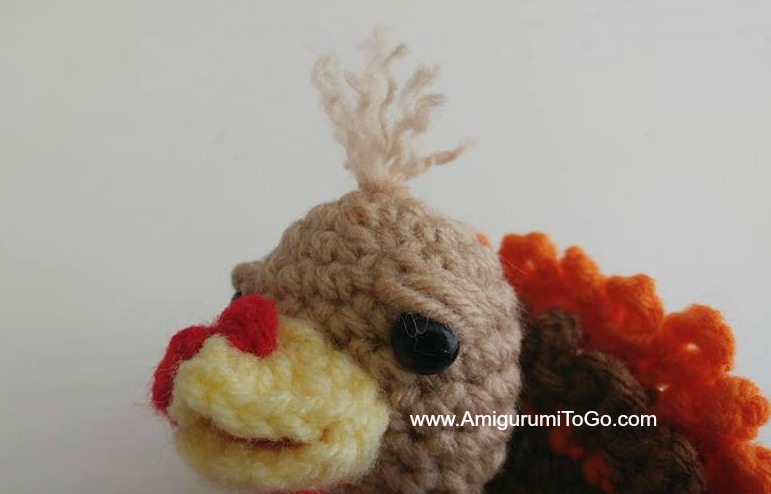
3a)The back of the beak where you worked in the blo should be flat, sew the flat part to the face with the top edge just under the 5th row. Pin the inside of the beak to the head and sew all around inside the beak, going though to the back of the head.
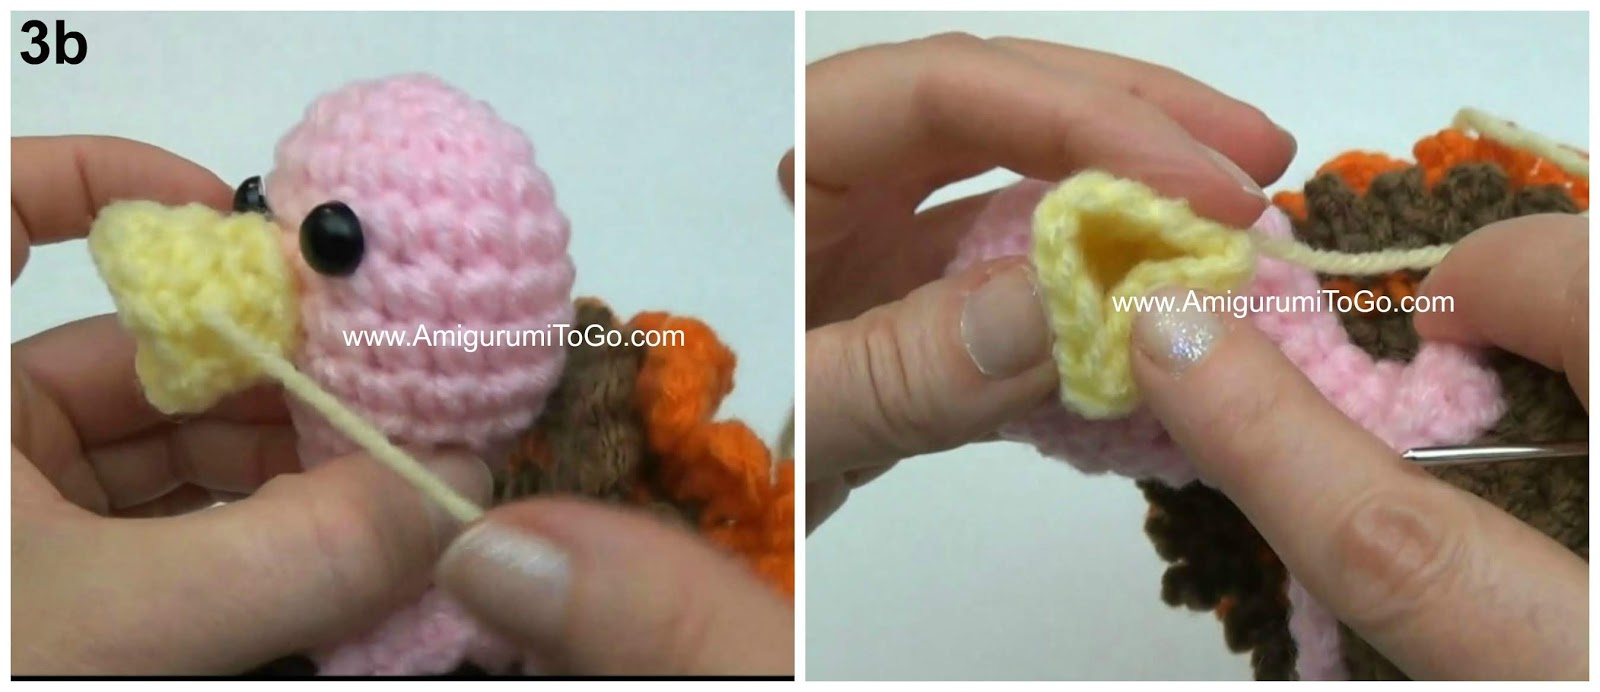
3b) Bring the yarn tail to the side of the beak. Shape the beak as desired
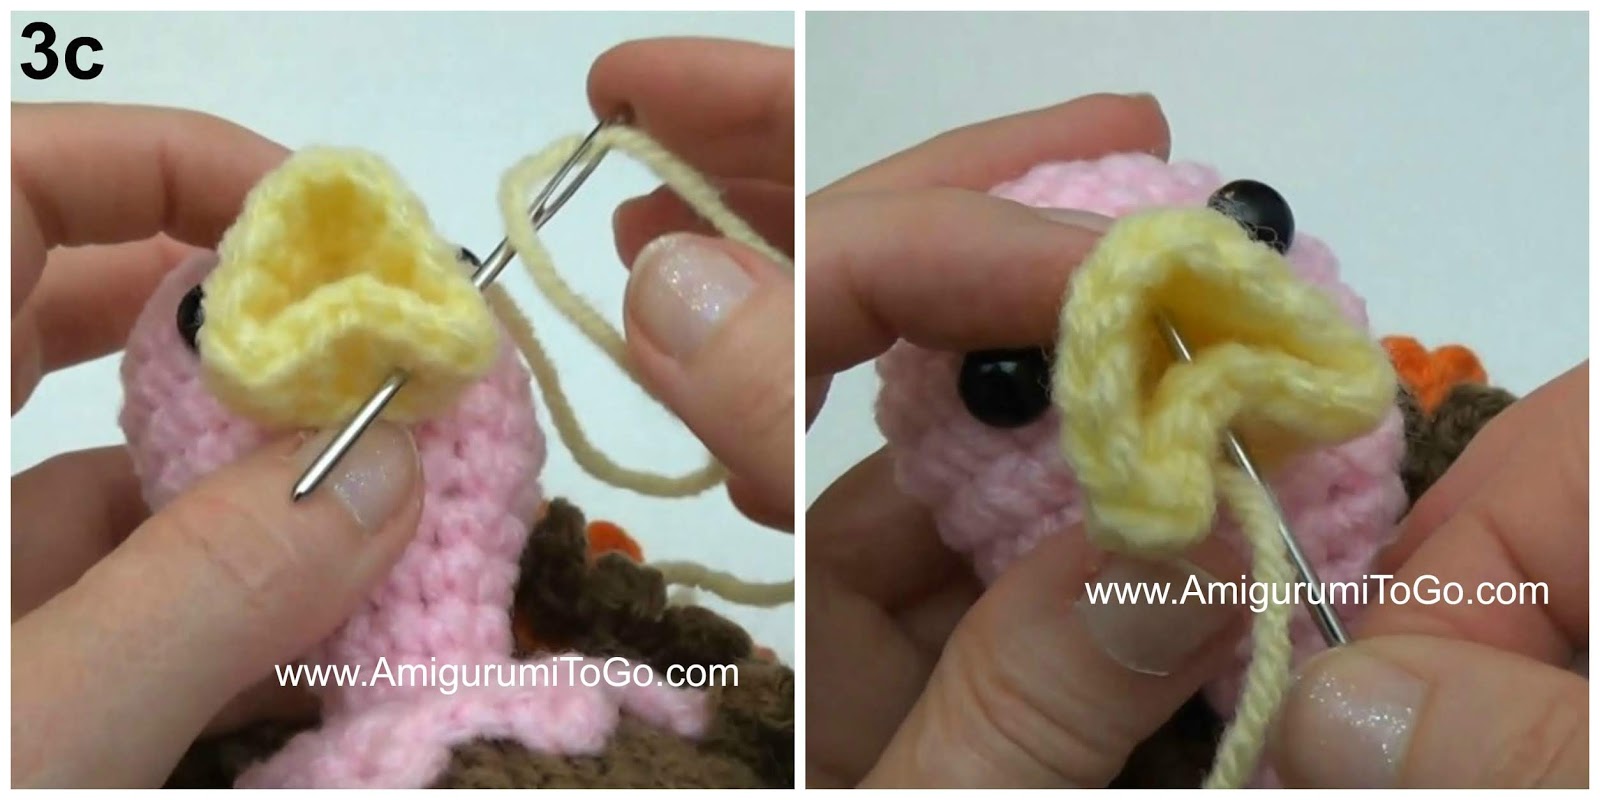
3c) Use the yarn tail to hold the shape you made. The one pictured below, I pushed the bottom center of the beak up at the same time pushing the sides of the top down. I stitched both sides of the beak to hold that shape then brought the yarn tail up, from the outside of the bottom beak, through the center and out the top of the top beak, pulled tight to hold everything together. Knot off and hide yarn tail.
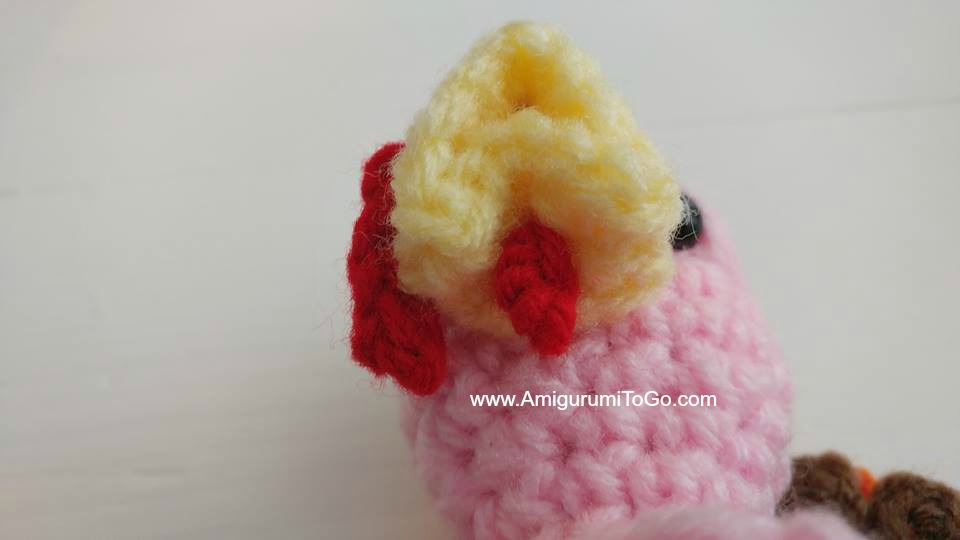
4) Sew the snood to the beak. Place the ch3 over the top center of the beak, wrap the yarn tail around this a couple times to hold it in place. Add a holding stitch to the side of the snood. After the snood is sewn in place you can add a "wattle" using the yarn tail. This is optional, don't stress over it if you can't make it work, you can also substitute this method by sewing in a chain. Bring the yarn tail down through the center of the beak and out underneath, wrap the yarn tail around the tip of the needle 5 times then go back up through the center of the beak and out the top. Hang onto the wrap as you pull the yarn tail through it. Once done, knot off at the top and hide the yarn tail inside the snood.

3) Add eyelids and tuft of hair at the same time, if you want them. Pull yarn through the center hole of row 1 at the top of the head and knot it off at the top, then bring the yarn down to the corner of the eye wrap over the eye a few times there until you have an eyelid, once done, carry the yarn tail over to the other eye and do the same. Once done with both eyes, bring the yarn tail back up and out through the center hole of row 1, knot off. Trim the yarn tails to desired length and split the yarn.
4) Add feet. Set the turkey on a flat surface, the row just above the flat surface is where you add the feet. Bring yellow yarn through a stitch hole at the bottom of the turkey's body and out to where the first foot will go, wrap yarn over the row about 7 or 8 times, then carry the yarn tail over about 5 stitch holes over and wrap the other foot. Bring the finishing yarn tail out through the same stitch hole you went in, knot them together, then carry the yarn tails away from that area and cut free.