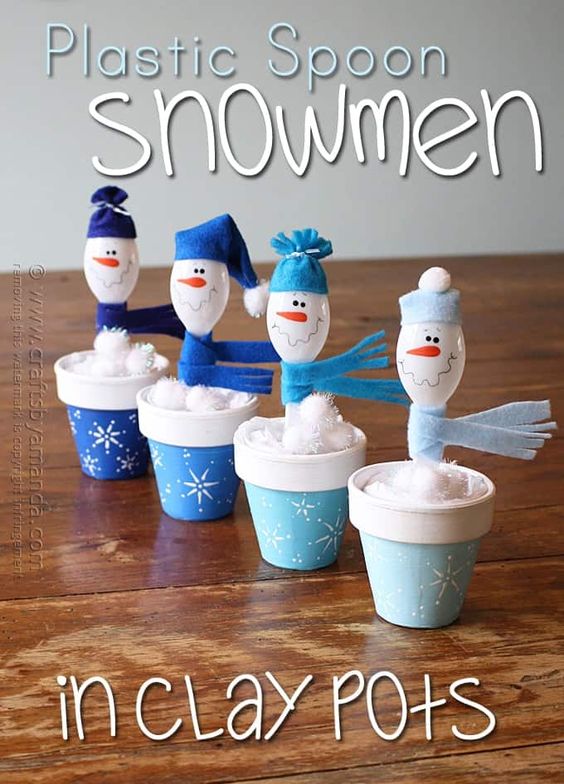
Plastic Spoon Snowmen
Creating plastic spoon snowmen is such a delightful and simple craft that brings lots of winter charm to any space! These little snowmen are perfect for decorating your home or giving as gifts to friends and family. It's a fun activity that can be enjoyed by kids and adults alike, spreading joy and festive cheer wherever they go. So gather your supplies and get ready to craft your very own adorable plastic spoon snowmen – you'll have a jolly good time making them!
To make ONE snowman:
- 4-inch clay pot
- Plastic spoon
- Blue craft paint (I used Americana acrylics in Indian Turquoise
, Whispering Turquoise
, Ocean Blue
and True Blue
)
- Orange
, white and black craft paint
- Blue felt
- Matte finish sealer (I used Americana DuraClear Satin Varnish
)
- Floral foam
- White tissue paper
- White pom poms
- Ribbon
- scissors, toothpicks, hot glue gun, Micron pen
(03)
IMPORTANT NOTE: Turns out that the Micron pen never quite dries on plastic. So if you think that people might touch the snowman’s face and smear the ink, you can use black paint dots (using a toothpick) to add the snowman’s mouth instead. If you prefer the pen, note that if it does smear you can easily wipe the smile off the spoon and reapply it.
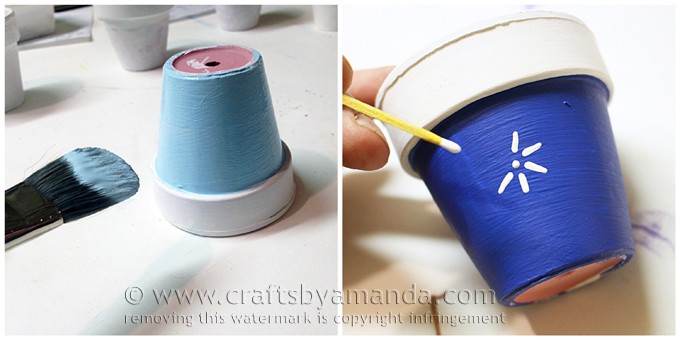
Paint the clay pot blue and paint the rim white. When dry, use a toothpick and white paint to decorate the pot with snowflakes. When completely dry, give the pots a coat of sealer.
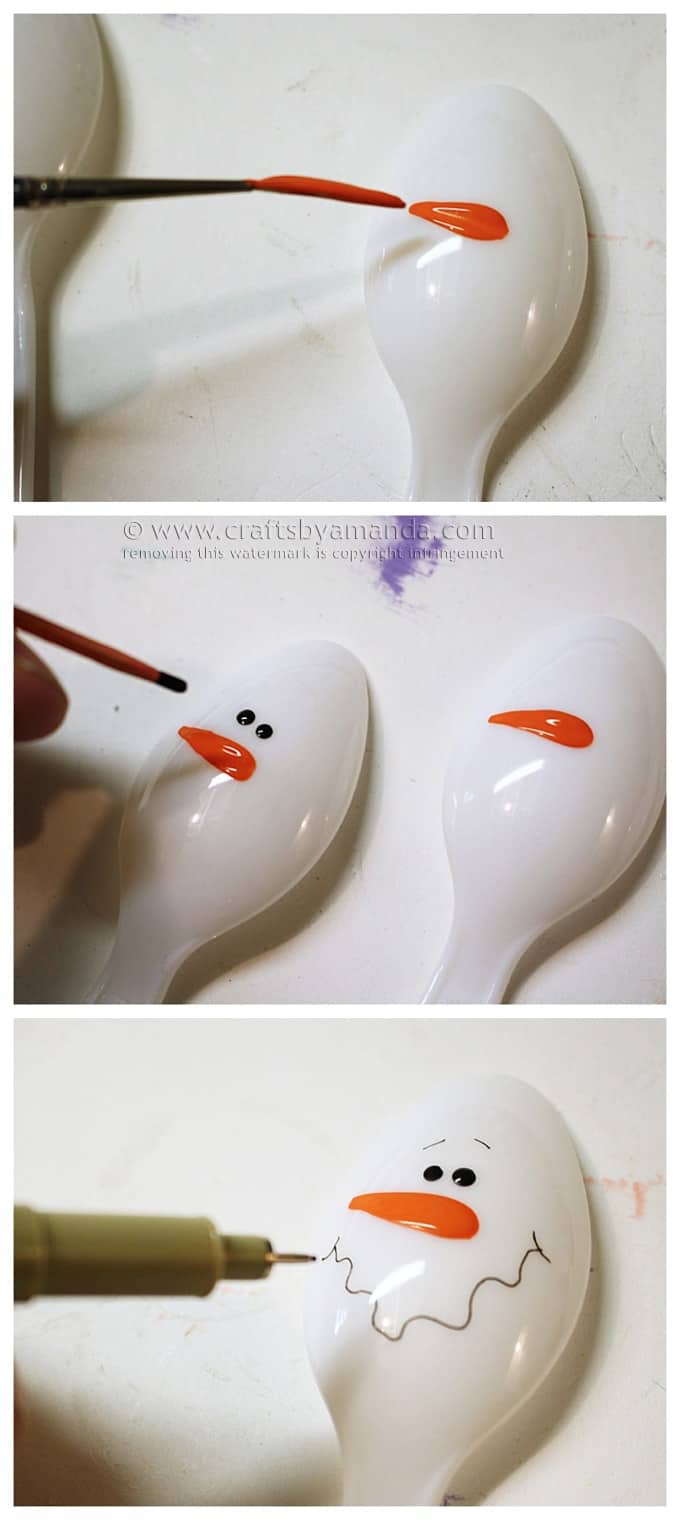
Use a long liner brush to paint an orange nose onto the spoon. Use a toothpick dipped in black paint to add the eyes. Use the black pen to add the smile and eyebrows. Please be sure and read the important note above about the pen.
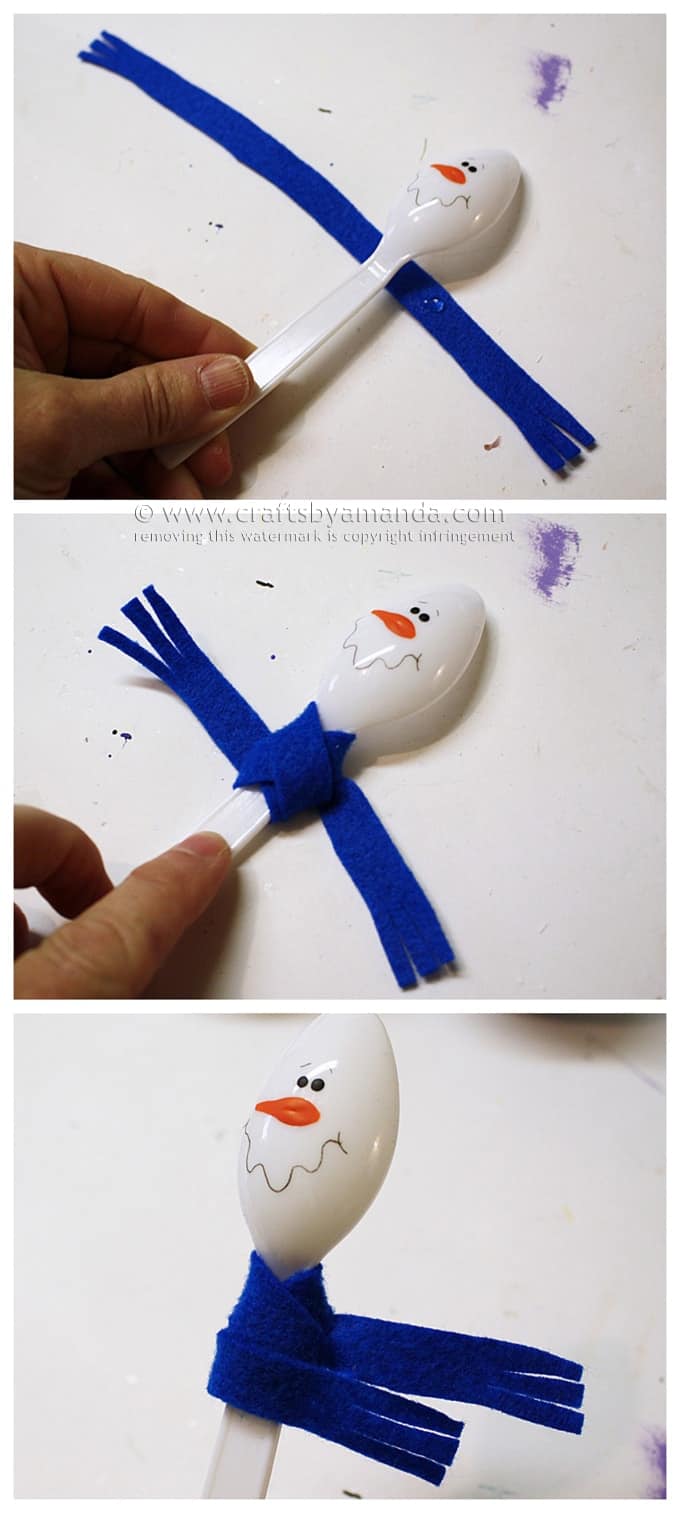
Cut a 1/2-inch wide strip of felt and fringe the ends. Add a dab of hot glue about 3-inches from the right end. Place the snowman onto the glue then wrap the scarf around several times, securing with more hot glue.
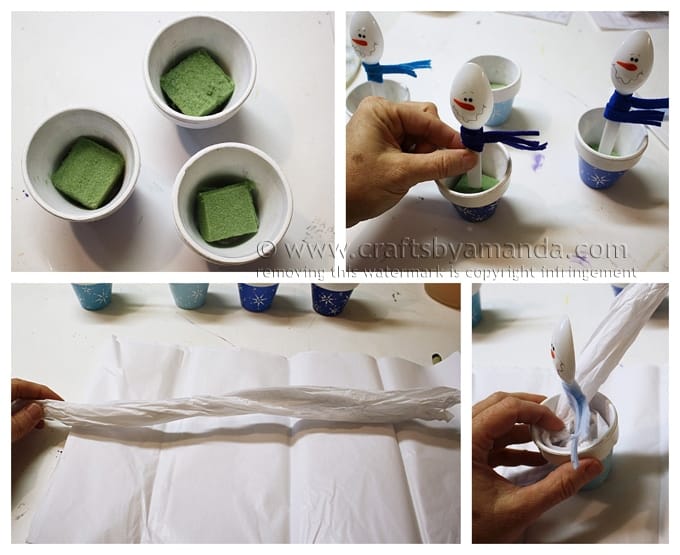
Cut a small square of floral foam so that it fits snugly inside the clay pot. Insert the snowman spoon into the floral foam. Tear or cut a sheet of tissue paper in half and roll it up. Use the tissue paper to fill the inside of the clay pot, covering up the floral foam.
Make the Hats
I’ve made 4 different hats and will show you how to make each one below.
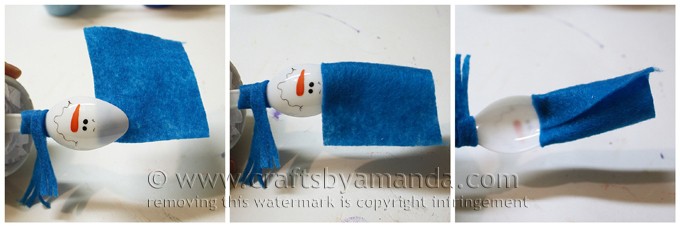
But first the basics. Cut a piece of felt, about 3” x 4”. Hot glue the corner of the felt to the back of the spoon. Wrap the felt around the front of the spoon and glue in place. Wrap the felt around to the back (trimming if needed) and glue it in place. This is how each of the hats below are started.
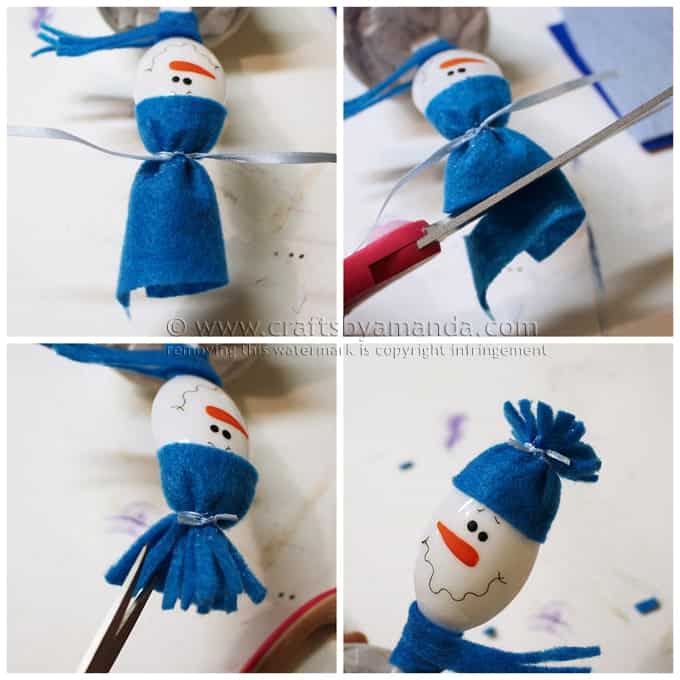
Fringed Pom Hat
Follow the basic hat instructions and tie a piece of ribbon tight around the felt near the top of the snowman’s head. Trim the top of the hat to about 1-inch above the ribbon. Use scissors to fringe the top of the hat and trim down until you like how it looks.
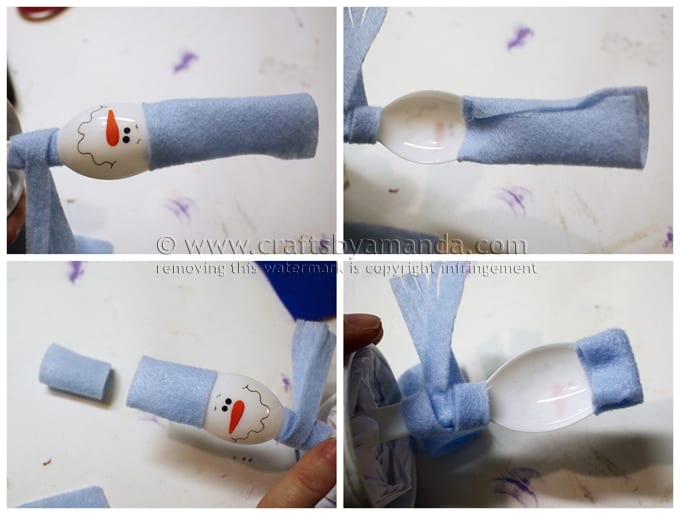
Beanie with Pom Pom
Follow the basic instructions for your hat then trim off the top, leaving about 2-inches of hat. Fold the top of the felt down to the back of the snowman’s head and glue in place. Glue a pom pom to the top.
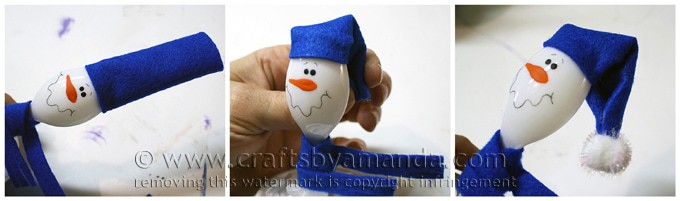
Stocking Cap
Follow the basic hat instructions but don’t trim anything off the top. Fold the top of the felt down behind the snowman’s head. Use hot glue to hold it in place behind the head and fold the end of the felt together, securing with glue. Glue a pom pom to the end.
Basic Pom Hat
Follow the instructions for the Fringed Pom Hat but do not fringe the top.
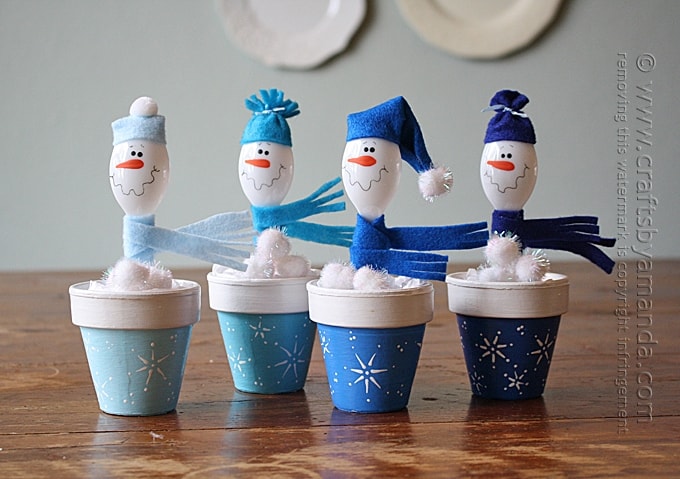
To finish everything off, add a few sparkly white pom poms to the pot to look like a pile of snowballs!