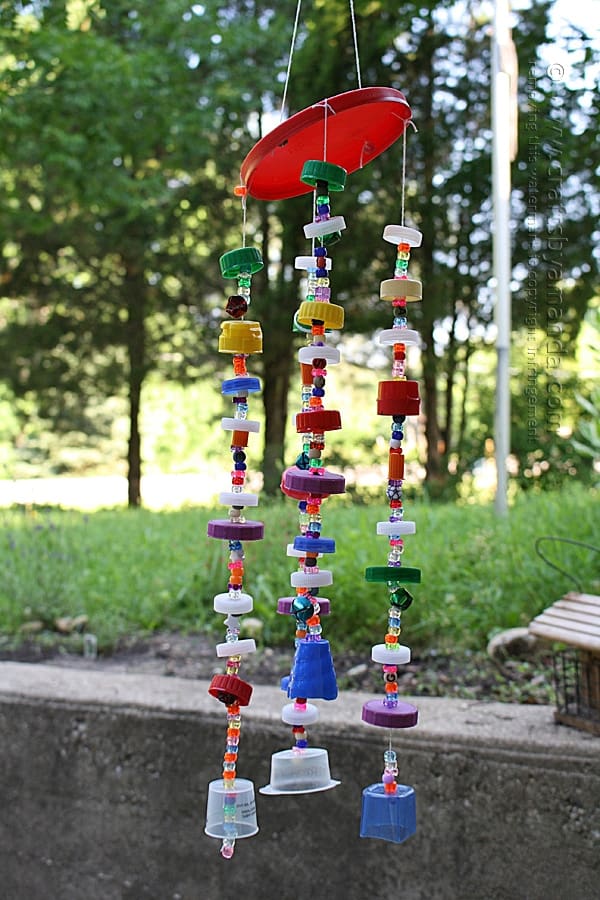
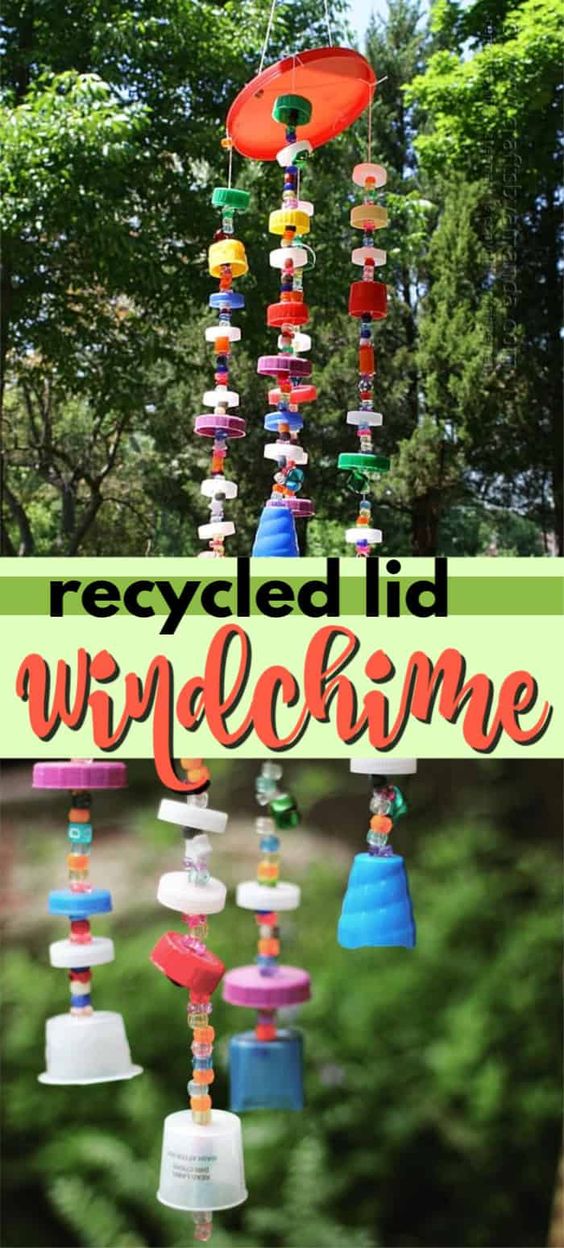
Recycled Plastic Lid Windchime
Have you heard about the wonderful world of Recycled Plastic Lid Windchimes? These colorful and eco-friendly creations not only add a delightful touch to your outdoor space but also help protect our planet. By repurposing plastic lids into beautiful wind chimes, you not only get to enjoy the soothing sounds they create but also contribute to reducing plastic waste. The tinkling melodies they produce are like nature's music, bringing a sense of calm and joy to any environment. Creating your own recycled plastic lid windchime is a fantastic way to get creative, be kind to the environment, and add a touch of charm to your surroundings.
Supplies you need to make this recycled wind chime
I’ve included the different types of plastic lids I used:
- Measuring cups from liquid cough & cold medicines
- Milk jug lids
- Syrup bottle lids
- Water bottle lids
- Soda bottle lids
- Top from a can of whipped cream
- The top of the wind chime is from a Coffee Mate powdered creamer container
I also used:
- Pony Beads
- Jingle bells
- String
- Needle
- Flat nose pliers, a thimble, hammer and a nail
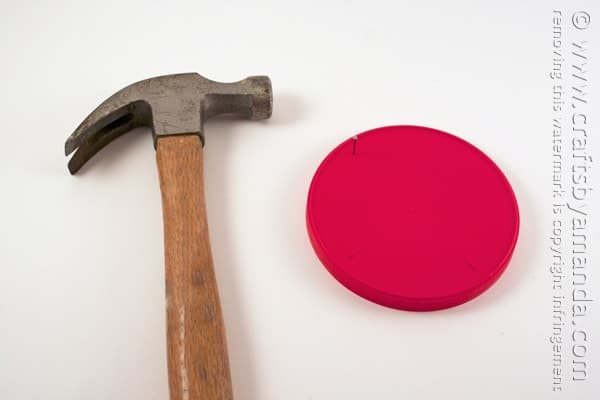 Use the hammer and nail to make four holes (like a plus sign) in the large lid. Set the lid aside.
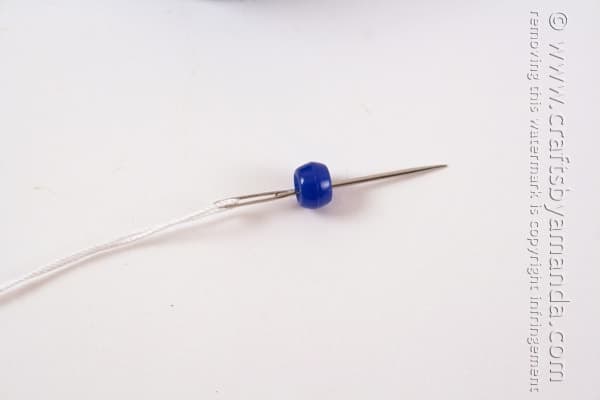 Thread needle with a piece of string. The amount of string you use is up to you, it just depends on how long you want your chimes to be!
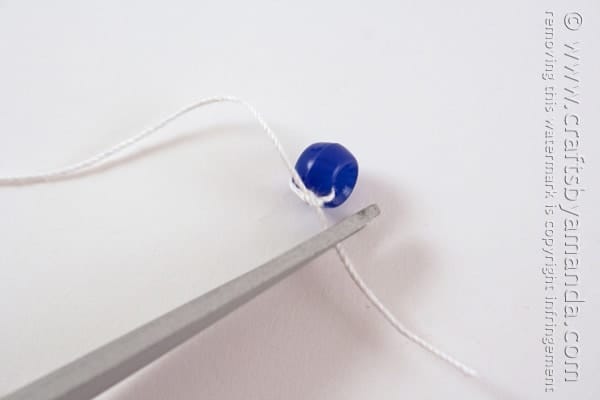 Thread the needle through one bead. Tie a few knots around that bead at the end of the string.
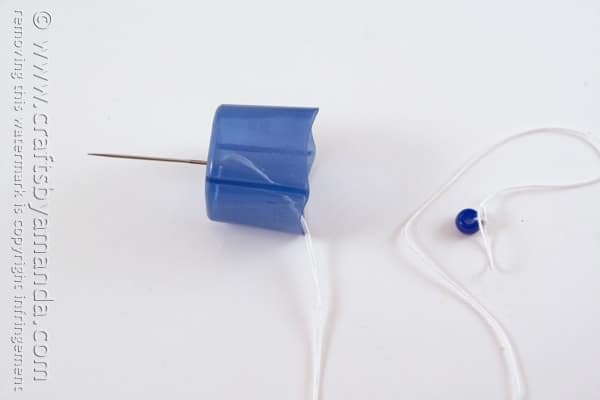 Poke the needle through center of the inside of a deep plastic lid, like a cough medicine cup.
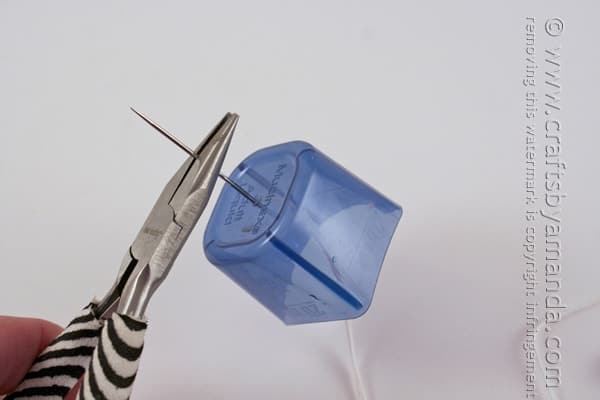 Pull the needle through, pushing the plastic lid all the way to the end, touching the bead. If you have trouble pulling the needle through, use flat nose pliers. Don’t grab the needle at the eye, it’s weaker there and the pliers will break it.
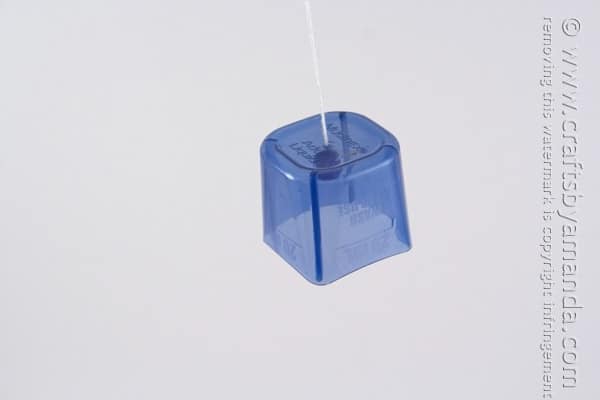
As you can see, it hangs like a bell :)
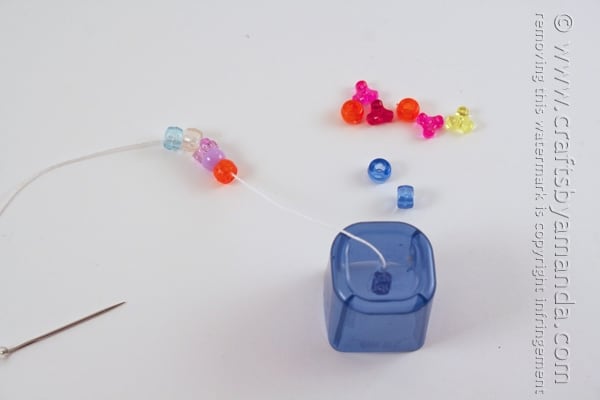 Add several beads to the string and push them to the end.
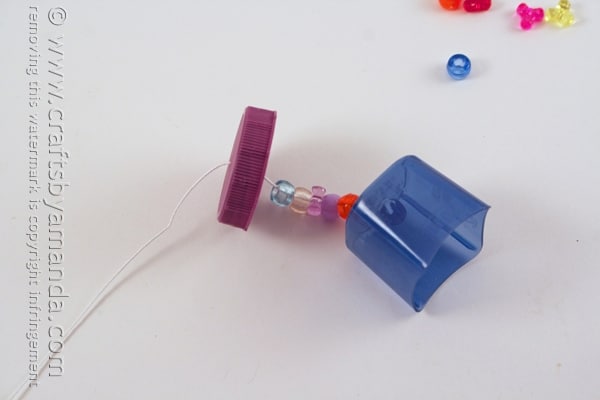 Add another plastic lid, pushing it to the end.
Continue with the above steps until you have reached the length you like.
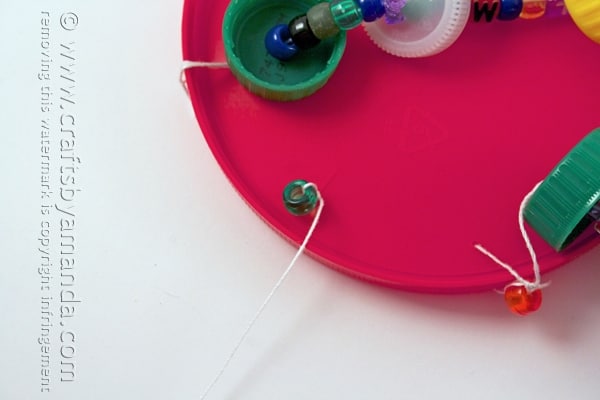
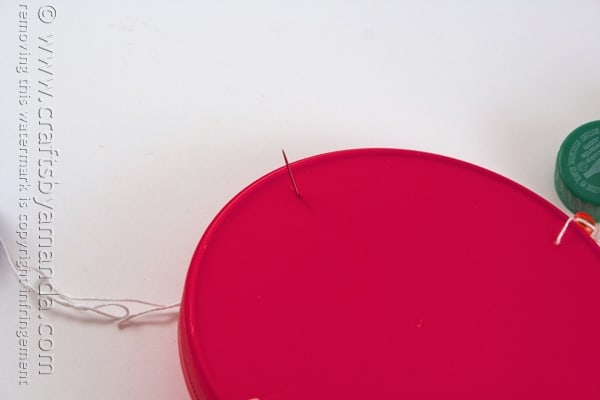 Poke the needle through one of the holes you made in the large lid in step 1.
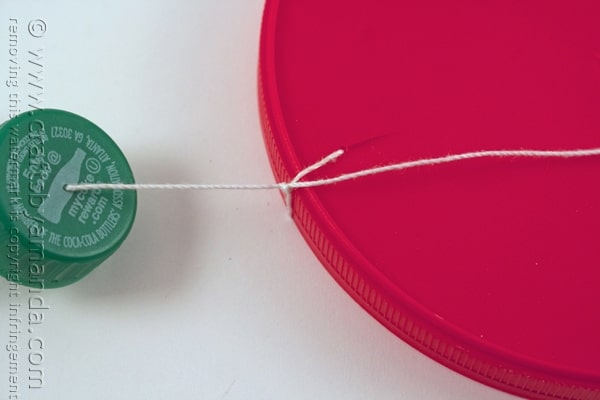 Tie a knot a few times and trim off the excess string. Repeat these steps three more times for the remaining chime strings.
To make the hanger, use a hammer and nail to poke two more holes in the large lid, across from each other.
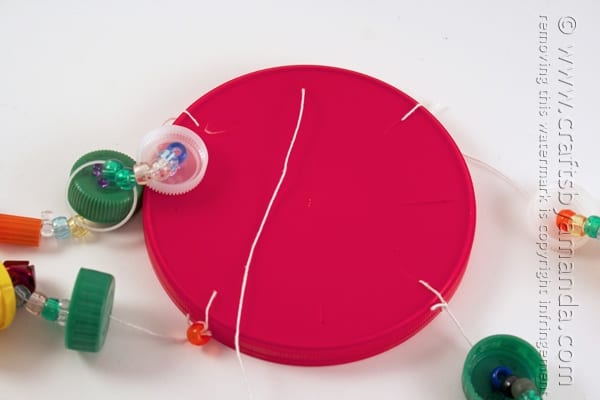 Thread a needle with string and tie a bead to the end. Poke it through one of the new holes in the large lid and pull it through the top. The bead will stop it from coming out the other side.
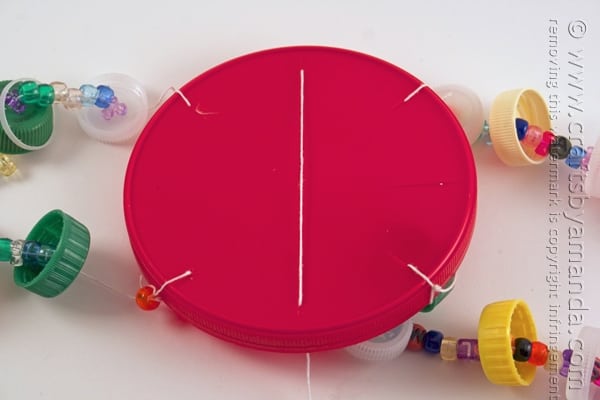 Poke the needle back down through the second hole and pull it snug. Pull the string out as long as you want the hanger to be.
 To keep the hanger at that length, turn the lid over and tie a bead to that string to keep it in place. Trim any excess string.