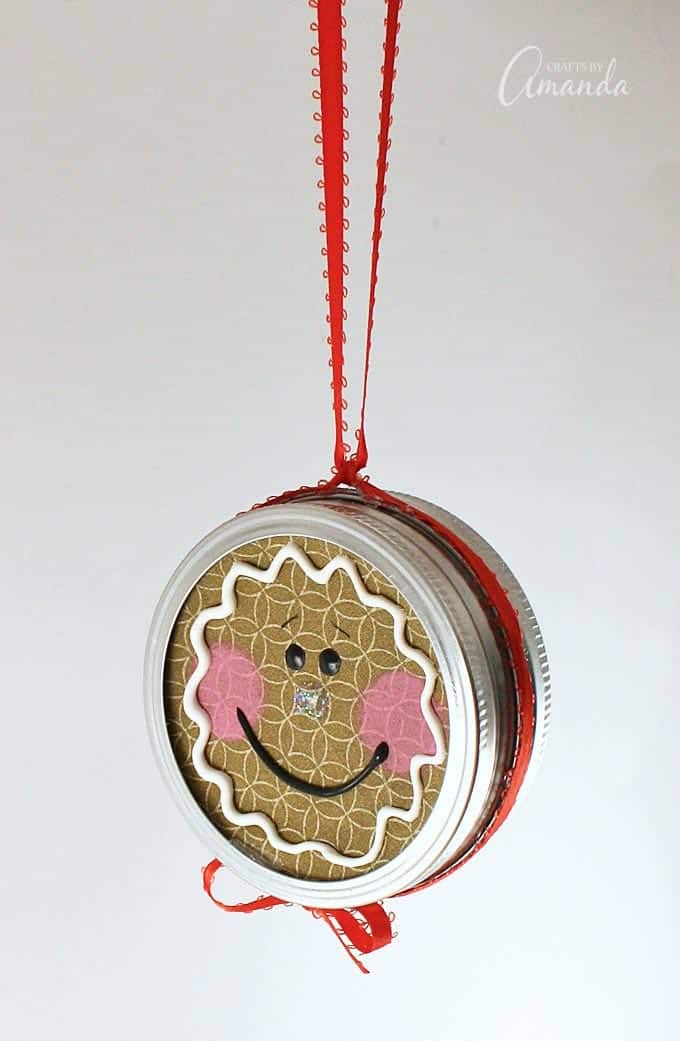
Gingerbread Man Canning Lid Ornament
The Gingerbread Man Canning Lid Ornament is a charming and festive addition to any holiday decor. Crafted with care and attention to detail, this adorable ornament brings a touch of whimsy to Christmas trees or wreaths. Its cute design, resembling a classic gingerbread man, is sure to bring smiles and spread holiday cheer. Made from durable materials, this ornament can be treasured and enjoyed for many holiday seasons to come. Whether hung on a tree or used as a decorative accent around the house, the Gingerbread Man Canning Lid Ornament is a delightful and heartwarming decoration that adds a merry and cozy vibe to any space.

Supplies needed to make a gingerbread man canning lid ornament
Supplies:
- 2 canning lids and bands
- Light brown or tan fabric
- Red ribbon
- Cotton batting
- Pink and black craft paint
- puffy paint: white glitter, black and white
Tools:
- Hot glue gun
- Instant grab glue
- Scissors
- Round sponge applicator
- Fine point black marker
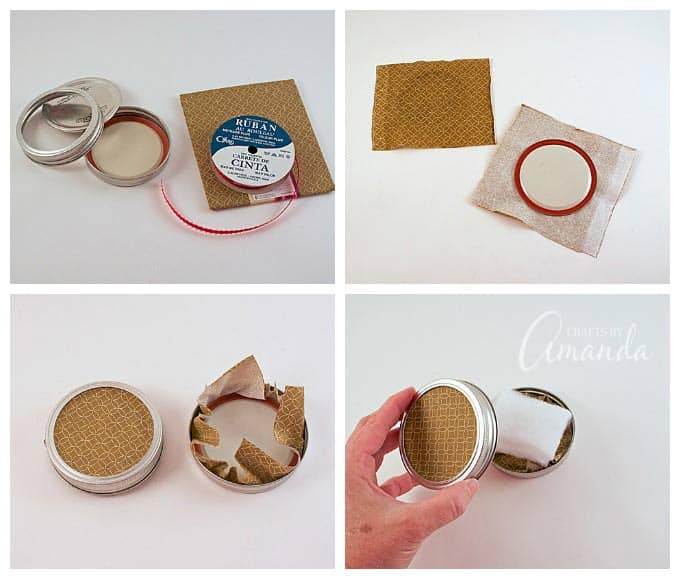
1. Spread instant grab glue all over the top of both canning lids and press fabric to it. Use your fingers to even out the fabric.
2. Place fabric covered canning lid inside canning band. Add a couple spots of hot glue to hold it in place. Hot glue the fabric down inside the lid and band.
3. Add some cotton batting or stuffing inside one of the lids. This will keep the lids from accidentally collapsing inward.
4. Glue the two lids together using the instant grab glue. Hot glue will not work properly, so be sure to use the instant grab. White glue will work too, it just takes a lot longer to dry.
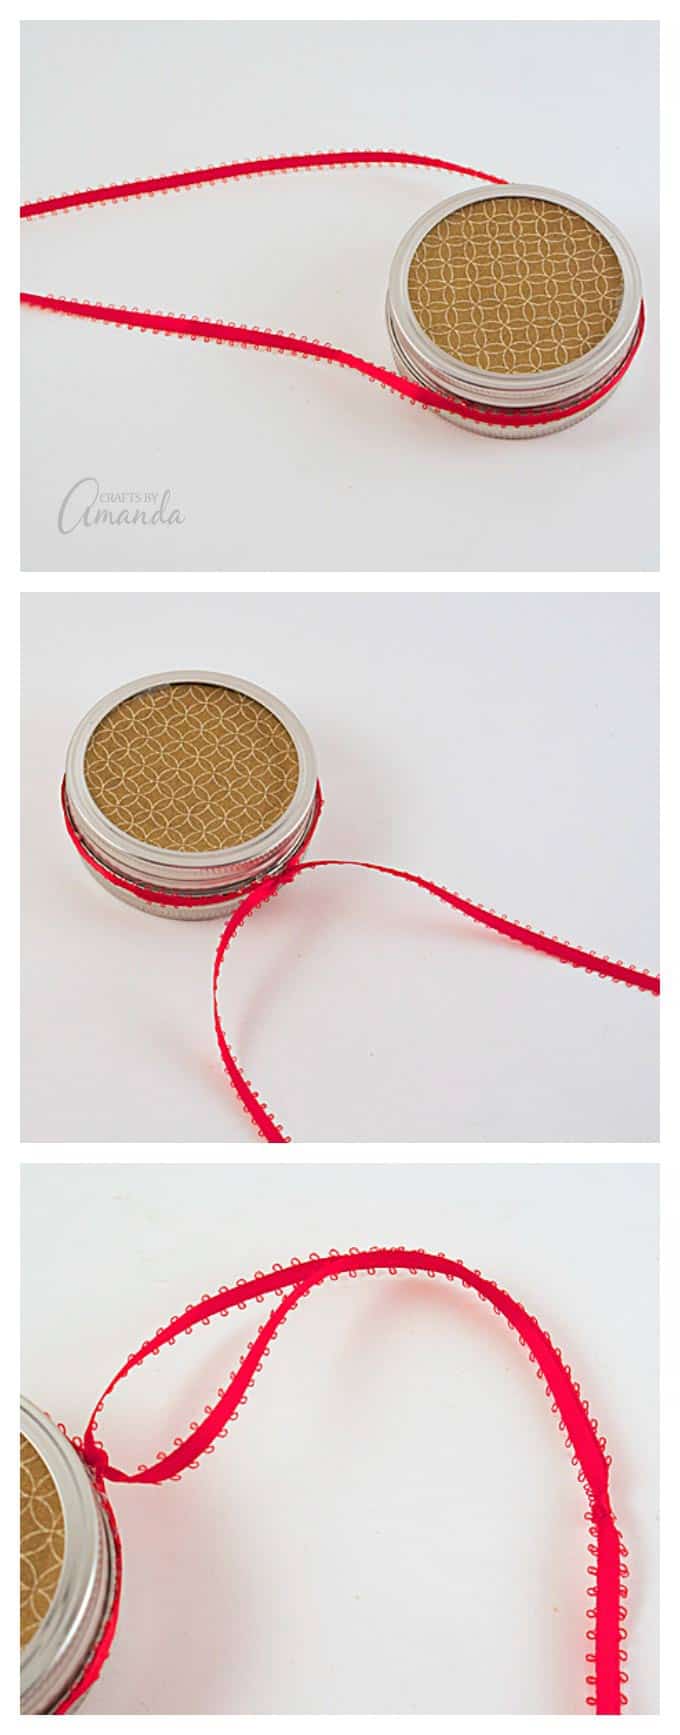
5. Cut a long piece of red ribbon and hot glue it around the center of the two bands. When the two ends of the ribbon meet, tie them in a knot. Tie the open ends of the ribbon together to create the hanger. Trim off excess. Make a small bow from another piece of ribbon and hot glue it to the bottom of the ornament.
6. Dip round applicator into pink paint and dab off the excess paint onto a piece of paper towel. Gently apply pink circles to the “face” to create the cheeks.
7. Use white or clear glitter paint to draw on a nose.

8. Use black 3D paint for the smile and dip the handle end a paintbrush into black craft paint to dot on the eyes.
9. Use white 3D paint to draw on rick rack around the face.
10. Draw eyebrows on with fine point marker.
11. Repeat all the facial steps on the other side.
12. Allow everything to dry completely.