Crochet Adorable Pumpkin
Crocheting adorable pumpkins can be such a fun and festive activity, perfect for adding a touch of charm to your autumn decor! Whether you're a seasoned crocheter or just starting out, creating these cute little pumpkins is a delightful way to get into the fall spirit. With their warm, cozy colors and soft textures, they make for lovely decorations or even thoughtful gifts for friends and family. Plus, the satisfaction of seeing your handmade pumpkins come to life with every stitch is simply heartwarming. So grab your yarn, hook, and a cup of tea, and let's crochet some pumpkin perfection together!
Materials
DK Weight Yarn (#3)
- Color A (White) [1oz/120yds]
- Color B (Black) [1oz/120yds]
E/4/3.50mm Hook
Fiberfill Stuffing
Yarn Needle
Scissors
Gauge
Not critical for this project
Finished Measurements
Varies based on beginning chain count
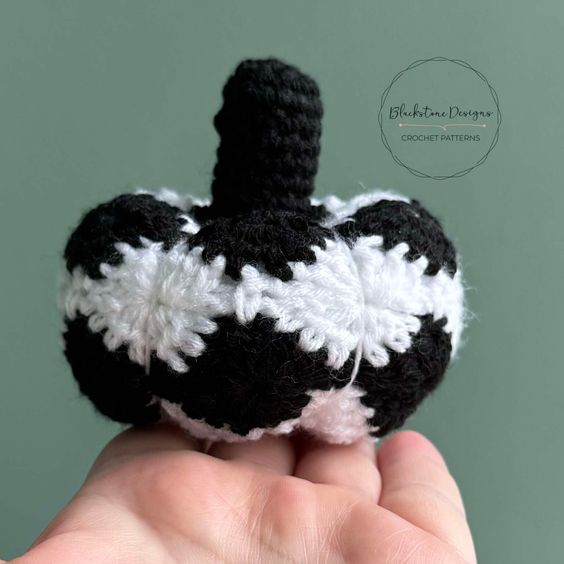
Pumpkin shown: 3”W x 2”H (10.5”D)
Stitch Guide
ch = chain
dc = half double crochet
dc3tog = See Special Stitches
dc6tog = See Special Stitches
sc = single crochet
sl st(s) = slip stitch(es)
YO = Yarn Over
Skill Level
Intermediate
Written in U.S. Terms
Pattern Notes
- Beginning chains do not count as stitches.
- Where asterisks appear, repeat the instructions between them.
- Where brackets appear, repeat the instructions between them as indicated.
- This pattern is worked in a multiple of 8 + 2; the instructions are written for a beginning ch-50.
- This pattern is written for a mini pumpkin size. The finished width of this pumpkin can be adjusted by adding or removing chains in multiples of 8. The finished height of this pumpkin can be adjusted by adding rows in multiples of 2 or 4. Likewise yarn and hook sizes can be adjusted to make them larger, fluffier..etc.
Special Stitches
double crochet three together (dc3tog) = [Yarn over, insert hook into stitch indicated and draw up a loop, yarn over and draw through 2 loops on hook] 3X, yarn over and draw through all 4 loops on hook.
double crochet six together (dc6tog) = [Yarn over, insert hook into stitch indicated and draw up a loop, yarn over and draw through 2 loops on hook] 6X, yarn over and draw through all 7 loops on hook.
Instructions
With Color A,
R1. Ch 50, sc in 2nd ch from hook and in each st across, turn (49)
R2. Ch 1, sc, skip 3 sts, [3 dc, ch 1, 3 dc], skip 3 sts, sc in next, *skip 3 sts, [3 dc, ch 1, 3 dc] in next, skip 3 sts, sc in next* across, turn
R3. Ch 3, skip 1st sc, dc3tog over next 3 dcs, *ch 7, skip ch-1, dc6tog over next 6 dcs (skipping sc)* across, dc3tog over last 3 dcs, dc in top of turning ch, turn
R4. Ch 3, 3 dc in 1st dc, *sc in the ch-1 below ch-7 (working over the ch-7 and “pinning” it down), [3 dc, ch 1, 3 dc] in the “eyelet” created from the dc6tog* across, 3 dc in last eyelet, 1 dc in top of turning ch, turn
With Color B,
R5. Ch 4, skip 1st dc, *dc6tog over next 6 dcs (skipping sc), ch 7, skip ch-1* across, ch 3, sc in top of turn ch, turn
R6. Ch 1, skip 1st sc and ch-3, *[3 dc, ch 1, 3 dc] in “eyelet” created from dc6tog, sc in the ch-1 below ch-7 (working over the ch-7 and “pinning” it down)* across, sc in beginning ch of turning ch, turn
R7-10. Repeat R3-6
R11. Ch 1, *sc in sc, ch 3, skip 3 dc, sc in ch-1 space, ch 3, skip 3 dc* across, sc in turning ch; Fasten.
STEM
With Color B,
R1. Make magic ring, ch 1, 6 sc in ring (6)
R2. 2 sc arnd (12)
R3-10. Repeat R10
R11. FLO 2 sc in each st arnd; Fasten.
Finishing
- Fold in half, right sides together, and sew seam to form a “cylinder”.
- Weave yarn in and out of stitches around the bottom opening and pull tight to cinch closed, then place some stitches to keep it closed.
- Stuff pumpkin full, but don’t overfill as it will stretch the stitches, then weave yarn in and out of stitches around the top opening and pull tight to cinch closed, then place some stitches to keep it closed.
- Create sections around the pumpkin by inserting a “threaded” needle in through the bottom center of the pumpkin and out through the top center, then back in through the bottom; pull string to cinch pumpkin slightly. Repeat this 5 more times, then adjust loops to make sections even.
- Attach stem to the top center.
- Hide all strings.