Light Bulb Snowman Ornament
Creating a light bulb snowman ornament is a delightful and eco-friendly craft that adds a charming touch to your holiday decor. To make one, start by painting a light bulb with white acrylic paint, adding cute details like a carrot-shaped nose and coal eyes using colored markers or paint. Attach a ribbon loop to the top for easy hanging and voilà, you have a whimsical snowman ornament ready to adorn your tree or give as a heartwarming handmade gift. Get creative and personalize each snowman with different accessories like a tiny scarf or top hat to make them truly unique and special. This craft is not only fun and budget-friendly but also a wonderful way to spread joy and creativity during the festive season.
Supplies you will need:
- burnt out light bulb
- rubbing alcohol
- white acrylic paint
- gold cord or ribbon
- child’s sock
- scrap material
- two buttons
- 4 toothpicks
- Fiberfil cotton batting
- hot glue
- scissors
- black marker or Micron craft pen
To make your light bulb snowman:
Wipe bulb down with rubbing alcohol, this will help the paint adhere to the bulb. Let dry. Paint entire light bulb with white acrylic paint and let dry. Apply a second coat. If finish appears streaked, you can use a large paint brush or a sponge to blot on a “stucco” look. It is not necessary to paint the socket. Allow bulb to dry completely.
While bulb is drying, cut off the ribbing from the child’s sock. Roll up a brim at one end and tie off the other end with gold ribbon or cord, tie in a bow. Leave about half an inch of sock above ribbon for the fluffy top, fringe ends. Add a bit of Fiberfil to the inside of the hat. Cut a tiny square of fabric and glue to the front brim of the hat.
From the remaining material on the sock, cut a rectangle, about 2 inches wide and 1 1/2 inches long. Place a small amount of Fiberfil in the center, roll up jelly roll style and glue together. Glue ends closed. Take one of the toothpicks and carefully cut/break in half. Insert pointed side of each toothpick into the muff on either side.
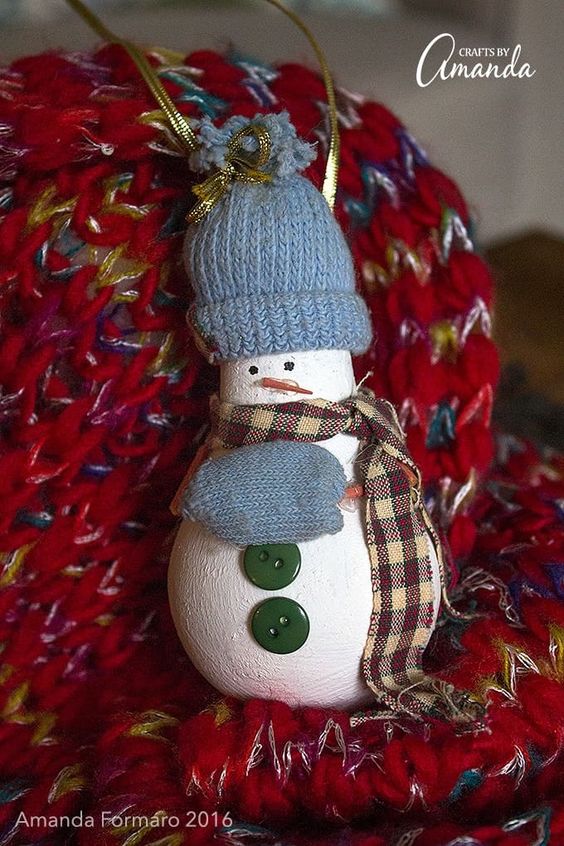
Once light bulb is dry, glue the muff to the belly of the bulb, below the neck and above the fattest part of the bulb. Glue the toothpicks to the bulb. Using another toothpick, cut into fourths. Using the sections that do not have pointed ends, glue to the toothpick arms that are already in place on the bulb. This will create the elbow to the shoulder. Glue to the elbow and to the bulb (see photo for guide).
Fit hat snugly over socket of light bulb and glue in place. To create the hanger, tie a long piece of ribbon into a loop. With the hanging ends, tie around the hat underneath the brim (roll it down out of your way). Loop tie should be positioned at the back of the hat. Tie ribbon tight and snip off extra ends. Roll brim back up to cover ribbon.
Fashion a scarf from scrap material and tie carefully around neck, glue in place. Fringe ends of scarf with scissors. Glue two buttons to belly area, tuck top button underneath muff halfway. With one of the remaining pointed toothpicks that you cut into fourths, glue on for nose. Carefully dot on eyes with black marker. Hang!
Special note: You may not use all the toothpicks that the instructions call for. They are easily split when broken or cut, so I allowed for that with extras.